メインコンテンツにスキップ

Ridgid R2601 Motor Assembly Replacement

必要な工具と部品

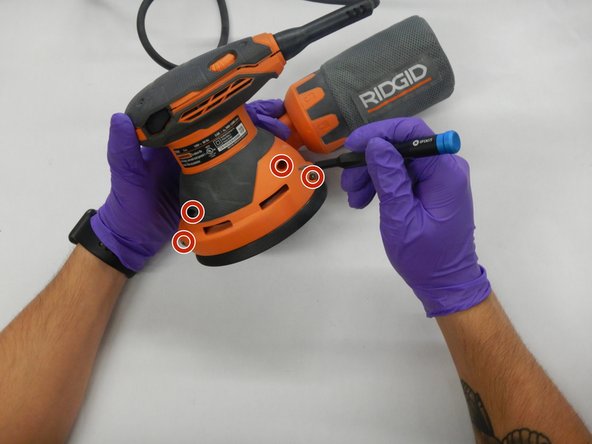
  1. Ridgid R2601 Motor Assembly Replacement, Top Cover: 手順 1、 1の画像 1
    • Remove the four M3.5 x 16 mm screws from the top cover using a Torx T10 screwdriver.

  2. Ridgid R2601 Motor Assembly Replacement: 手順 2、 1の画像 1
    • Pull off the top cover.

  3. Ridgid R2601 Motor Assembly Replacement, Bearing: 手順 3、 1の画像 1
    • Turn the sander upside down so that the base faces you.

    • Remove the four 6.4 mm screws from the bottom of the base using a Torx T-25 screwdriver.

  4. Ridgid R2601 Motor Assembly Replacement: 手順 4、 1の画像 1
    • Remove the base.

  5. Ridgid R2601 Motor Assembly Replacement: 手順 5、 1の画像 1
    • Remove the 10 mm screw from the center of the bearing using a Torx T-20 screwdriver.

  6. Ridgid R2601 Motor Assembly Replacement: 手順 6、 1の画像 1
    • Remove the bearing.

  7. Ridgid R2601 Motor Assembly Replacement, Brake: 手順 7、 1の画像 1
    • Remove the four 16mm screws from the side of the sander using a Torx T20 screwdriver.

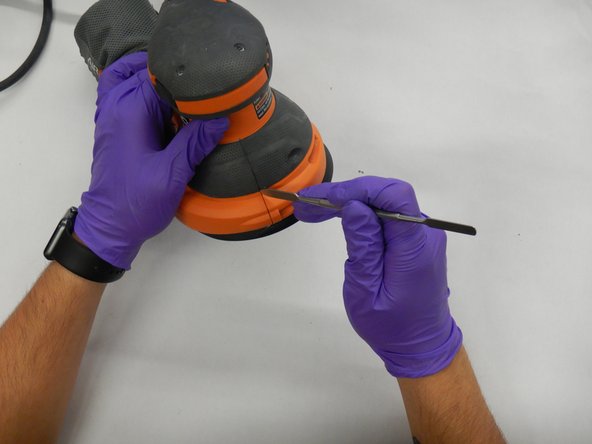
  8. Ridgid R2601 Motor Assembly Replacement: 手順 8、 1の画像 1
    • Use a metal spudger to open the sander's plastic housing.

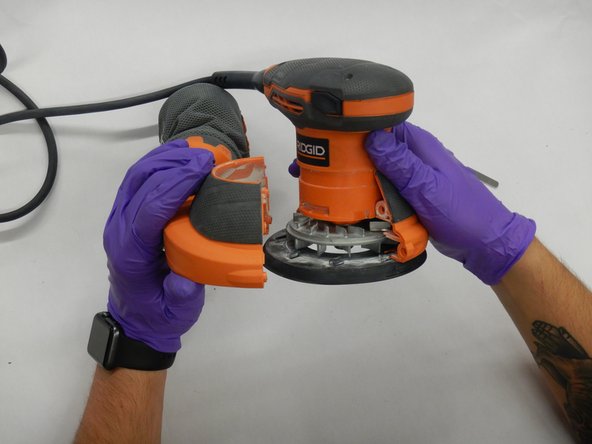
  9. Ridgid R2601 Motor Assembly Replacement: 手順 9、 1の画像 1
    • Remove the plastic housing.

  10. Ridgid R2601 Motor Assembly Replacement: 手順 10、 1の画像 1
    • Remove the brake from its slot in the housing.

  11. Ridgid R2601 Motor Assembly Replacement, Motor Assembly: 手順 11、 1の画像 1
    • Remove the metal flywheel.

  12. Ridgid R2601 Motor Assembly Replacement: 手順 12、 1の画像 1
    • Rotate the sander so that the top is facing you.

    • Remove the power switch.

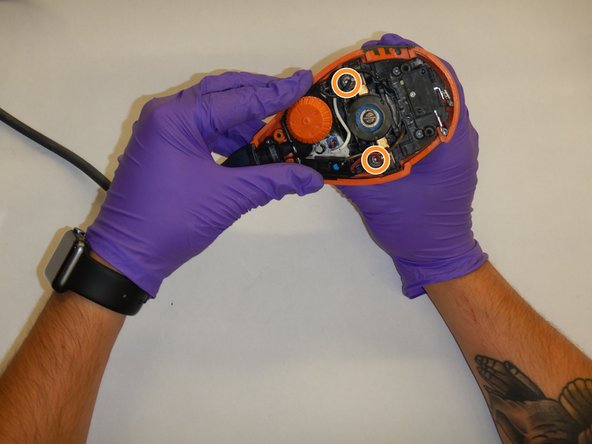
  13. Ridgid R2601 Motor Assembly Replacement: 手順 13、 2の画像 1 Ridgid R2601 Motor Assembly Replacement: 手順 13、 2の画像 2
    • Use a T20 Torx screwdrivers to remove the four 11.11mm screws from the motor housing.

    • Use a T25 Torx screwdriver to remove the two 12.7mm screws next to the leads.

  14. Ridgid R2601 Motor Assembly Replacement: 手順 14、 1の画像 1
    この手順で使用する道具:
    Flathead 3/32" or 2.5 mm Screwdriver
    $5.49
    購入する
    • Use a 2.5mm flathead screwdriver to loosen but not remove the screws holding the wiring leading to the speed controller.

  15. Ridgid R2601 Motor Assembly Replacement: 手順 15、 1の画像 1
    • Remove the leads.

  16. Ridgid R2601 Motor Assembly Replacement: 手順 16、 1の画像 1
    • Remove the motor housing.

  17. Ridgid R2601 Motor Assembly Replacement: 手順 17、 1の画像 1
    • Remove the motor.

終わりに

To reassemble your device, follow these instructions in reverse order.

2 の人々がこのガイドを完成させました。

作成者

3人の作成者と共同で作成されました。

Gary Garner

メンバー登録日: 10/03/19

295 ポイント

2のガイドは作成済み

0 件のコメント

コメントを追加

統計データ:

過去 24時間: 2

過去 7 日: 9

過去 30 日: 20

今までの合計 901