メインコンテンツにスキップ

Ridgid Angle Grinder R10202 Handle Disassembly

必要な工具と部品

  1. Ridgid Angle Grinder R10202 Handle Disassembly, Ridgid Angle Grinder R10202 Handle Disassembly: 手順 1、 3の画像 1 Ridgid Angle Grinder R10202 Handle Disassembly, Ridgid Angle Grinder R10202 Handle Disassembly: 手順 1、 3の画像 2 Ridgid Angle Grinder R10202 Handle Disassembly, Ridgid Angle Grinder R10202 Handle Disassembly: 手順 1、 3の画像 3
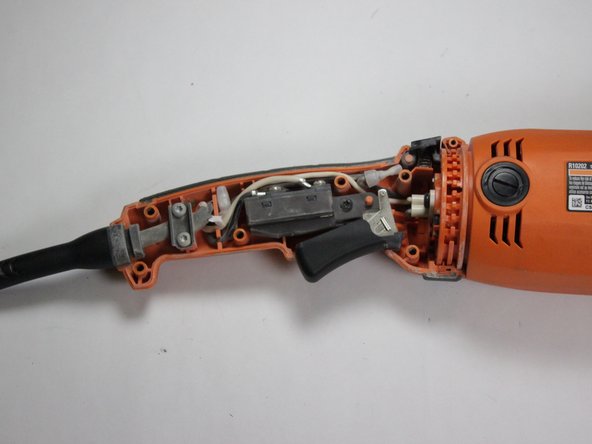
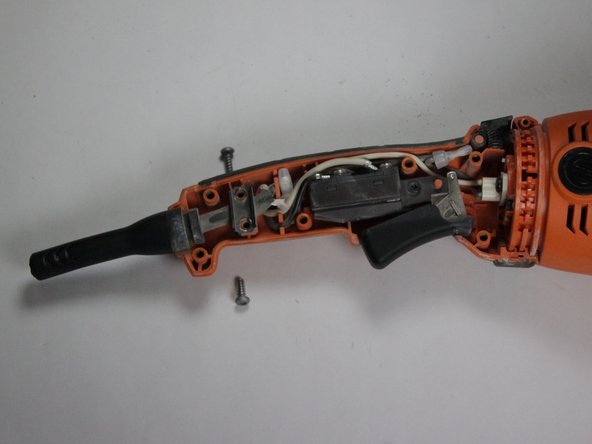
    • Using a Torx T20 screwdriver, unscrew the five M5 x 16 mm screws.

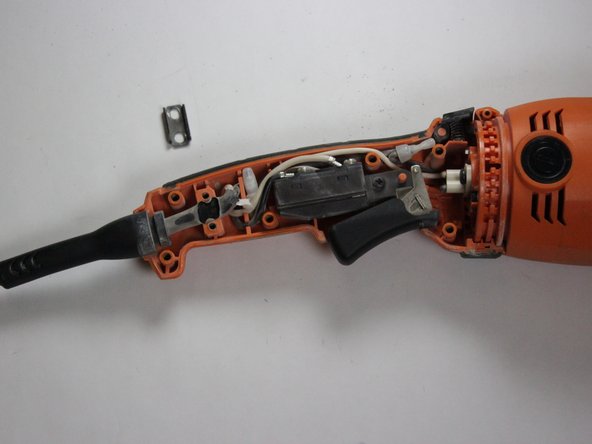
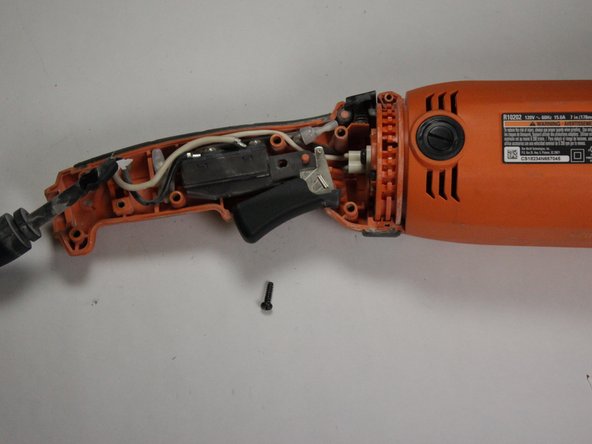
    • Using the T20 screwdriver, remove the M5 x 28 mm screw.

  2. Ridgid Angle Grinder R10202 Handle Disassembly: 手順 2、 1の画像 1
    • Using a Torx T10 screwdriver, remove the M3 x 10mm screw.

  3. Ridgid Angle Grinder R10202 Handle Disassembly: 手順 3、 2の画像 1 Ridgid Angle Grinder R10202 Handle Disassembly: 手順 3、 2の画像 2
    • Gently pull off the right side handle.

  4. Ridgid Angle Grinder R10202 Handle Disassembly: 手順 4、 3の画像 1 Ridgid Angle Grinder R10202 Handle Disassembly: 手順 4、 3の画像 2 Ridgid Angle Grinder R10202 Handle Disassembly: 手順 4、 3の画像 3
    • Using a hex head screwdriver, remove the two 8-16 x 1/2in screws.

  5. Ridgid Angle Grinder R10202 Handle Disassembly: 手順 5、 1の画像 1
    • Gently pull away the bend relief.

  6. Ridgid Angle Grinder R10202 Handle Disassembly: 手順 6、 2の画像 1 Ridgid Angle Grinder R10202 Handle Disassembly: 手順 6、 2の画像 2
    • Remove the one M4 x 14 mm screw using a Phillips screwdriver.

  7. Ridgid Angle Grinder R10202 Handle Disassembly: 手順 7、 1の画像 1
    • Gently lift away the switch and wires.

  8. Ridgid Angle Grinder R10202 Handle Disassembly: 手順 8、 2の画像 1 Ridgid Angle Grinder R10202 Handle Disassembly: 手順 8、 2の画像 2
    • Press down the handle lock button.

    • Force-ably twist and pull away the left side handle assembly.

終わりに

To reassemble your device, follow these instructions in reverse order.

ある他の人がこのガイドを完成しました。

作成者

3人の作成者と共同で作成されました。

Parker Massie

メンバー登録日: 01/10/19

607 ポイント

4のガイドは作成済み

チーム

0 件のコメント

コメントを追加

統計データ:

過去 24時間: 0

過去 7 日: 0

過去 30 日: 4

今までの合計 392