メインコンテンツにスキップ

この修理ガイドは変更されています。最新の未承認バージョンに切り替えます。

Ricoh YF-20 Super Lens Cover Replacement

必要な工具と部品

  1. Ricoh YF-20 Super Lens Cover Replacement, Front Cover: 手順 1、 2の画像 1 Ricoh YF-20 Super Lens Cover Replacement, Front Cover: 手順 1、 2の画像 2
    • Use the screwdriver to unscrew the indicated screws from the left, right, bottom, and back sides of the camera.

  2. Ricoh YF-20 Super Lens Cover Replacement: 手順 2、 3の画像 1 Ricoh YF-20 Super Lens Cover Replacement: 手順 2、 3の画像 2 Ricoh YF-20 Super Lens Cover Replacement: 手順 2、 3の画像 3
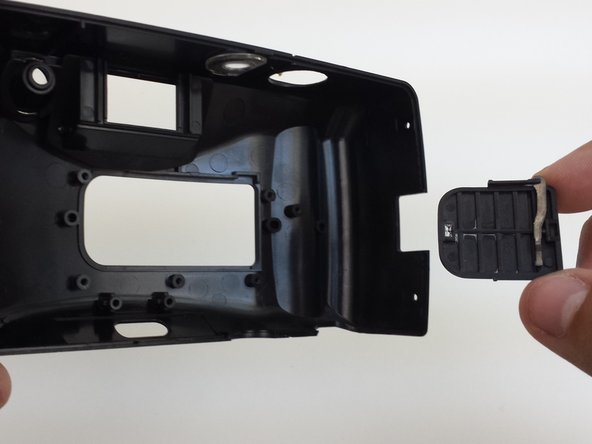
    • Loosen the back cover from both the left and the right sides of the camera. Take off the back cover.

    • The lid of the battery compartment may fall off because it is not attached to anything.

  3. Ricoh YF-20 Super Lens Cover Replacement: 手順 3、 3の画像 1 Ricoh YF-20 Super Lens Cover Replacement: 手順 3、 3の画像 2 Ricoh YF-20 Super Lens Cover Replacement: 手順 3、 3の画像 3
    • Open the film compartment.

    • Press your finger on top of the grey latch on the left side of the camera.

  4. Ricoh YF-20 Super Lens Cover Replacement: 手順 4、 3の画像 1 Ricoh YF-20 Super Lens Cover Replacement: 手順 4、 3の画像 2 Ricoh YF-20 Super Lens Cover Replacement: 手順 4、 3の画像 3
    • Removing the film compartment door is optional. However, it may aid maneuverability in future steps.

    • Use a thin object like a toothpick or a small screwdriver to push down on the metal pin holding the film compartment door in place.

    • Use your fingers to completely remove the metal pin.

    • Remove the film compartment door.

  5. Ricoh YF-20 Super Lens Cover Replacement: 手順 5、 2の画像 1 Ricoh YF-20 Super Lens Cover Replacement: 手順 5、 2の画像 2
    • Use a thin shaft screwdriver and unscrew the two indicated screws within the film compartment.

  6. Ricoh YF-20 Super Lens Cover Replacement: 手順 6、 3の画像 1 Ricoh YF-20 Super Lens Cover Replacement: 手順 6、 3の画像 2 Ricoh YF-20 Super Lens Cover Replacement: 手順 6、 3の画像 3
    • Loosen the front cover from the left and right sides of the camera.

    • Take off the front cover.

  7. Ricoh YF-20 Super Lens Cover Replacement, Lens Cover: 手順 7、 3の画像 1 Ricoh YF-20 Super Lens Cover Replacement, Lens Cover: 手順 7、 3の画像 2 Ricoh YF-20 Super Lens Cover Replacement, Lens Cover: 手順 7、 3の画像 3
    • The lens cover is only attached to the front cover of the camera. Set the rest of the camera aside.

    • In order to reach the lens cover, the zoom mechanism must be removed.

    • Unscrew three screws from the front cover that hold the zoom mechanism in place.

    • Remove the zoom mechanism.

  8. Ricoh YF-20 Super Lens Cover Replacement: 手順 8、 3の画像 1 Ricoh YF-20 Super Lens Cover Replacement: 手順 8、 3の画像 2 Ricoh YF-20 Super Lens Cover Replacement: 手順 8、 3の画像 3
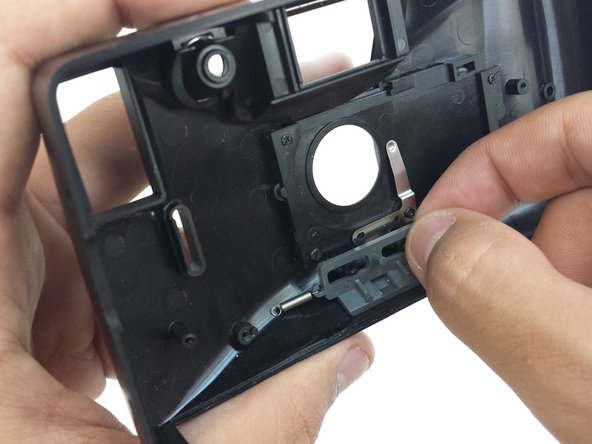
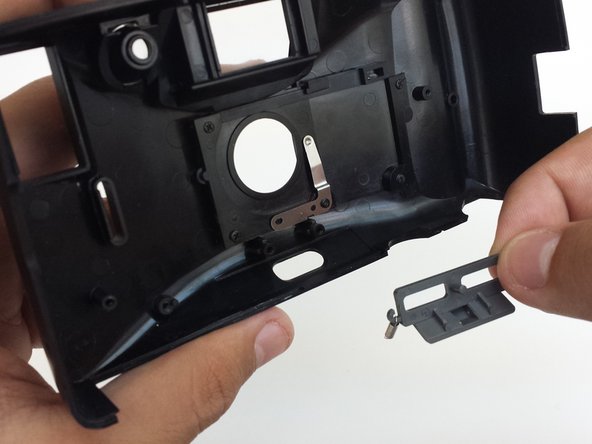
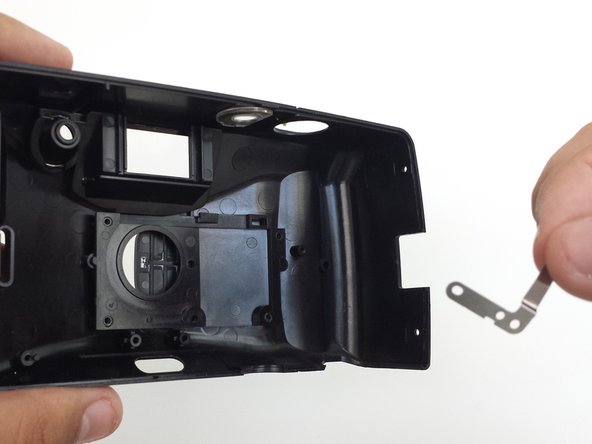
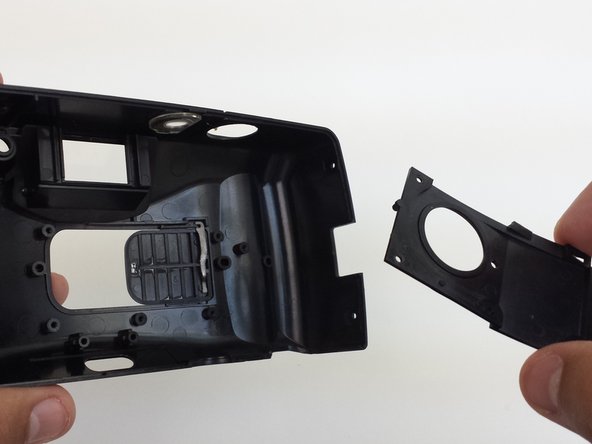
    • Unscrew the five screws that hold the lens cover plate and metal brace in place.

    • Remove metal brace.

    • Remove lens cover plate.

  9. Ricoh YF-20 Super Lens Cover Replacement: 手順 9、 2の画像 1 Ricoh YF-20 Super Lens Cover Replacement: 手順 9、 2の画像 2
    • To remove lens cover, push the lens cover from the outside of the front cover towards the inside of the front cover.

    • Remove the lens cover.

    • The metal arm attached to the lens cover is not securely attached and may fall off.

終わりに

To reassemble your device, follow these instructions in reverse order.

作成者

4人の作成者と共同で作成されました。

Eric Dazet

メンバー登録日: 04/10/12

352 ポイント

5のガイドは作成済み

チーム

Cal Poly, Team 6-21, Amido Spring 2012 Cal Poly, Team 6-21, Amido Spring 2012人のメンバー

CPSU-AMIDO-S12S6G21

4 メンバー

18のガイドは作成済み

0 件のコメント

コメントを追加

統計データ:

過去 24時間: 0

過去 7 日: 1

過去 30 日: 2

今までの合計 311