はじめに
This repair requires soldering if you are not familiar with how to use a soldering iron first refer to: Soldering
必要な工具と部品
-
-
Using a Phillips J00 head remove the three 5mm screws on both left and right side of the camera as well as the one in back of it.
 FixBotに聞いてみる
-
-
-
Using the same J00 phillips head screwdriver proceed to removing the remaining four 5mm screws on the bottom of the camera.
-
Last, using the same #00 phillips head screwdriver remove the two 0.6mm screws which are one on each side of the tripod connection dip.
-
-
-
-
The case can now be removed from the camera.
-
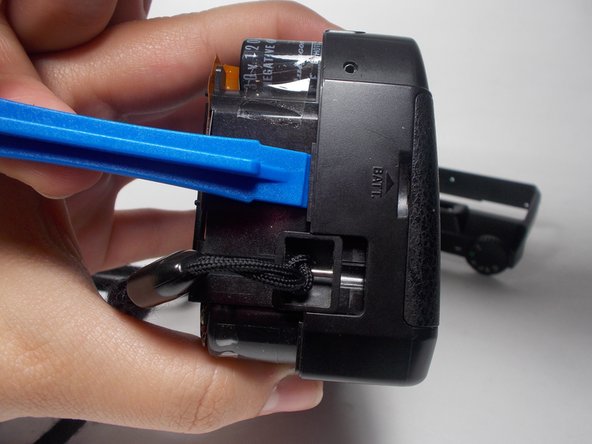
Using a blue opening tool start by lifting the back part of the case right where the tripod dip is. Lift until the back part of the case is released and can be easily removed
-
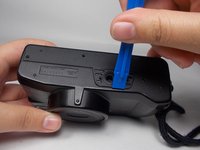
Next, using the same opening tool lift and push by the battery compartment as shown in the second picture. Do this until the front part of the case is released and can be easily removed.
-
-
-
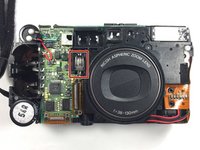
The LED diode to be replaced can be found in the front of the camera next to the zooming lens.
-
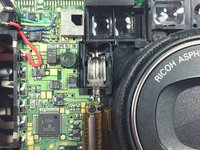
Desolder the LED to remove it from the motherboard
-


To reassemble your device, follow these instructions in reverse order.

チーム

UMass Dartmouth, Team 3-4, Isaacson Fall 2016 UMass Dartmouth, Team 3-4, Isaacson Fall 2016人のメンバー
UMASSD-ISAACSON-F16S3G4
3 メンバー
10のガイドは作成済み