はじめに
上部ケースアセンブリにはキーボードが含まれています。 このガイドを使用して、ケース/キーボードアセンブリ全体を1つのユニットとして交換します。
必要な工具と部品
-
-
下部ケースを固定する以下8本のネジを取り外します。
-
2本の1.8 mm P5ペンタローブネジ
-
4本の2.9 mm P5ペンタローブネジ
-
2本の6.1 mm P5ペンタローブネジ
-
-
-
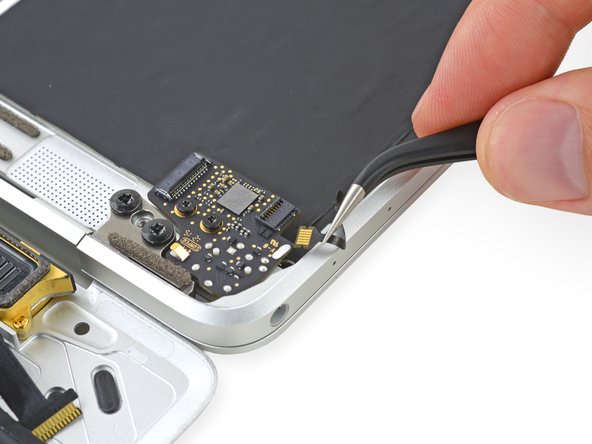
追加の予防策として、ロジックボードとバッテリーコネクタの間にバッテリー絶縁ピックを挿入して、バッテリーを物理的に外すことができます。
-
-


デバイスを再組み立てするには、これらの手順を逆の順序で実行します。
デバイスを再組み立てするには、これらの手順を逆の順序で実行します。
7 の人々がこのガイドを完成させました。
以下の翻訳者の皆さんにお礼を申し上げます:
100%


これらの翻訳者の方々は世界を修理する私たちのサポートをしてくれています。 あなたも貢献してみませんか?
翻訳を始める ›

4 件のコメント
Just a warning, but when any repairs are being done on this particular model, its important to discharge the battery before disconnecting ANY cables or connections internally. Not doing so can damage logic board components or more. I was looking into the take aprt for the top case, and there was no mention about discharging the battery before cables were being disconnected so I wanted to put this on your radar. Thank you
On step 22, the retaining flap mentioned isn't opening for me, and I can't tell from the photos which direction it opens (and I don't want to force it). Can someone please advise? @adamocamb are you able to help me out here?