はじめに
We will “make” and install a new watch gasket with Sugru, a formable adhesive. This will hold the watch together after being opened for repairs. The new seal will take 24 hours to cure, so we will also build a fixture to hold the watch together during the cure time.
必要な工具と部品
-
-
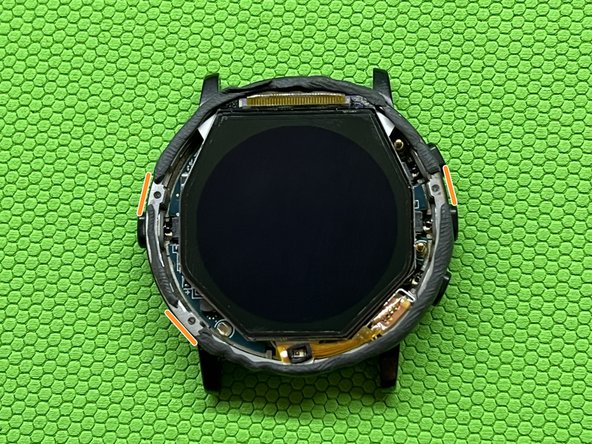
To prepare for resealing the watch, clean the sealing surfaces thoroughly.
-
I used isopropyl alcohol on cotton swabs to clean the bezel and watch case sealing surfaces. All old gasket material should be removed.
-
-
-
Sugru is a formable adhesive, with a consistency similar to modeling clay. It comes in small single-use packets, and cures with exposure to the humidity in the air.
-
Make sure you're ready to re-seal the watch when you open the Sugru, it will begin to cure in about 30 minutes.
-
-
-
Rip off a very tiny bit of Sugru
-
Use your fingers to roll it out on a table or other surface, until it's less than 1mm thin.
-
-
-
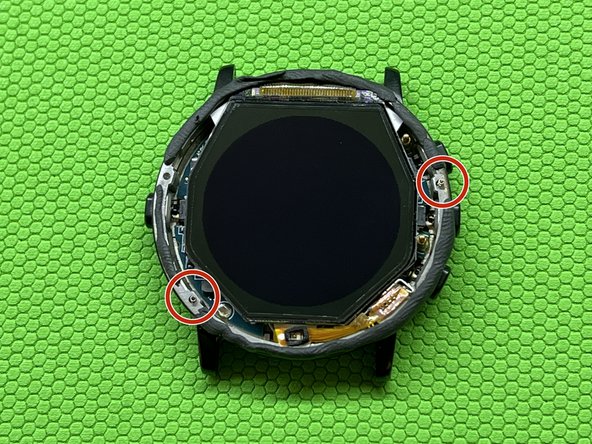
We want to cover the sealing surface of the watch without getting any adhesive into the (3x) spring holes.
-
Tiny springs go in these holes and make an electrical connection between the watch case and bezel.
-
If you want to improve the waterproofing of the finished product, you can line the entire perimeter of the case with Sugru, but it could reduce the Bluetooth range. I haven't tested this myself but will the next time I repair another of these watches.
-
Lay out small strips of the rolled Sugru, until you've covered the perimeter of the bezel. Give the Sugru a light smush into the bezel to keep it in place.
-
I put a thicker coat of Sugru than necessary on this watch, but we will address that later. You should roll the Sugru out a little thinner than I did.
-
-
-
-
There are three holes for springs, but in multiple Pebble Time Rounds that I've repaired, I've only been able to recover two springs. I'm either bad at keeping track of them, or some models are manufactured with 2 springs. The reassembled watches seem to work fine with only two springs. I recommend one spring on the right and left side.
-
Use tweezers to gently place a spring in each hole, being extremely careful to not lose them.
-
-
-
Install the display inner bezel over the display and Sugru.
-
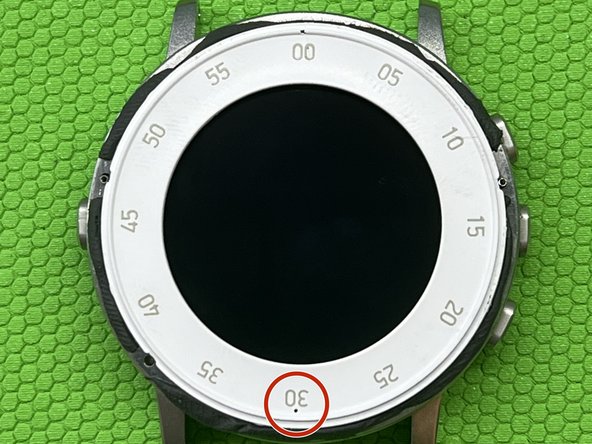
On silver Pebble Time Rounds, the bezel is correctly aligned when the "30" is at the bottom.
-
The bezel is correctly installed when it sits flush with the display, there are notches in the case that it must align with.
-
-
-
This is your last chance to prevent accidentally sealing in any dust, fingerprints, or other grime.
-
Take a microfiber cloth sprayed with isopropyl alcohol, and wipe down the display, inner bezel, and the inside of the glass, making sure everything is nice and clean.
-
-
-
Install the outer glass bezel, and give the watch a good squeeze all the way around the bezel.
-
Some Sugru should come out the edges, wipe it up with a cloth or cotton swaps. It's much easier to remove excess Sugru before it dries.
-
-
-
Now we can put together a fixture to let the Sugru dry in. I used a C-Clamp, some scrap wood, and a foam pad to compress the watch.
-
The wood helps distribute the clamp force evenly across the display, and the foam helps protect the glass.
-
Make a Pebble sandwich with the clamp, wood, foam, and watch. Tighten the clamp enough that the watch is compressed, but don't make it too tight.
-
Remove any more Sugru that seeps out with a cotton swab.
-
-
-
After the Sugru has cured, remove the watch from the clamp fixture and clean off any excess adhesive.
-
I've found that running the edge of my fingernail along the seam is a good way to remove the small remainder that may be stuck in there.
-


The Pebble Time Round was never a “waterproof” watch, it was advertised only as “Splash-Resistant” . This fix will keep your watch in one piece, but it will not necessarily keep water out, so be careful!
The Pebble Time Round was never a “waterproof” watch, it was advertised only as “Splash-Resistant” . This fix will keep your watch in one piece, but it will not necessarily keep water out, so be careful!

チーム
