メインコンテンツにスキップ

ResMed AirSense 10 Wireless Communication Board Replacement

医療機器
この修理ガイドは医療機器メーカーからの是認を得ておらず、iFixitと医療機器メーカーは提携していません。

必要な工具と部品

  1. ResMed AirSense 10 Wireless Communication Board Replacement, Top Cover: 手順 1、 2の画像 1 ResMed AirSense 10 Wireless Communication Board Replacement, Top Cover: 手順 1、 2の画像 2
    • Remove the water tub by gently pulling it out.

  2. ResMed AirSense 10 Wireless Communication Board Replacement: 手順 2、 3の画像 1 ResMed AirSense 10 Wireless Communication Board Replacement: 手順 2、 3の画像 2 ResMed AirSense 10 Wireless Communication Board Replacement: 手順 2、 3の画像 3
    • Pry off the face plate by using your finger or an opening tool.

    • Use a moderate amount of force when prying open.

    • Remove the face plate from the top cover.

    • There will be a clicking sound on either side of the divot when assembling and disassembling.

  3. ResMed AirSense 10 Wireless Communication Board Replacement: 手順 3、 2の画像 1 ResMed AirSense 10 Wireless Communication Board Replacement: 手順 3、 2の画像 2
    • Unscrew and remove the two 11.8 mm TR10 Torx screws that were revealed from the face plate being removed.

  4. ResMed AirSense 10 Wireless Communication Board Replacement: 手順 4、 2の画像 1 ResMed AirSense 10 Wireless Communication Board Replacement: 手順 4、 2の画像 2
    • Unscrew and remove the two 11.8 mm TR10 Torx screws from the bottom of the device.

  5. ResMed AirSense 10 Wireless Communication Board Replacement: 手順 5、 3の画像 1 ResMed AirSense 10 Wireless Communication Board Replacement: 手順 5、 3の画像 2 ResMed AirSense 10 Wireless Communication Board Replacement: 手順 5、 3の画像 3
    • Remove the top cover from the rest of the device.

  6. ResMed AirSense 10 Wireless Communication Board Replacement, Wireless Communication Board: 手順 6、 3の画像 1 ResMed AirSense 10 Wireless Communication Board Replacement, Wireless Communication Board: 手順 6、 3の画像 2 ResMed AirSense 10 Wireless Communication Board Replacement, Wireless Communication Board: 手順 6、 3の画像 3
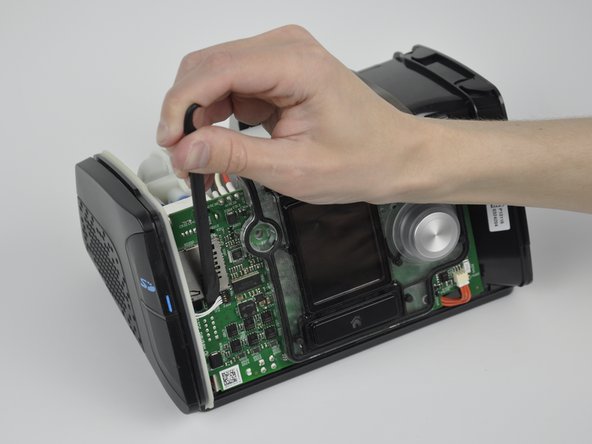
    • Place a halberd spudger behind the connector cable.

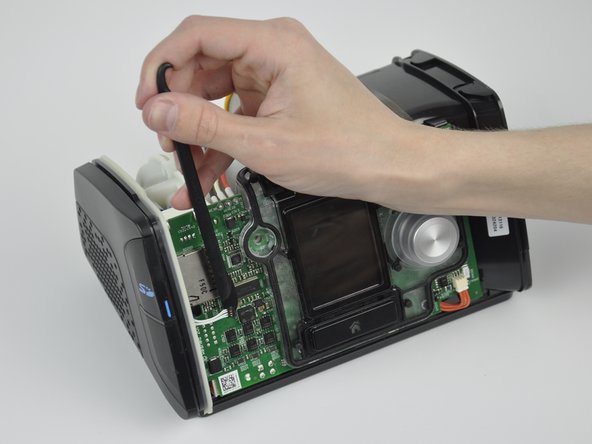
    • Use a halberd spudger to pull the connector away from the motherboard.

  7. ResMed AirSense 10 Wireless Communication Board Replacement: 手順 7、 2の画像 1 ResMed AirSense 10 Wireless Communication Board Replacement: 手順 7、 2の画像 2
    • Unscrew and remove the two 11.8 mm TR10 Torx screws from the bottom of the device.

  8. ResMed AirSense 10 Wireless Communication Board Replacement: 手順 8、 2の画像 1 ResMed AirSense 10 Wireless Communication Board Replacement: 手順 8、 2の画像 2
    • Insert a plastic opening tool in between the side and bottom panel.

    • Pry the side panel away from the bottom panel with the plastic opening tool.

    • Remove the side panel by pulling it away from the device.

  9. ResMed AirSense 10 Wireless Communication Board Replacement: 手順 9、 2の画像 1 ResMed AirSense 10 Wireless Communication Board Replacement: 手順 9、 2の画像 2
    • Push in the clips which secure the board to the side panel with the plastic opening tool.

  10. ResMed AirSense 10 Wireless Communication Board Replacement: 手順 10、 2の画像 1 ResMed AirSense 10 Wireless Communication Board Replacement: 手順 10、 2の画像 2
    • Remove the wireless communication board from the side panel.

終わりに

To reassemble your device, follow these instructions in reverse order.

作成者

2人の作成者と共同で作成されました。

Mitchell Novak

メンバー登録日: 01/16/20

778 ポイント

5のガイドは作成済み

チーム

コメント 1 件

I have an early ResMed Airsense 10 and my wireless comm board was 3G. Can this be updated with a replacement board?

Lynd Mccormick - 返信

コメントを追加

統計データ:

過去 24時間: 1

過去 7 日: 10

過去 30 日: 46

今までの合計 1,330