メインコンテンツにスキップ

Replacing Philips FC 6148 handheld vacuum cleaner batteries

必要な工具と部品

  1. Replacing Philips FC 6148 handheld vacuum cleaner batteries, Replacing Philips FC 6148 handheld vacuum cleaner batteries: 手順 1、 2の画像 1 Replacing Philips FC 6148 handheld vacuum cleaner batteries, Replacing Philips FC 6148 handheld vacuum cleaner batteries: 手順 1、 2の画像 2
    • Remove all attachments, leaving only the base unit.

    • Unscrew the five Phillips screws.

  2. Replacing Philips FC 6148 handheld vacuum cleaner batteries: 手順 2、 1の画像 1
    • You have to disassemble the device into two halves. To do this, cut the sticker at the seam with a sharp tool.

  3. Replacing Philips FC 6148 handheld vacuum cleaner batteries: 手順 3、 1の画像 1
    • Take a plastic lever tool and carefully split the device into two halves. It probably is stuck a little.

    • Now is a good time to give the inside of the appliance a good clean, especially all the foam filters.

  4. Replacing Philips FC 6148 handheld vacuum cleaner batteries: 手順 4、 2の画像 1 Replacing Philips FC 6148 handheld vacuum cleaner batteries: 手順 4、 2の画像 2
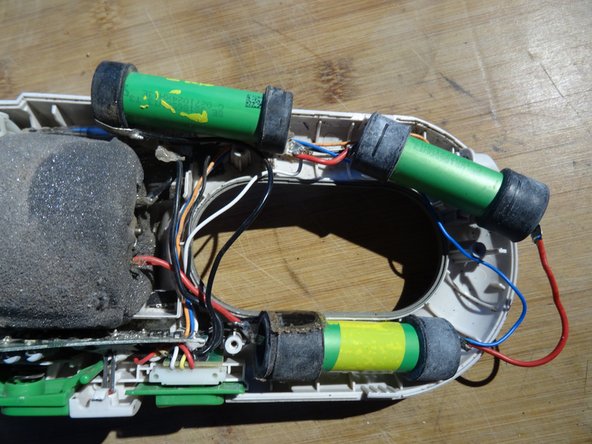
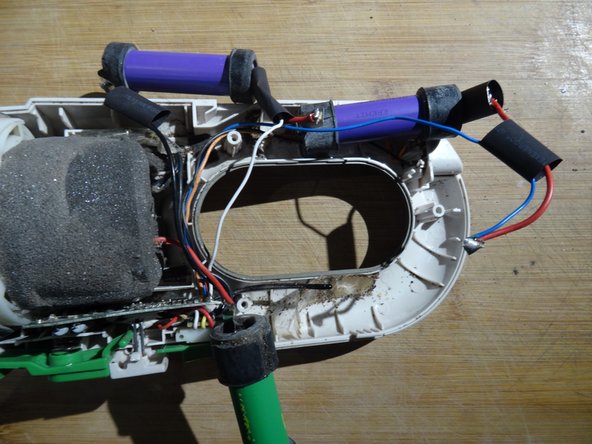
    • The batteries - shown here in green - are easy to see. They are held in the device by rubber buffers.

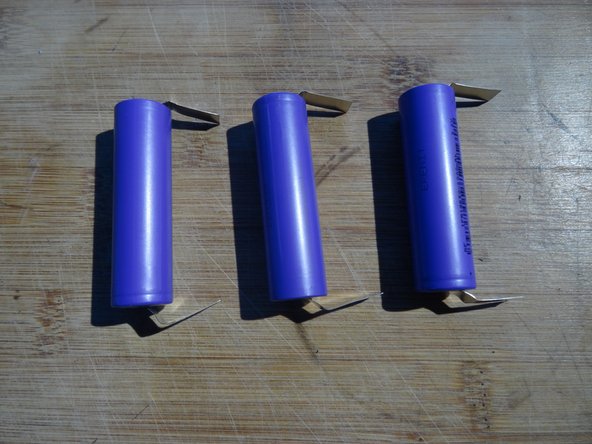
    • You need three 18650 batteries with U-shaped solder tabs. The higher the capacity, the longer you can vacuum. Use types with a nominal voltage of 3.7 V and a charging voltage of 4.1 V.

    • To be on the safe side, measure the voltage of each cell. They should all be the same.

  5. Replacing Philips FC 6148 handheld vacuum cleaner batteries: 手順 5、 3の画像 1 Replacing Philips FC 6148 handheld vacuum cleaner batteries: 手順 5、 3の画像 2 Replacing Philips FC 6148 handheld vacuum cleaner batteries: 手順 5、 3の画像 3
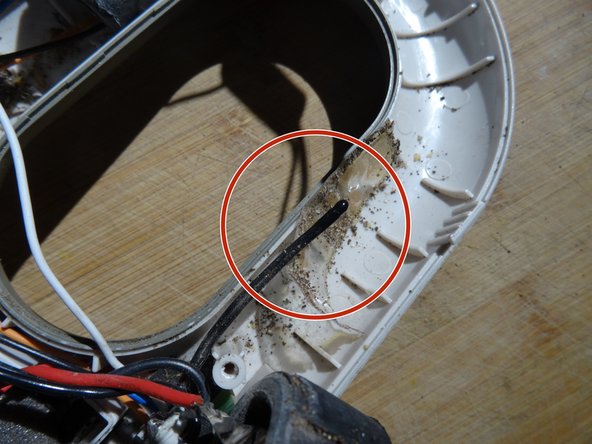
    • Carefully lift out the batteries. A fuse and a thermal sensor are glued to the first and third battery.

    • Remove the adhesive tapes and carefully push the fuse and the thermal sensor to the side.

    • In the third picture you can see the thermal sensor. Note how it is guided through a groove in the rubber buffer and rests against the battery.

  6. Replacing Philips FC 6148 handheld vacuum cleaner batteries: 手順 6、 2の画像 1 Replacing Philips FC 6148 handheld vacuum cleaner batteries: 手順 6、 2の画像 2
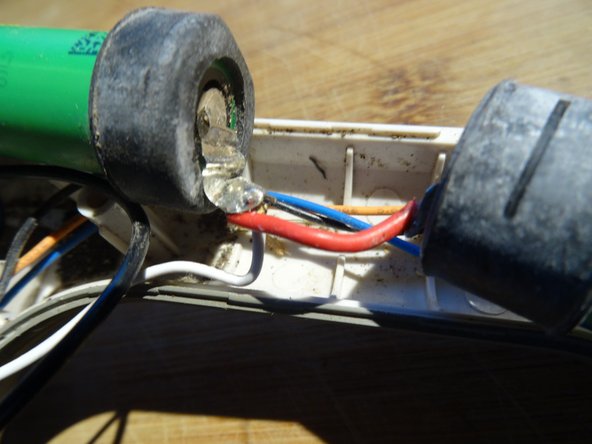
    • All solder joints are secured with heat-shrink tubing. Cut all heat-shrink tubing with a sharp tool and remove it.

  7. Replacing Philips FC 6148 handheld vacuum cleaner batteries: 手順 7、 2の画像 1 Replacing Philips FC 6148 handheld vacuum cleaner batteries: 手順 7、 2の画像 2
    • Now comes the main work: soldering. Get some wide heat-shrink tubing that fits over the soldering tabs.

    • Desolder the old batteries piece by piece - you can also pinch off the cables - and solder them to the new batteries in the same way:

    • Slide on suitable pieces of heat-shrink tubing before soldering.

    • Pay very close attention to the polarity of the batteries. If you make a mistake here, nothing will work!

    • Heat the heat-shrink tubing until it tightens against the soldering tabs.

  8. Replacing Philips FC 6148 handheld vacuum cleaner batteries: 手順 8、 1の画像 1
    • Tape the fuse and the heat sensor in place with insulating tape.

    • Insert the batteries.

    • Check the polarity of the batteries once more.

    • Minus

    • Plus

    • Switch on the device for testing.

終わりに

Work through the steps in reverse order to reassemble your device.

以下の翻訳者の皆さんにお礼を申し上げます:

de en

100%

oldturkey03さんは世界中で修理する私たちを助けてくれています! あなたも貢献してみませんか?
翻訳を始める ›

作成者

1人の作成者と共同作成されました。

VauWeh

メンバー登録日: 10/19/15

205,589 ポイント

252のガイドは作成済み

チーム

Repair is War on Entropy Repair is War on Entropy人のメンバー

Community

25 メンバー

1,156のガイドは作成済み

0 件のコメント

コメントを追加

統計データ:

過去 24時間: 7

過去 7 日: 46

過去 30 日: 159

今までの合計 333