このバージョンは誤った内容を含んでいる可能性があります。最新の承認済みスナップショットに切り替えてください。
必要な工具と部品
-
-
この手順は未翻訳です。 翻訳を手伝う。
-
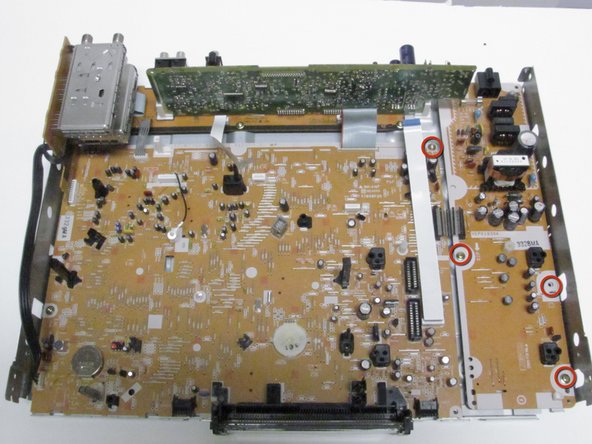
With the cover off, locate the DVD drive and remove the four red screws circled in image one.
-
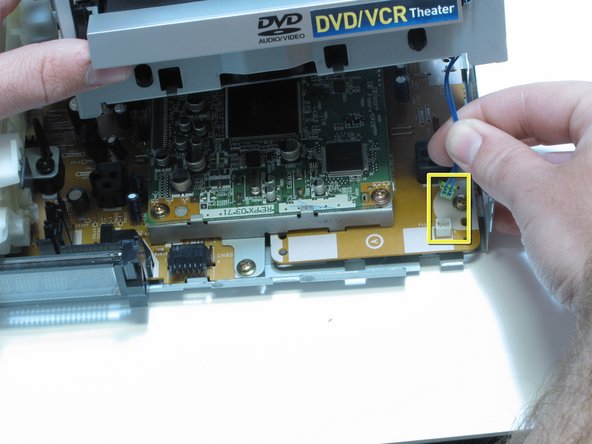
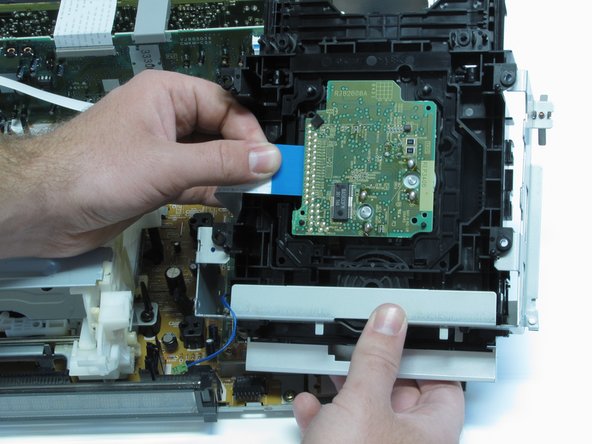
Gently lift the out the DVD drive and unplug the cable connection shown in image two.
-
Slowly turn over the DVD drive and remove the electronic strip in the bottom as shown in image three.
-
-
この手順は未翻訳です。 翻訳を手伝う。
-
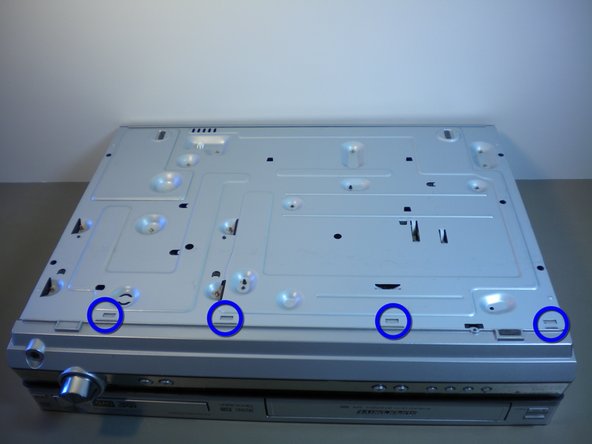
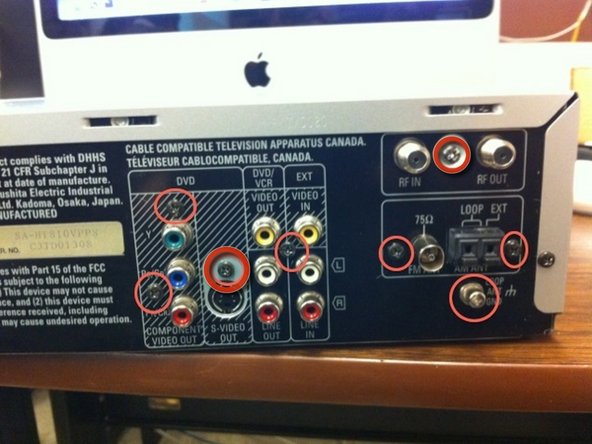
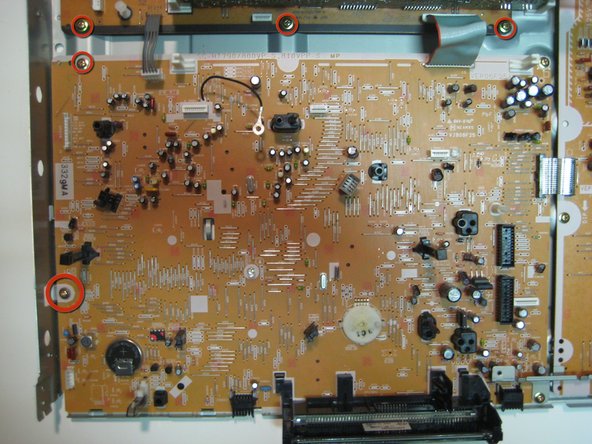
Locate and remove the six screws that are circled in image one.
-
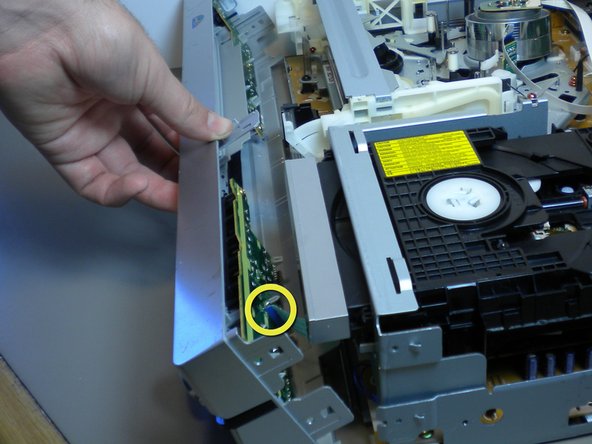
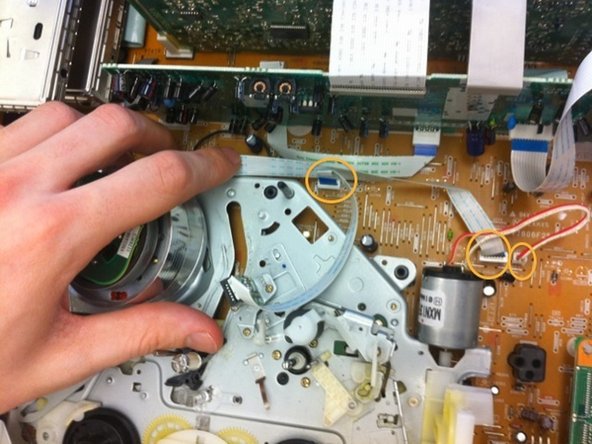
Remove the two electronic strips that are circled in image two that connect the VCR to the motherboard and unplug the cable.
-
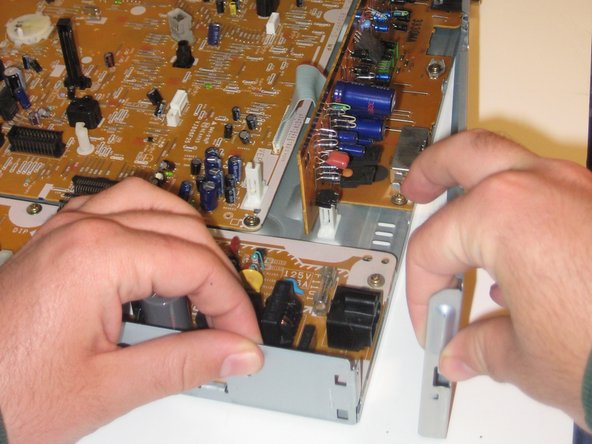
Slowly remove the VCR by lifting it up and set aside. It may be difficult to slide the VCR from the black pegs that keep it in place.
-
-
この手順は未翻訳です。 翻訳を手伝う。
-
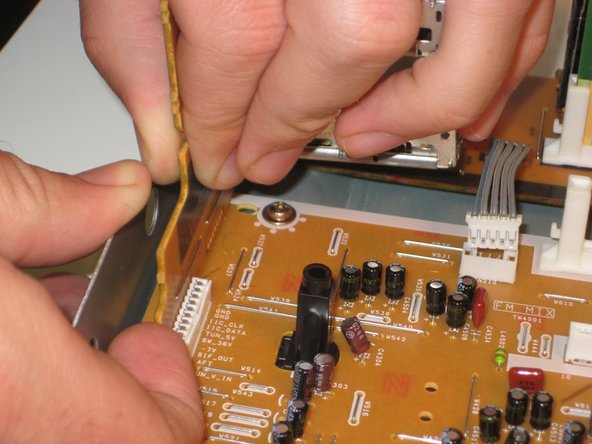
Remove electronic strips on the right, bottom center, top center, and a cable on the left side of the input board.
-
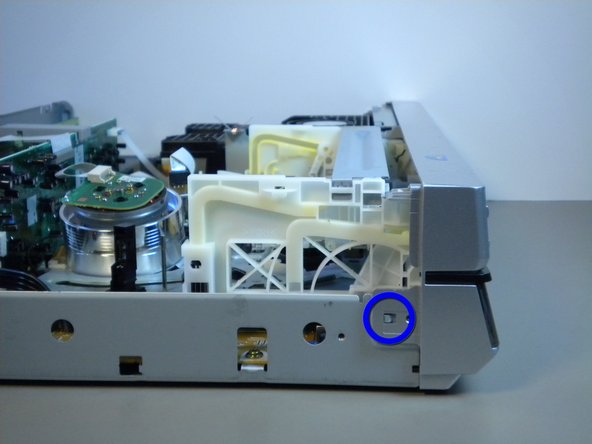
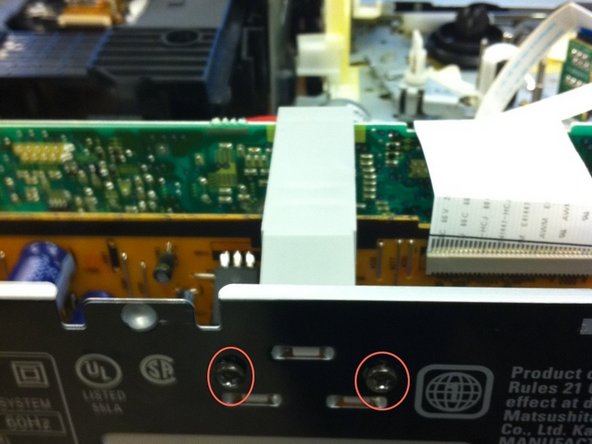
Remove two screws shown in the second image. Remove the gray connector on top of the input board.
-
Next, use a flat head screwdriver to assist you in prying the right clip while simultaneously pulling up on the input board. Unclip the component from the logic board.
-
-
この手順は未翻訳です。 翻訳を手伝う。
-
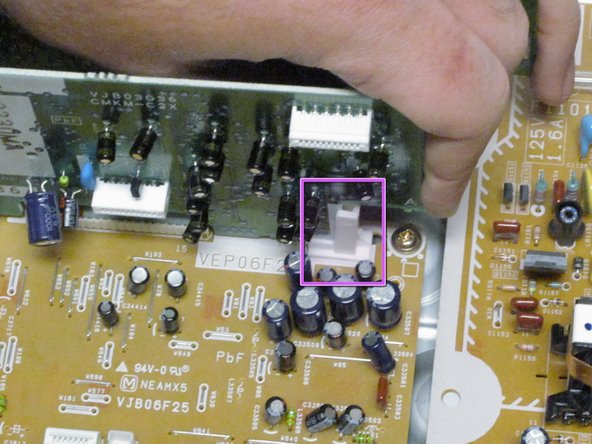
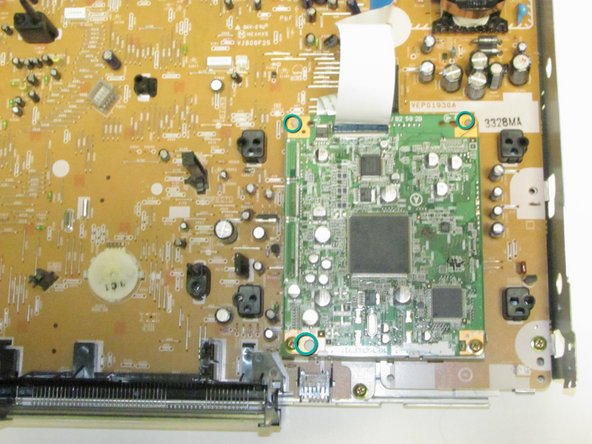
In order to remove the DVD video processor, first locate and remove the two screws circled in image one.
-
The final step is popping of the component off of the three nodes circled in image three.
-
Unfortunately one or more of these 'nodes' will probably be difficult to remove and you will just have to pull on it until they come unattached or rotate the component to unhinge from the plastic clip.
-
-
この手順は未翻訳です。 翻訳を手伝う。
-
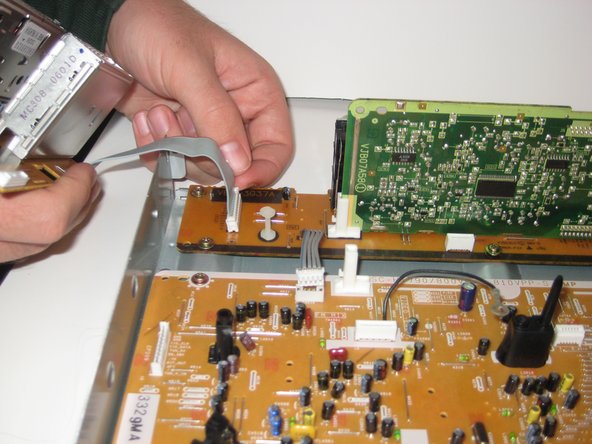
The next step is to remove the FM/AM radio receiver pictured in image one.
-
First unsnap it from the tab that holds it to the mother board (see image two).
-
Second, disconnect the electrical strip as seen in image three by pulling the tabs on the plastic piece of the electric strip.
-
Remove the black cable from the side slot.
-


チーム

Cal Poly, Team 16-5, Maness Spring 2010 Cal Poly, Team 16-5, Maness Spring 2010人のメンバー
CPSU-MANESS-S10S16G5
4 メンバー
7のガイドは作成済み