必要な工具と部品
-
-
Remove the back cover by prying it off with a fine tool (I used a screwdriver).
-
-
-
Remove the sim/mic tray and the 13 screw that hold the intermediate cover to the screen frame.
-
With a thin tool, pull apart the screen cover, inserting it with care.
-
Once slightly pulled apart, you can continue separating it, using a nail or the spudger.
-
-
-
-
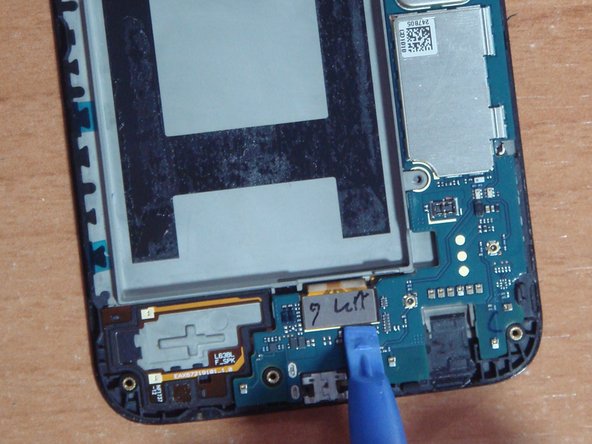
Disconnect the flex cable for the bottom screen.
-
-
-
Now that the motherboard has been released from the easily removable components, pick it up lightly by the side of the USB connector
-
Once you've picked it up, take it by hand and pull it slightly upwards to the left.
-
-
-
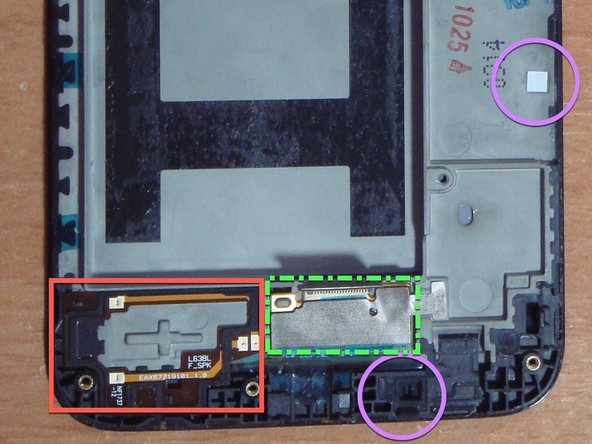
Move the remaining pieces from the old frame to the new frame.
-
- 2 flex cables (on button + speaker connector). Marked with red squares
-
- 2 rubber bands (main mic + noise-cancelling mic). Marked with lilac circles
-
- Vibrator. Marked with a red square
-
front flashlight. Marked with a lilac circle
-
Handset. Marked with a red square
-
For ease: metal mesh above the screen flex (green square) and humidity indicator sticker (lilac circle). I've passed them.
-
-
-
Once you have placed all the components into the new frame, proceed with the previous steps in reverse to reassemble the cell phone
-
Filler image
-


To reassemble your device, follow these instructions in reverse order.
To reassemble your device, follow these instructions in reverse order.
以下の翻訳者の皆さんにお礼を申し上げます:
100%

これらの翻訳者の方々は世界を修理する私たちのサポートをしてくれています。 あなたも貢献してみませんか?
翻訳を始める ›