メインコンテンツにスキップ

Repairing Rattling Sensor in Logitech G303 Computer Mouse

必要な工具と部品

  1. Repairing Rattling Sensor in Logitech G303 Computer Mouse, Repairing Rattling Sensor in Logitech G303 Computer Mouse: 手順 1、 2の画像 1 Repairing Rattling Sensor in Logitech G303 Computer Mouse, Repairing Rattling Sensor in Logitech G303 Computer Mouse: 手順 1、 2の画像 2
    • Pry off the mouse feet located at the front and back of the underside of the mouse by wedging a flat head screw driver into the depressed groove and applying upward force.

    • Ensure that the mouse is not plugged into any power source before starting the repair.

    • Carefully remove the feet and be wary of the adhesive. Careful handling will allow them to be reattached and not require the purchase of a new set of mouse feet

  2. Repairing Rattling Sensor in Logitech G303 Computer Mouse: 手順 2、 3の画像 1 Repairing Rattling Sensor in Logitech G303 Computer Mouse: 手順 2、 3の画像 2 Repairing Rattling Sensor in Logitech G303 Computer Mouse: 手順 2、 3の画像 3
    • Using a Phillips #00 screwdriver, unscrew the three screws that hold the top and bottom halves of the mouse together.

  3. Repairing Rattling Sensor in Logitech G303 Computer Mouse: 手順 3、 2の画像 1 Repairing Rattling Sensor in Logitech G303 Computer Mouse: 手順 3、 2の画像 2
    • Grip the mouse cable with one had and the top buttons with the other and apply force in opposite directions to separate the two halves of the mouse.

    • Try lightly squeezing the top buttons together while separating the two halves of the mouse.

  4. Repairing Rattling Sensor in Logitech G303 Computer Mouse: 手順 4、 2の画像 1 Repairing Rattling Sensor in Logitech G303 Computer Mouse: 手順 4、 2の画像 2
    • Using the Phillips #00 screwdriver, unscrew the three internal screws.

  5. Repairing Rattling Sensor in Logitech G303 Computer Mouse: 手順 5、 1の画像 1
    • Remove the internal operating board by lifting it out of the bottom half of the mouse.

    • Handle the internals carefully to prevent damage from occurring.

  6. Repairing Rattling Sensor in Logitech G303 Computer Mouse: 手順 6、 2の画像 1 Repairing Rattling Sensor in Logitech G303 Computer Mouse: 手順 6、 2の画像 2
    • First Adhesive Method:

    • Apply a thin bead of the Silicon caulk to the rim of the sensor component.

    • Ensure that no Silicon is covering the center where the sensor is located.

    • The Silicon takes 30 minutes to set. This allows slight adjustments to be made if the Silicon initially covers the sensor.

  7. Repairing Rattling Sensor in Logitech G303 Computer Mouse: 手順 7、 1の画像 1
    • Second Adhesive Method:

    • Attach the double sided tape to the bottom half of the housing. Place them directly over the central grooves.

    • Ensure that the central hole is not covered so the sensor still functions as designed.

終わりに

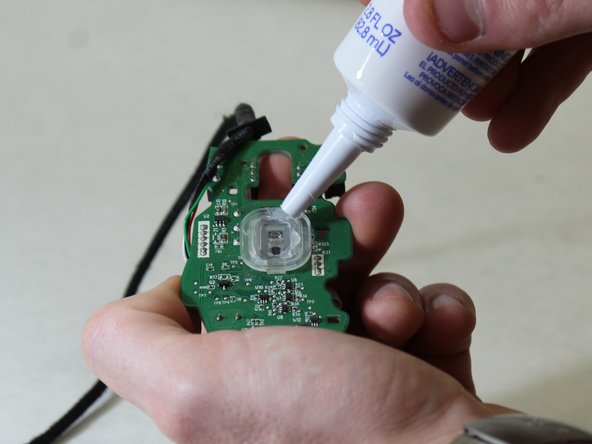
To reassemble your device, follow these instructions in reverse order. Lastly, ensure that none of the adhesive is blocking the sensor on the bottom of the device.

2 の人々がこのガイドを完成させました。

作成者

6人の作成者と共同で作成されました。

Benjamen Zielinski

メンバー登録日: 06/20/18

194 ポイント

1ガイドが承認済み

チーム

Washington State, Team S1-G4, Hope Summer 2018 Washington State, Team S1-G4, Hope Summer 2018人のメンバー

WSU-HOPE-SU18S1G4

4 メンバー

2のガイドは作成済み

0 件のコメント

コメントを追加

統計データ:

過去 24時間: 0

過去 7 日: 7

過去 30 日: 42

今までの合計 3,298