メインコンテンツにスキップ

Repairing Pioneer R1 Speaker Cables

必要な工具と部品

  1. Repairing Pioneer R1 Speaker Cables, Repairing Pioneer R1 Speaker Cables: 手順 1、 1の画像 1
    • Insert your plastic spudger into the opening near the HDMI port.

    • Gently pry the back cover of the R1 from the the front by using the spudger along the edges.

    • Do not pull the back cover straight off the R1. You may further damage the cables connecting the speakers to the motherboard.

  2. Repairing Pioneer R1 Speaker Cables: 手順 2、 1の画像 1
    • Lay the R1 flat like an open book.

    • This will prevent further damage to the cables connecting the speakers to the motherboard.

  3. Repairing Pioneer R1 Speaker Cables: 手順 3、 2の画像 1 Repairing Pioneer R1 Speaker Cables: 手順 3、 2の画像 2
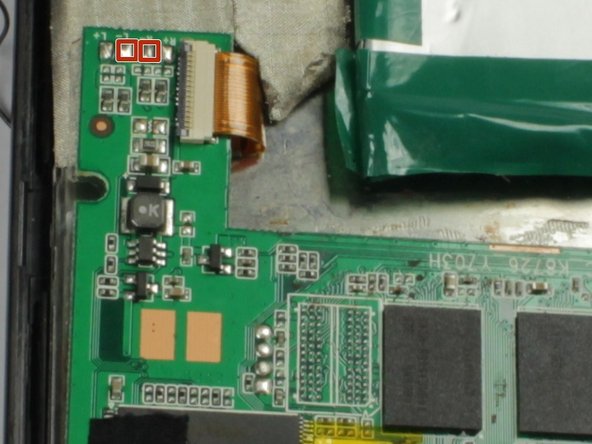
    • Solder the black cable of the left speaker to the nodule marked L+ on the motherboard.

    • Do not allow solder from one nodule to touch another nodule. This will cause the speakers to malfunction.

    • Solder the black cable of the Right speaker to the nodule marked R+ on the motherboard.

    • Solder the red cable of the left speaker to the nodule marked L- on the motherboard.

    • Solder the red cable of the right speaker to the nodule marked R- on the motherboard.

終わりに

To reassemble your device, follow these instructions in reverse order.

ある他の人がこのガイドを完成しました。

作成者

2人の作成者と共同で作成されました。

Christopher Rosario

メンバー登録日: 02/17/15

411 ポイント

4のガイドは作成済み

チーム

San Diego State, Team 1-1, Sheppard Winter 2015 San Diego State, Team 1-1, Sheppard Winter 2015人のメンバー

SDSU-SHEPPARD-W15S1G1

3 メンバー

7のガイドは作成済み

0 件のコメント

コメントを追加

統計データ:

過去 24時間: 0

過去 7 日: 2

過去 30 日: 4

今までの合計 144