メインコンテンツにスキップ

Repairing Kitchenaid KMT422CU1 Catch Lever

必要な工具と部品

  1. Repairing Kitchenaid KMT422CU1 Catch Lever, Repairing Kitchenaid KMT422CU1 Catch Lever: 手順 1、 3の画像 1 Repairing Kitchenaid KMT422CU1 Catch Lever, Repairing Kitchenaid KMT422CU1 Catch Lever: 手順 1、 3の画像 2 Repairing Kitchenaid KMT422CU1 Catch Lever, Repairing Kitchenaid KMT422CU1 Catch Lever: 手順 1、 3の画像 3
    • Start this fix by making sure the toaster is unplugged.

    • Next, remove the crumb tray from the bottom slot and set it aside.

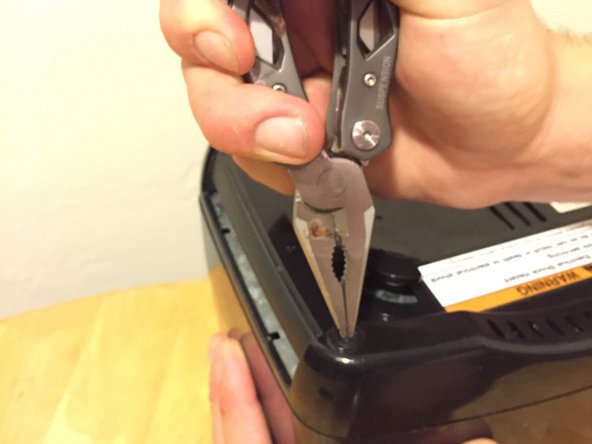
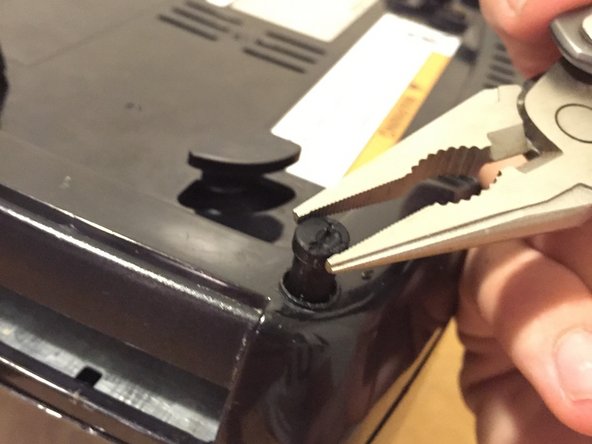
    • Pull the toaster lever cover straight off.

  2. Repairing Kitchenaid KMT422CU1 Catch Lever: 手順 2、 2の画像 1 Repairing Kitchenaid KMT422CU1 Catch Lever: 手順 2、 2の画像 2
    • Pull the timer knob located on the front of the toaster. With a little bit of force, it should easily pop off.

  3. Repairing Kitchenaid KMT422CU1 Catch Lever: 手順 3、 3の画像 1 Repairing Kitchenaid KMT422CU1 Catch Lever: 手順 3、 3の画像 2 Repairing Kitchenaid KMT422CU1 Catch Lever: 手順 3、 3の画像 3
    • Flip the toaster upside down.

    • Use needle nose pliers to remove the rubber screw covers located on the four corners of the bottom of the toaster.

  4. Repairing Kitchenaid KMT422CU1 Catch Lever: 手順 4、 2の画像 1 Repairing Kitchenaid KMT422CU1 Catch Lever: 手順 4、 2の画像 2
    • Use the screwdriver to remove the four 12.5 mm Phillips #1 screws. The screws are located on the four corners of the toaster under the rubber covers.

    • To remove the screws, turn the screwdriver counterclockwise.

  5. Repairing Kitchenaid KMT422CU1 Catch Lever: 手順 5、 2の画像 1 Repairing Kitchenaid KMT422CU1 Catch Lever: 手順 5、 2の画像 2
    • Pull the bottom of the toaster straight out of the top shell.

    • Be careful to not loosen or break any components.

    • Set the toaster down the normal way it would sit.

  6. Repairing Kitchenaid KMT422CU1 Catch Lever: 手順 6、 3の画像 1 Repairing Kitchenaid KMT422CU1 Catch Lever: 手順 6、 3の画像 2 Repairing Kitchenaid KMT422CU1 Catch Lever: 手順 6、 3の画像 3
    • Locate broken metal lever catch to the right of the large spring. It should look like a paperclip.

    • Remove it carefully with your fingers or needle nose pliers.

  7. Repairing Kitchenaid KMT422CU1 Catch Lever: 手順 7、 3の画像 1 Repairing Kitchenaid KMT422CU1 Catch Lever: 手順 7、 3の画像 2 Repairing Kitchenaid KMT422CU1 Catch Lever: 手順 7、 3の画像 3
    • Use needle nose plyers to pry off the remaining piece of the broken metal lever catch.

    • The broken metal lever catch pieces are pictured in the third picture.

  8. Repairing Kitchenaid KMT422CU1 Catch Lever: 手順 8、 3の画像 1 Repairing Kitchenaid KMT422CU1 Catch Lever: 手順 8、 3の画像 2 Repairing Kitchenaid KMT422CU1 Catch Lever: 手順 8、 3の画像 3
    • Take new paperclip with needle nose plyers.

    • Bend in paperclip into the hook shape pictured so it will be able to loop around the divots on the plastic lever.

    • The divots on the plastic lever are shown in the third picture.

  9. Repairing Kitchenaid KMT422CU1 Catch Lever: 手順 9、 3の画像 1 Repairing Kitchenaid KMT422CU1 Catch Lever: 手順 9、 3の画像 2 Repairing Kitchenaid KMT422CU1 Catch Lever: 手順 9、 3の画像 3
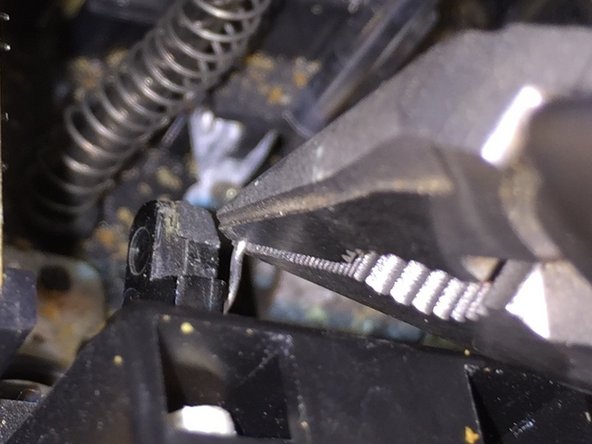
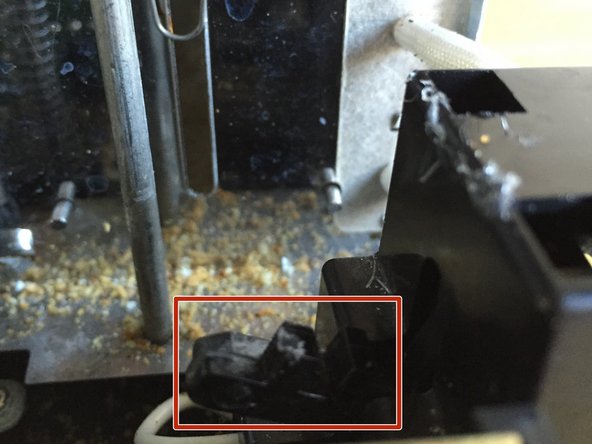
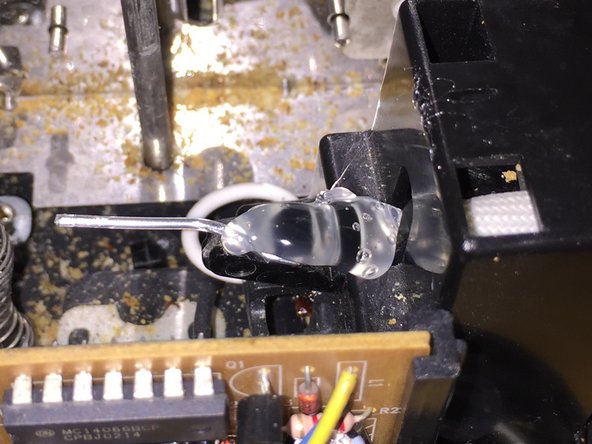
    • Place the newly bent paperclip onto plastic lever weaving it through the divots. Make sure that when the main spring comes down it engages the paperclip to push the lever down.

    • When the plastic lever is pushed down, the magnet engages and the timer on the toaster starts. As long as the paperclip stays glued on, the toaster will function fine because the magnet actually holds the toast down. The plastic lever just engages the magnet. The paperclip's main purpose is to extend the lever so it will be able to engage.

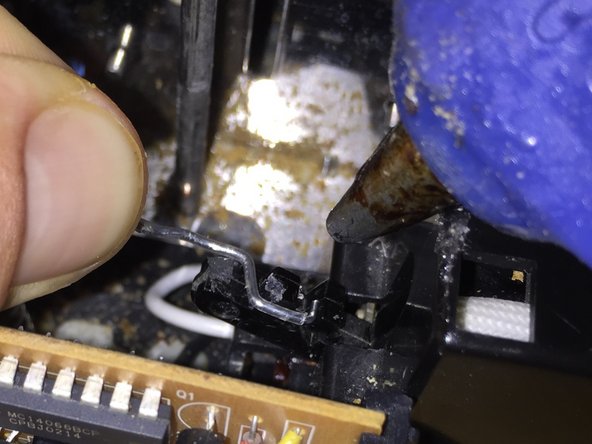
    • Use an adhesive to bond the paperclip to the plastic lever. A plastic welding adhesive such as JB weld will work best but super glue or even a hot glue gun will work as well. As long as the paperclip stays glued on, the toaster will function fine. Make sure to fully cover the paperclip with the adhesive.

終わりに

To reassemble your device, follow steps 1-5 in reverse order.

ある他の人がこのガイドを完成しました。

作成者

3人の作成者と共同で作成されました。

Jake Williams

メンバー登録日: 09/29/15

110 ポイント

1ガイドが承認済み

チーム

Cal Poly, Team 17-3, Green Fall 2015 Cal Poly, Team 17-3, Green Fall 2015人のメンバー

CPSU-GREEN-F15S17G3

4 メンバー

3のガイドは作成済み

0 件のコメント

コメントを追加

統計データ:

過去 24時間: 1

過去 7 日: 9

過去 30 日: 46

今までの合計 8,248