メインコンテンツにスキップ

Repairing HTC Droid Incredible Digitizer

アーカイブされたガイド
このガイドは将来的な使用のためにのみ保存されてます。ご自身の修理作業には更新バージョンをご利用ください。

必要な工具と部品

  1. Repairing HTC Droid Incredible Digitizer, Battery: 手順 1、 3の画像 1 Repairing HTC Droid Incredible Digitizer, Battery: 手順 1、 3の画像 2 Repairing HTC Droid Incredible Digitizer, Battery: 手順 1、 3の画像 3
    • Pry off back plastic, starting at the gap provided at the bottom of the phone. A spudger can be used to make this easier.

  2. Repairing HTC Droid Incredible Digitizer: 手順 2、 2の画像 1 Repairing HTC Droid Incredible Digitizer: 手順 2、 2の画像 2
    • Remove battery, prying from the provided gap at the upper-right corner of the battery

  3. Repairing HTC Droid Incredible Digitizer, Back Panel: 手順 3、 2の画像 1 Repairing HTC Droid Incredible Digitizer, Back Panel: 手順 3、 2の画像 2
    • Depress MicroSD to eject it from the side of the case.

  4. Repairing HTC Droid Incredible Digitizer: 手順 4、 3の画像 1 Repairing HTC Droid Incredible Digitizer: 手順 4、 3の画像 2 Repairing HTC Droid Incredible Digitizer: 手順 4、 3の画像 3
    • Remove 4 corner screws, you may have to remove a "VOID" sticker from one of the screw heads.

  5. Repairing HTC Droid Incredible Digitizer: 手順 5、 3の画像 1 Repairing HTC Droid Incredible Digitizer: 手順 5、 3の画像 2 Repairing HTC Droid Incredible Digitizer: 手順 5、 3の画像 3
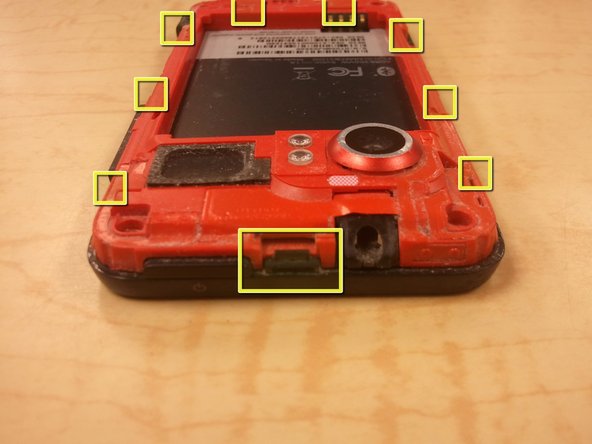
    • Using a spudger, unclip the nine clips holding the back panel to the front panel, highlighted in included pictures.

    • Start at the top, and work clockwise, being careful not to break the clips.

    • There are, 1, 3, 2, and 3 clips on each side, respectively.

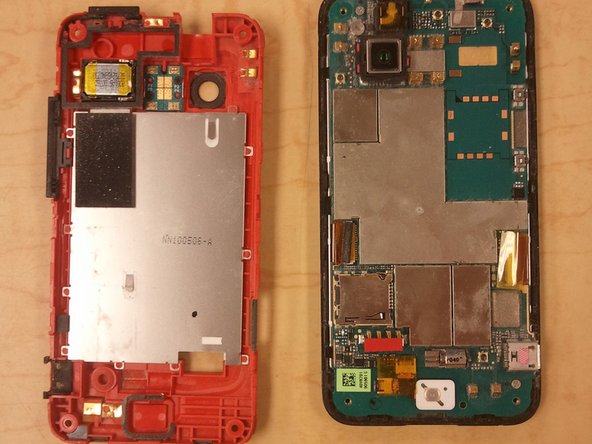
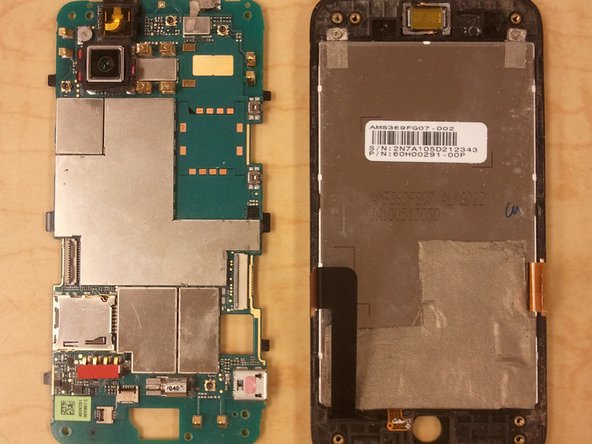
    • After the clips are disengaged, there are no cables holding the back panel in place.

  6. Repairing HTC Droid Incredible Digitizer, Optical Track Pad: 手順 6、 3の画像 1 Repairing HTC Droid Incredible Digitizer, Optical Track Pad: 手順 6、 3の画像 2 Repairing HTC Droid Incredible Digitizer, Optical Track Pad: 手順 6、 3の画像 3
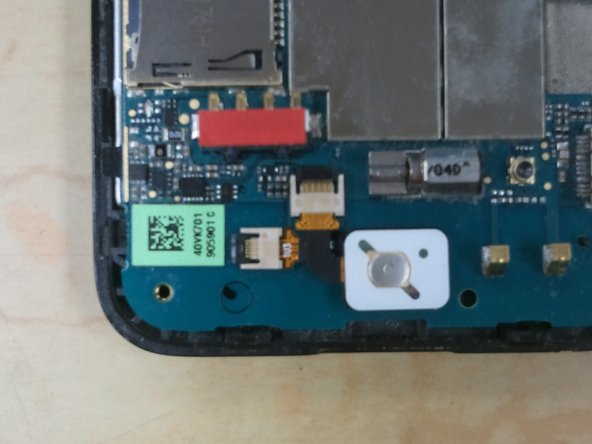
    • Use your spudger to release the jaw clip holding the Optical Track Pad cable to the logic board.

    • Remove Optical Track Pad from logic board.

  7. Repairing HTC Droid Incredible Digitizer, Logic Board: 手順 7、 1の画像 1
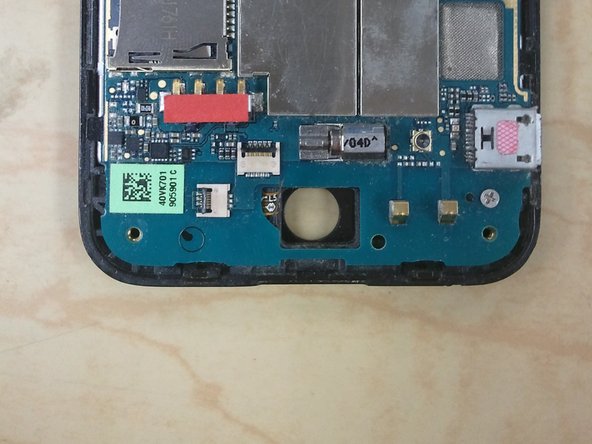
    • Use your spudger to release the remaining clips, disconnecting the ribbon cables from the logic board.

  8. Repairing HTC Droid Incredible Digitizer: 手順 8、 2の画像 1 Repairing HTC Droid Incredible Digitizer: 手順 8、 2の画像 2
    • Remove 2 Phillips Screws holding the logic board to the front panel.

    • Gently lift the logic board off the front panel.

  9. Repairing HTC Droid Incredible Digitizer, LCD: 手順 9、 2の画像 1 Repairing HTC Droid Incredible Digitizer, LCD: 手順 9、 2の画像 2
    • Remove the two phillips screws from the top of the LCD frame.

    • Use your spudger to pry the LCD out of the frame.

  10. Repairing HTC Droid Incredible Digitizer, Digitizer Assembly: 手順 10、 2の画像 1 Repairing HTC Droid Incredible Digitizer, Digitizer Assembly: 手順 10、 2の画像 2
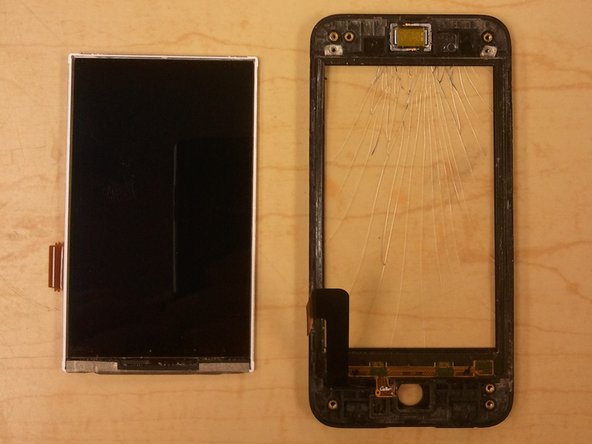
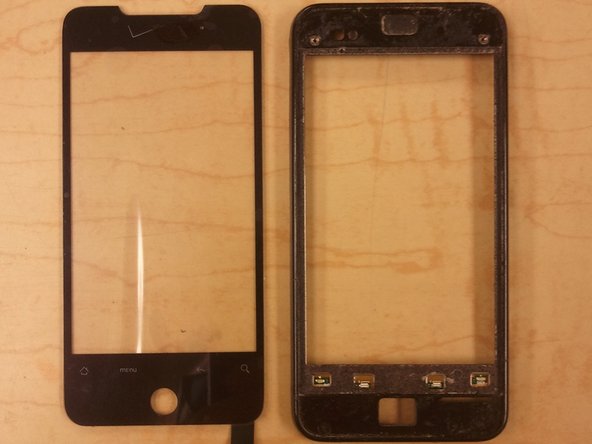
    • Once the LCD has been removed from the frame, the Digitizer can be gently pushed out from the back.

    • Be sure to catch the speaker cover as it is released from the digitizer, you will need to replace it when reinstalling the digitizer.

    • There is adhesive tape holding the Digitizer to the front panel, heating around the edges of the digitizer will help to loosen it, if it sticks.

    • After the digitizer is removed, you may wish to remove the adhesive tape and reapply before replacing the digitizer.

終わりに

To reassemble your device, follow these instructions in reverse order.

11 の人々がこのガイドを完成させました。

作成者

1人の作成者と共同作成されました。

Mobile Rapid Response Unit

メンバー登録日: 05/07/12

1,941 ポイント

6のガイドは作成済み

0 件のコメント

コメントを追加

統計データ:

過去 24時間: 0

過去 7 日: 0

過去 30 日: 0

今までの合計 6,042