はじめに
Vous devez ouvrir ou remplacer votre panneau arrière de votre Dell XPS 13 9380, ce guide est alors fait pour vous !
必要な工具と部品
-
-
Dévisser les huit vis (Torx M2x3) qui fixent le panneau arrière.
-
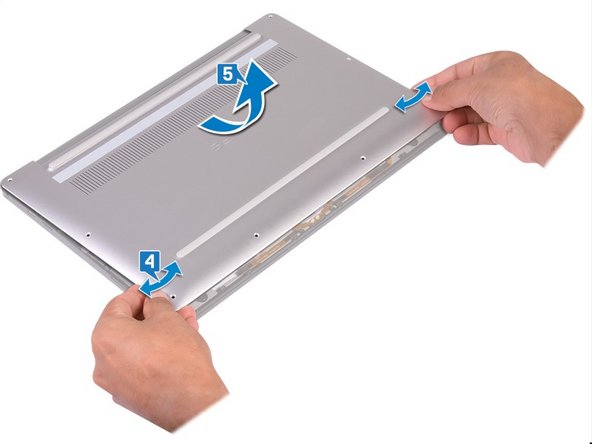
Retournez l’ordinateur, puis ouvrez-le en l’inclinant.
-
À l'aide d'un Spudger, faites levier sur le panneau arrière.
-
En faisant glisser le panneau arrière de gauche à droite, libérez les clips qui le fixent. Vous pouvez ainsi le retirer.
-
-


もう少しです!
Pour réassembler votre appareil, suivez les instructions dans l'ordre inverse.
終わりに
Pour réassembler votre appareil, suivez les instructions dans l'ordre inverse.
ある他の人がこのガイドを完成しました。

チーム
