メインコンテンツにスキップ

この修理ガイドは変更されています。最新の未承認バージョンに切り替えます。

Removing the Dell Inspiron 1150 Keyboard

必要な工具と部品

  1. Removing the Dell Inspiron 1150 Keyboard, Removing Dell Inspiron 1150 Battery: 手順 1、 3の画像 1 Removing the Dell Inspiron 1150 Keyboard, Removing Dell Inspiron 1150 Battery: 手順 1、 3の画像 2 Removing the Dell Inspiron 1150 Keyboard, Removing Dell Inspiron 1150 Battery: 手順 1、 3の画像 3
    • Place the laptop upside down on a clean, flat surface.

    • Locate the battery release button with the padlock symbol above it.

    • Slide the battery release button towards the padlock symbol and hold it there. Note that the button is spring loaded and will return if released.

    • The battery is now released from the battery compartment.

    • Gently remove the battery from the side of the laptop.

  2. Removing the Dell Inspiron 1150 Keyboard, Keyboard: 手順 2、 3の画像 1 Removing the Dell Inspiron 1150 Keyboard, Keyboard: 手順 2、 3の画像 2 Removing the Dell Inspiron 1150 Keyboard, Keyboard: 手順 2、 3の画像 3
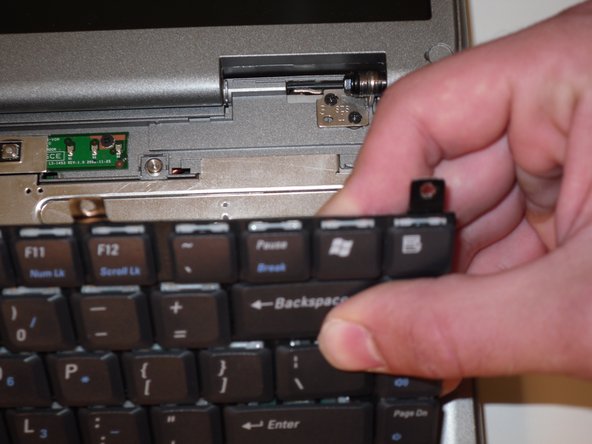
    • Use a spudger to lift the notched right edge of the hinge cover, and pry it loose

    • You need to lay the LCD screen down flat to allow the hinge cover to be lifted off

    • Lift the hinge cover off and set aside

  3. Removing the Dell Inspiron 1150 Keyboard: 手順 3、 3の画像 1 Removing the Dell Inspiron 1150 Keyboard: 手順 3、 3の画像 2 Removing the Dell Inspiron 1150 Keyboard: 手順 3、 3の画像 3
    • Remove 4ea M2 x 3mm keyboard screws

    • Lift up keyboard from the rear to expose the connector below

    • Disconnect the keyboard ribbon cable from the mother board

終わりに

To reassemble your device, follow these instructions in reverse order.

ある他の人がこのガイドを完成しました。

作成者

1人の作成者と共同作成されました。

Richdave

メンバー登録日: 04/09/10

32,051 ポイント

30のガイドは作成済み

チーム

Master Techs Master Techs人のメンバー

Community

322 メンバー

2,520のガイドは作成済み

0 件のコメント

コメントを追加

統計データ:

過去 24時間: 0

過去 7 日: 1

過去 30 日: 3

今までの合計 865