メインコンテンツにスキップ

この修理ガイドは変更されています。最新の未承認バージョンに切り替えます。

Removing Panasonic DVD-RV31 Player Motherboard

必要な工具と部品

  1. Removing Panasonic DVD-RV31 Player Motherboard, Disk Tray Cover: 手順 1、 1の画像 1
    • Eject the disk tray from the DVD player before removing power supply.

  2. Removing Panasonic DVD-RV31 Player Motherboard: 手順 2、 1の画像 1
    • Evenly lift upward on the disk tray front cover (not slanted, as pictured). This will allow for easier disassembly of the player.

  3. Removing Panasonic DVD-RV31 Player Motherboard, Outer Case: 手順 3、 2の画像 1 Removing Panasonic DVD-RV31 Player Motherboard, Outer Case: 手順 3、 2の画像 2
    • Remove the three screws running along the back edge of case cover.

    • Remove the two screws from each side of the case cover.

  4. Removing Panasonic DVD-RV31 Player Motherboard: 手順 4、 1の画像 1
    • Grab edges of the cover with your hands. Pull outward slightly, then straight up.

  5. Removing Panasonic DVD-RV31 Player Motherboard, Front Panel: 手順 5、 2の画像 1 Removing Panasonic DVD-RV31 Player Motherboard, Front Panel: 手順 5、 2の画像 2
    • Lift up the five tabs securing the front panel to the chassis. There are three on the bottom, and two on the inside edges of the panel. Panel should then lift off the player.

  6. Removing Panasonic DVD-RV31 Player Motherboard, Motherboard: 手順 6、 2の画像 1 Removing Panasonic DVD-RV31 Player Motherboard, Motherboard: 手順 6、 2の画像 2
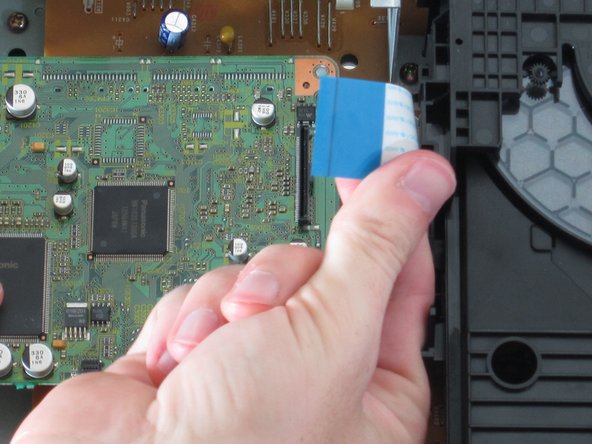
    • Remove the blue ribbon wire from its connector. When doing this, be cautious to not damage the connector.

    • Place forefinger under cable loop as shown, gripping with thumb.

    • Pull straight up. It should disconnect with little force.

  7. Removing Panasonic DVD-RV31 Player Motherboard: 手順 7、 2の画像 1 Removing Panasonic DVD-RV31 Player Motherboard: 手順 7、 2の画像 2
    • Using tweezers or pliers, squeeze the tabs of the plastic fasteners together. While doing this, gently lift up on the motherboard until the fasteners are released.

  8. Removing Panasonic DVD-RV31 Player Motherboard: 手順 8、 1の画像 1
    • Remove the two screws securing the motherboard using a philips screw driver.

  9. Removing Panasonic DVD-RV31 Player Motherboard: 手順 9、 1の画像 1
    • Lift the board from the side closest to the front panel (top of photo).

    • Gently apply force until bottom connector releases from power board below.

終わりに

To reassemble your device, follow these instructions in reverse order.

ある他の人がこのガイドを完成しました。

作成者

5人の作成者と共同で作成されました。

Kevin

メンバー登録日: 04/26/11

375 ポイント

8のガイドは作成済み

チーム

Cal Poly, Team 18-20, Garner Spring 2011 Cal Poly, Team 18-20, Garner Spring 2011人のメンバー

CPSU-GARNER-S11S18G20

4 メンバー

11のガイドは作成済み

0 件のコメント

コメントを追加

統計データ:

過去 24時間: 0

過去 7 日: 1

過去 30 日: 1

今までの合計 3,224