メインコンテンツにスキップ

Removing Minolta X-370 Bottom Cover

必要な工具と部品

  1. Removing Minolta X-370 Bottom Cover, Minolta X-370 Battery Replacement: 手順 1、 2の画像 1 Removing Minolta X-370 Bottom Cover, Minolta X-370 Battery Replacement: 手順 1、 2の画像 2
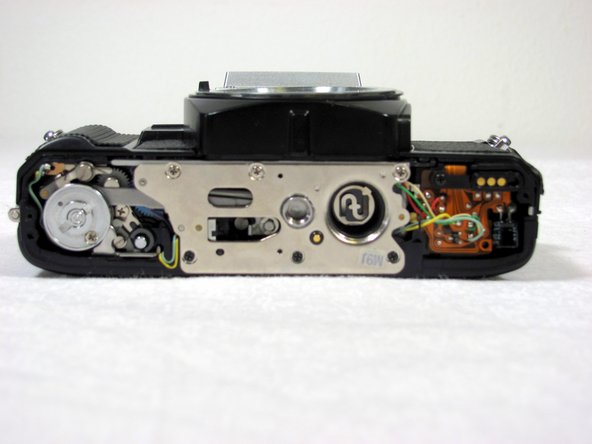
    • Flip the camera so that the bottom is facing you.

    • Take a spare coin and unscrew the battery cover off.

  2. Removing Minolta X-370 Bottom Cover: 手順 2、 1の画像 1
    • Remove the batteries, making sure to note their proper alignment.

  3. Removing Minolta X-370 Bottom Cover, Bottom Cover: 手順 3、 2の画像 1 Removing Minolta X-370 Bottom Cover, Bottom Cover: 手順 3、 2の画像 2
    • Remove two 4.8mm screws.

    • Remove one 3.4mm screw.

    • Remove one 2.65mm screw.

    • Lift off the back cover.

  4. Removing Minolta X-370 Bottom Cover: 手順 4、 1の画像 1
    • Remove three 3.5mm screws.

    • Remove two 3.8mm screws.

    • Remove one 6.35mm screw.

    • Remove one 4mm screw. Lift off the disk.

    • Remove one 5.11mm screw.

  5. Removing Minolta X-370 Bottom Cover: 手順 5、 1の画像 1
    • Lift up the silver, metal piece

    • Please note that some internal pieces may come loose during this process.

終わりに

To reassemble your device, follow these instructions in reverse order.

3 の人々がこのガイドを完成させました。

作成者

4人の作成者と共同で作成されました。

Nick

メンバー登録日: 04/19/11

525 ポイント

4のガイドは作成済み

チーム

Cal Poly, Team 8-7, Regan Spring 2011 Cal Poly, Team 8-7, Regan Spring 2011人のメンバー

CPSU-REGAN-S11S8G7

4 メンバー

8のガイドは作成済み

コメント 1 件

good advice, will use, have multiple Minolta cameras to work with.

gabriel johnson - 返信

コメントを追加

統計データ:

過去 24時間: 1

過去 7 日: 5

過去 30 日: 24

今までの合計 10,756