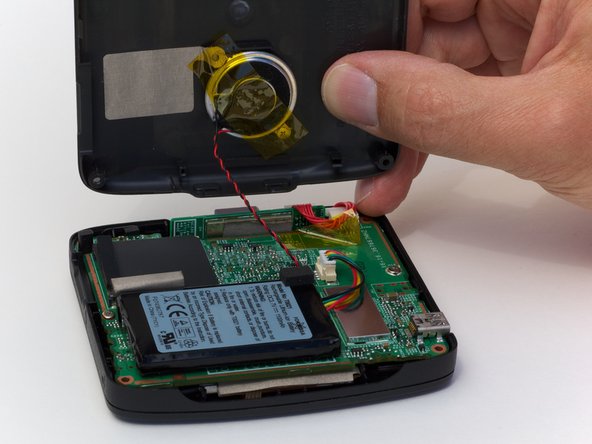
メインコンテンツにスキップ

Magellan RoadMate 1200 Back Cover Replacement

必要な工具と部品

  1. Magellan RoadMate 1200 Back Cover Replacement, Back Cover: 手順 1、 2の画像 1 Magellan RoadMate 1200 Back Cover Replacement, Back Cover: 手順 1、 2の画像 2
    • Remove the four rubber caps from the back by using the Phillips #00 screwdriver.

  2. Magellan RoadMate 1200 Back Cover Replacement: 手順 2、 1の画像 1
    • Remove the four screws holding the cover in place by using the Phillips #00 screwdriver.

  3. Magellan RoadMate 1200 Back Cover Replacement: 手順 3、 2の画像 1 Magellan RoadMate 1200 Back Cover Replacement: 手順 3、 2の画像 2
    • Remove the back cover from the device by separating the back cover along its seam.

    • Slowly lift the cover—the speaker is screwed onto the back cover and is connected to the circuit board.

  4. Magellan RoadMate 1200 Back Cover Replacement: 手順 4、 2の画像 1 Magellan RoadMate 1200 Back Cover Replacement: 手順 4、 2の画像 2
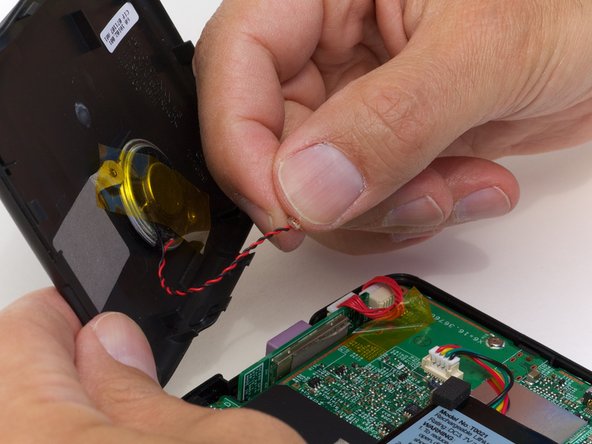
    • Pull the speaker cord, horizontally, by its base, away from the motherboard.

    • When reassembling, make sure that you plug the terminal in the same way. The black wire should be on the side farthest from the battery.

    In my 1200, the speaker is glued to the back and soldered into the board so there is no plug to undo. Just carefully find a position so that board doesn't pull on the speaker wire while it is open.

    Jomar - 返信

    where can we get the speakers from? please

    bbunni1404 - 返信

終わりに

To reassemble your device, follow these instructions in reverse order.

2 の人々がこのガイドを完成させました。

作成者

6人の作成者と共同で作成されました。

Ross Light

メンバー登録日: 04/12/10

217 ポイント

6のガイドは作成済み

0 件のコメント

コメントを追加

統計データ:

過去 24時間: 0

過去 7 日: 2

過去 30 日: 3

今までの合計 3,469