はじめに
The diverter valve may become clogged if water is not rinsed regularly with water after foaming. Or if the seals are old and need to be replaced. Sometimes the mechanics are loose and the sliding mechanism does not close properly anymore.
必要な工具と部品
-
-
After opening the lid, the machine shows its interior.
-
The water comes from the top right into the thermoblock and then enters the bottom right of the Themroblock in the switching valve.
-
Depending on the position of the milk frother nozzle, the water is either directed downwards into the frothing nozzle or to the left back into the thermoblock to the coffee spout.
-
Now, use the open-end wrench to free the diverter valve from all tubes and disconnect the hose.
-
Carefully disconnect the changeover valve from the milk froth nozzle.
-
If connections can not be easily solved, it is recommended to remove the complete unit consisting of thermoblock and diverter valve.
-
-
-
-
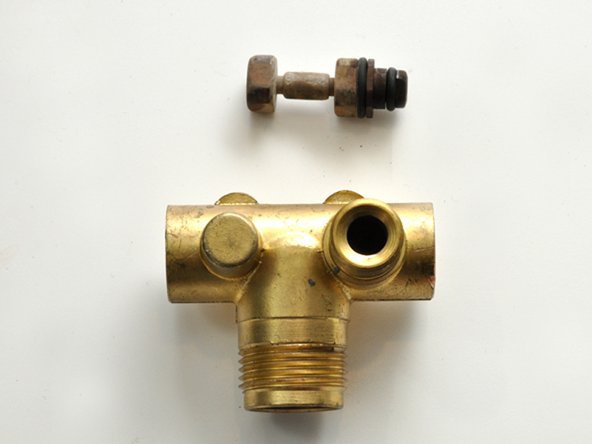
In the interior of the valve, a small plug is pushed to the left and to the right to close the outlet on the right when the milk frother nozzle is unfolded.
-
So no more water can get to the coffee spout.
-
Thoroughly clean the valve and check the seals and replace if necessary.
-
When reassembling, make sure that the milk frothing nozzle is fully inserted, that the sliding mechanism works smoothly and that the nozzle is firmly connected to the valve.
-


4 の人々がこのガイドを完成させました。
以下の翻訳者の皆さんにお礼を申し上げます:
100%


これらの翻訳者の方々は世界を修理する私たちのサポートをしてくれています。 あなたも貢献してみませんか?
翻訳を始める ›
