はじめに
Guide for the disassembly of the Razer Panthera Evo Fight Stick.
必要な工具と部品
-
-
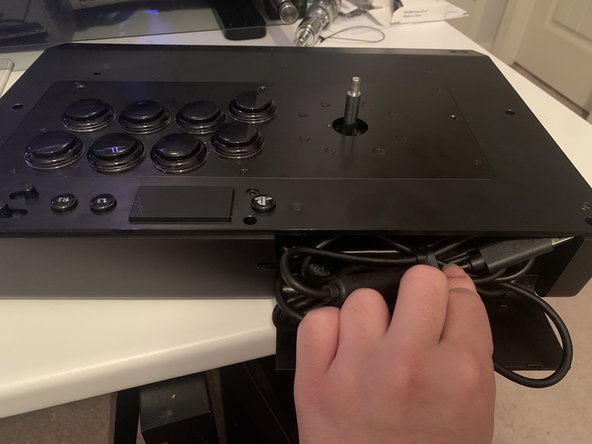
Unplug the USB cable of the device if connected to a console or PC.
-
Turn the device over to its underside.
-
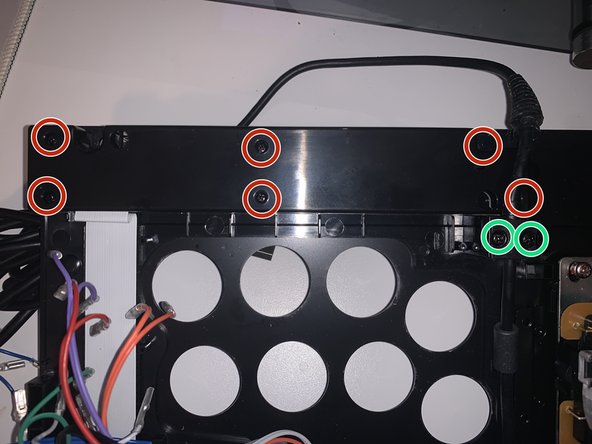
Unscrew the six screws using a Phillips-head screwdriver located around the perimeter of the device.
-
-
-
Remove the rubber cap located at the center of the device.
-
Removing the cap should reveal a metal screwhead inside the access hole.
-
Place a flathead screwdriver firmly into the screwhead.
-
Unscrew the ball top grip counter-clockwise while firmly holding the screwdriver in place.
-
-
-
Turn the device around to where the acrylic side is on top.
-
Remove the shaft cover and the joystick dust cover from the device.
-
Unscrew silver screw located next to lever using the phillips-head screwdriver.
-
Grasp the acrylic top and take it off the device. Then do the same with the paper artwork underneath it.
-
-
-
Locate and unscrew the 9 screws located on the surface of the device using a Phillips-head screwdriver.
-
Turn the device to where the cable is facing you.
-
Open the cartridge that houses the cable and slot the cable out to put it inside the cartridge.
-
Rotate the device to where the cable is now opposite of you and lift the top deck towards your right.
-
-
-
この手順で使用する道具:Tweezers$4.99
-
The buttons, cables, and joystick lever are now all accessible. We can move on to disconnecting them all.
-
Start by disconnecting the wires from the buttons.
-
Do so by using tweezers to squeeze lightly on the bump found after the wire crimp. Then gently pull it off the button connector.
-
Repeat this on all 10 buttons present.
-
-
-
Find the two clips placed opposite of each other on the button.
-
Pinch the clips at the same time, twist, and push through.
-
Repeat with all 10 buttons present on the device.
-
-
-
The last component connecting the top deck to the bottom housing is the Audio I/O.
-
To remove this locate the small block with two screws on top at the bottom right corner of the bottom housing.
-
Unscrew the screws using a Phillips-head screwdriver then take off the top.
-
This should leave the Audio I/O device exposed gently take it out off the compartment.
-
-
-
Locate the rectangular block on the top left of the top deck of the device.
-
Start by removing the USB cable by unscrewing the two screws using a Philips-head screwdriver.
-
Then locate the 6 screws on the rectangular block and unscrew them using a Phillips-head screwdriver.
-
The PS4 Interface Unit should now be accessible to you.
-
To disconnect it gently flip the tab up using your finger on the ribbon connector and pull it out.
-
-
-
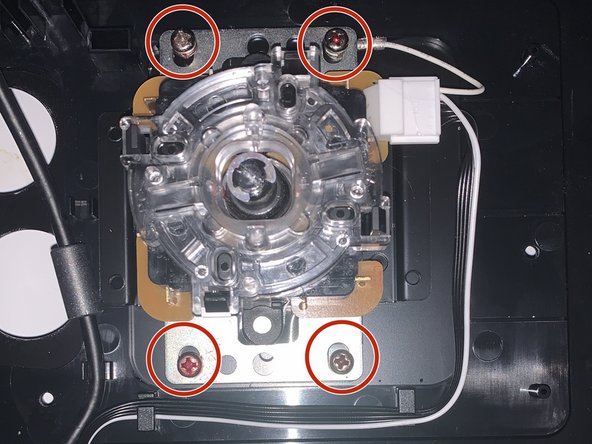
Locate the 4 screws around the base of the lever and use a Phillips-head screwdriver to unscrew them all out.
-
Pull out the joystick from the top deck.
-
Disconnect the white Molex connector by pulling on the tab and then pulling the connector.
-
-
-
Locate the 4 screws around the housing and unscrew them using a Phillips-head screwdriver
-
Once the Main PCB is accessible unscrew the two screws once again using a Phillips-head.
-
Then remove the ribbon cable from the connector
-
Remove the wires from the tabs and then safely pull the Main PCB out of its housing.
-


Now the device should be disassembled completely! To reassemble your device, follow these instructions in reverse order.
Now the device should be disassembled completely! To reassemble your device, follow these instructions in reverse order.

2件のガイドコメント
you forgot to mention the 6 screws on the bottom of the stick
Are there any parts available for this stick? I'm looking for the acrylic screws