メインコンテンツにスキップ

Razer Ouroboros Microswitch Replacement

必要な工具と部品

  1. Razer Ouroboros Microswitch  Replacement, Scroll Wheel: 手順 1、 3の画像 1 Razer Ouroboros Microswitch  Replacement, Scroll Wheel: 手順 1、 3の画像 2 Razer Ouroboros Microswitch  Replacement, Scroll Wheel: 手順 1、 3の画像 3
    • Use a Phillips #00 screwdriver to loosen the two captive screws from the bottom of the mouse.

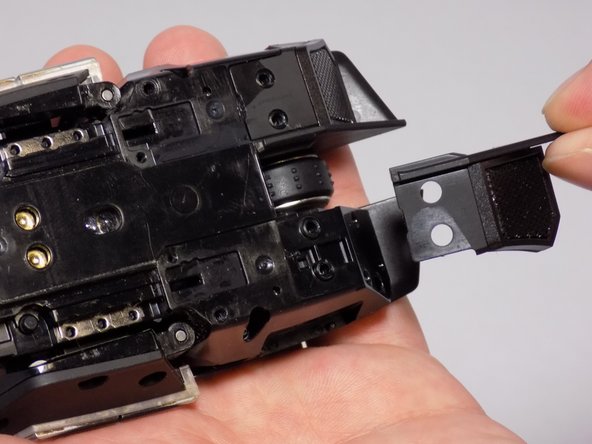
    • Slide the palm rest out of place.

  2. Razer Ouroboros Microswitch  Replacement: 手順 2、 2の画像 1 Razer Ouroboros Microswitch  Replacement: 手順 2、 2の画像 2
    • Remove all of the stickers on the back of the mouse. After doing so, you should see six screws on the back of the mouse.

    • Use the Phillips #0 Screwdriver to remove all six of these 4mm screws.

    • Use the Phillips #00 Screwdriver to remove these two, 3mm screws.

    • Slide the side panels off of the mouse.

    • Use your tweezers to take the lock switches off of the mouse.

    • Using the T6 Torx screwdriver, remove the two bottom 4mm screws as indicated in the second picture.

  3. Razer Ouroboros Microswitch  Replacement: 手順 3、 3の画像 1 Razer Ouroboros Microswitch  Replacement: 手順 3、 3の画像 2 Razer Ouroboros Microswitch  Replacement: 手順 3、 3の画像 3
    • Using the T6 Torx screwdriver, remove the two 4mm screws hidden in the deep holes indicated in the first picture.

    • Slide the top panels off of the mouse.

    • Flip the mouse over, and the mouse casing should come off.

    • There are some connectors connecting the casing to the motherboard. They should slide off. Just be careful not to break them.

  4. Razer Ouroboros Microswitch  Replacement: 手順 4、 3の画像 1 Razer Ouroboros Microswitch  Replacement: 手順 4、 3の画像 2 Razer Ouroboros Microswitch  Replacement: 手順 4、 3の画像 3
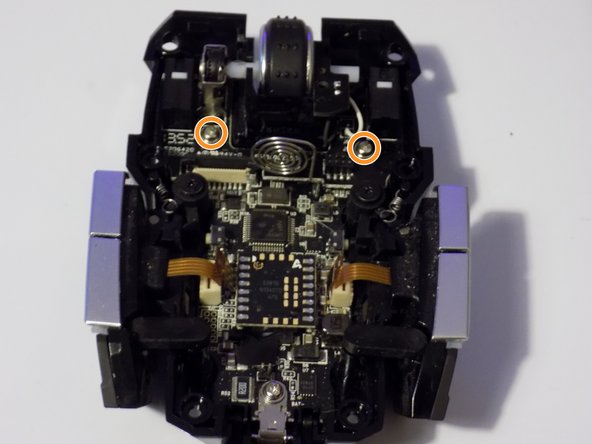
    • Locate the 4mm screw indicated in the first picture, use a Phillips #00 Screwdriver to remove it.

    • Locate the two 4mm screws in the second picture, and remove those two with a Phillips #0 Screwdriver.

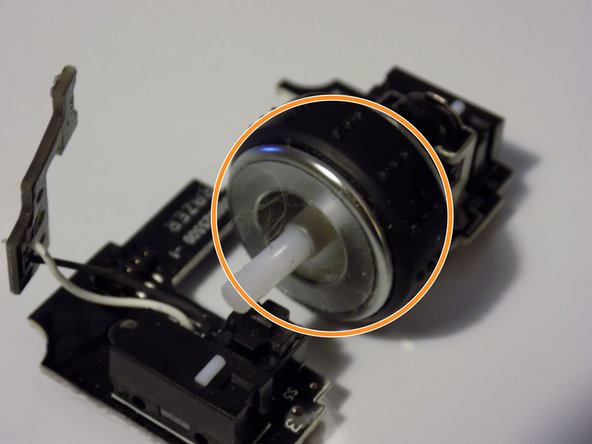
    • Now, you may remove the board that holds the scroll wheel and its components. Simply slide the wheel out and replace it.

    • Take note of the orientation in the final picture so that you can place the wheel back correctly into its mechanism.

  5. Razer Ouroboros Microswitch  Replacement, Microswitch: 手順 5、 3の画像 1 Razer Ouroboros Microswitch  Replacement, Microswitch: 手順 5、 3の画像 2 Razer Ouroboros Microswitch  Replacement, Microswitch: 手順 5、 3の画像 3
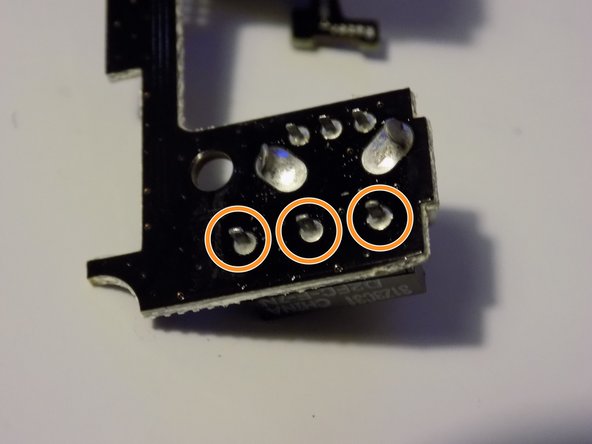
    • Carefully remove the circuit board that is inside the scroll wheel.

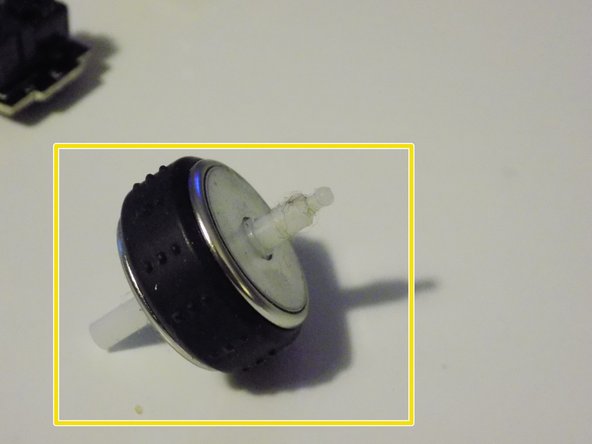
    • Pull the scroll wheel off the board.

    • Place the scroll wheel in a safe location.

  6. Razer Ouroboros Microswitch  Replacement: 手順 6、 3の画像 1 Razer Ouroboros Microswitch  Replacement: 手順 6、 3の画像 2 Razer Ouroboros Microswitch  Replacement: 手順 6、 3の画像 3
    • When you get to this point look at your micro switch to check that this is exactly the same.

    • If this is your first time soldering I would recommend watching this ifixit guide. はんだ付けとはんだ除去の作業ガイド

    • Now de solder the 3 pass through post continue pulling the micro switch away from the circuit board

    • Replace and solder the micro switch to the circuit board.

終わりに

To reassemble your device, follow these instructions in reverse order.

3 の人々がこのガイドを完成させました。

作成者

3人の作成者と共同で作成されました。

Ben Estes

メンバー登録日: 07/26/16

266 ポイント

1ガイドが承認済み

チーム

University of Memphis, Team 1-2, Kim SU 2016 University of Memphis, Team 1-2, Kim SU 2016人のメンバー

UM-KIM-SU16S1G2

3 メンバー

4のガイドは作成済み

2 件のコメント

Used this guide to clean out my Razer Ouroboros. Detailed enough, just be carefull with removing cables in the last stap, the one Going to the battery LED disconnects in a weird way and connects in a weird way. Might want to take a picture of how it is connected before disconnecting since you can connect in several different (and thus wrong) ways.

Lennert - 返信

can you tell me which size (mm) is the encoder wheel sensor???

gabrialencar - 返信

コメントを追加

統計データ:

過去 24時間: 0

過去 7 日: 4

過去 30 日: 17

今までの合計 4,308