メインコンテンツにスキップ

この修理ガイドは変更されています。最新の未承認バージョンに切り替えます。

Razer Ouroboros Lock Switch Replacement

必要な工具と部品

  1. Razer Ouroboros Lock Switch Replacement, Left and Right Trigger Switch: 手順 1、 2の画像 1 Razer Ouroboros Lock Switch Replacement, Left and Right Trigger Switch: 手順 1、 2の画像 2
    • Flip the mouse over and remove the stickers on the back of the device. These stickers are hiding the screws we need to remove.

    • Locate and remove the captive screws to remove the hand rest.

  2. Razer Ouroboros Lock Switch Replacement: 手順 2、 2の画像 1 Razer Ouroboros Lock Switch Replacement: 手順 2、 2の画像 2
    • Locate and remove the six 4mm screws on the back of the device.

    • Slide the side panels off the back of the mouse.

  3. Razer Ouroboros Lock Switch Replacement: 手順 3、 2の画像 1 Razer Ouroboros Lock Switch Replacement: 手順 3、 2の画像 2
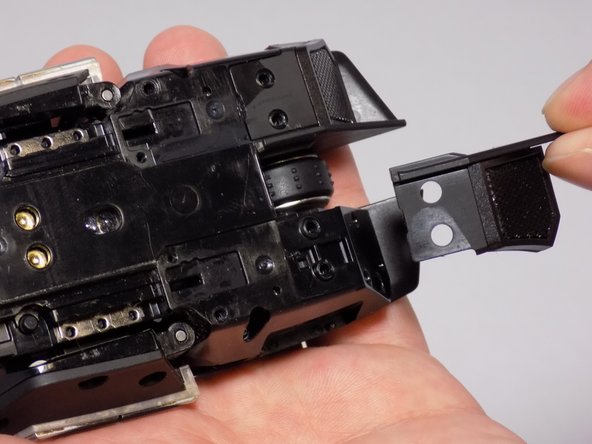
    • Using your tweezers, grab the trigger switch that you want to replace, and lift it from its slot.

    • If you have your replacement switch, place it in the newly freed slot and reassemble your device.

    • Note: the top guards of this mouse can come off now that the panel screws have been removed. Make sure these stay in place when reassembling.

終わりに

To reassemble your device, follow these instructions in reverse order.

ある他の人がこのガイドを完成しました。

作成者

2人の作成者と共同で作成されました。

Preston Darling

メンバー登録日: 07/26/16

372 ポイント

2のガイドは作成済み

チーム

University of Memphis, Team 1-2, Kim SU 2016 University of Memphis, Team 1-2, Kim SU 2016人のメンバー

UM-KIM-SU16S1G2

3 メンバー

4のガイドは作成済み

0 件のコメント

コメントを追加

統計データ:

過去 24時間: 2

過去 7 日: 5

過去 30 日: 15

今までの合計 3,174