メインコンテンツにスキップ

Razer Naga Trinity LED Light Ribbon Cable Replacement

必要な工具と部品

  1. Razer Naga Trinity LED Light Ribbon Cable Replacement, Razer Naga Trinity Disassembly: 手順 1、 2の画像 1 Razer Naga Trinity LED Light Ribbon Cable Replacement, Razer Naga Trinity Disassembly: 手順 1、 2の画像 2
    • Remove the interchangeable side plate.

  2. Razer Naga Trinity LED Light Ribbon Cable Replacement: 手順 2、 2の画像 1 Razer Naga Trinity LED Light Ribbon Cable Replacement: 手順 2、 2の画像 2
    • Remove the mouse's feet using the opening pick.

  3. Razer Naga Trinity LED Light Ribbon Cable Replacement: 手順 3、 1の画像 1
    • Remove the four 6mm screws by using a JIS #1 screwdriver.

  4. Razer Naga Trinity LED Light Ribbon Cable Replacement: 手順 4、 2の画像 1 Razer Naga Trinity LED Light Ribbon Cable Replacement: 手順 4、 2の画像 2
    • Separate the top mouse housing from the bottom mouse housing using the opening pick.

    • Be careful not to tug too hard on the ribbon connector.

  5. Razer Naga Trinity LED Light Ribbon Cable Replacement: 手順 5、 1の画像 1
    • Unlock the ribbon connector that is held down by the main board clips using the spudger's pointed end.

  6. Razer Naga Trinity LED Light Ribbon Cable Replacement: 手順 6、 1の画像 1
    • Remove the side housing using the opening pick.

  7. Razer Naga Trinity LED Light Ribbon Cable Replacement: 手順 7、 2の画像 1 Razer Naga Trinity LED Light Ribbon Cable Replacement: 手順 7、 2の画像 2
    • Remove the top housing LED 3-Pin connector that is near the main board.

  8. Razer Naga Trinity LED Light Ribbon Cable Replacement, LED Light Ribbon Cable: 手順 8、 2の画像 1 Razer Naga Trinity LED Light Ribbon Cable Replacement, LED Light Ribbon Cable: 手順 8、 2の画像 2
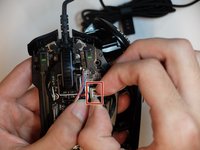
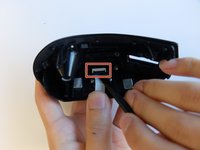
    • Using the flat end of a spudger, unlock the ribbon cable holding the clips.

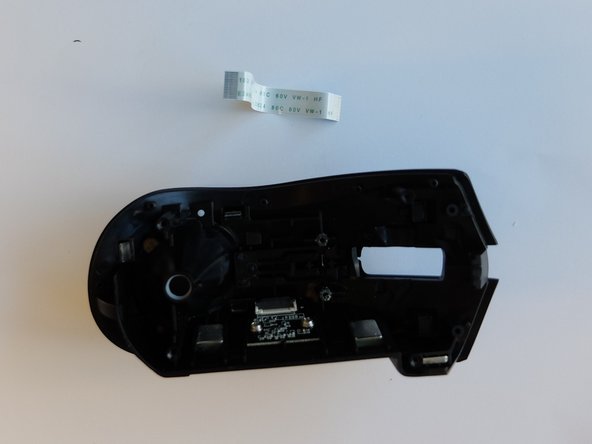
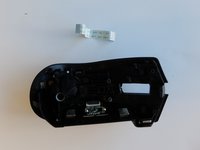
    • Remove the ribbon cable.

終わりに

To reassemble your device, follow these instructions in reverse order.

作成者

4人の作成者と共同で作成されました。

Alexandros Andreou

メンバー登録日: 09/16/19

700 ポイント

3のガイドは作成済み

チーム

0 件のコメント

コメントを追加

統計データ:

過去 24時間: 0

過去 7 日: 2

過去 30 日: 15

今までの合計 1,500