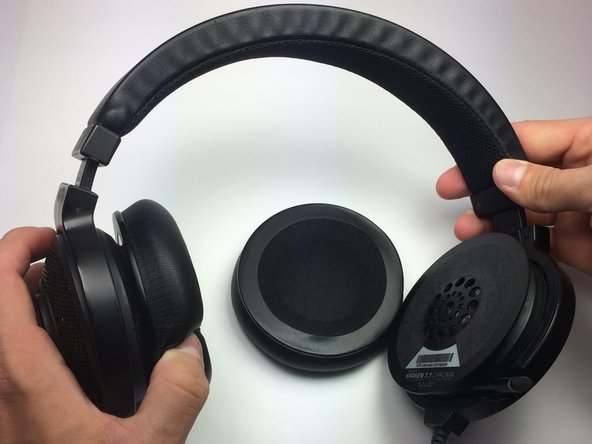
メインコンテンツにスキップ

Razer Kraken 7.1 Chroma Speaker Casing Replacement

必要な工具と部品

  1. Razer Kraken 7.1 Chroma Speaker Casing Replacement, Ear Cushion: 手順 1、 1の画像 1
    • Grab the ear cushion between your thumb and forefinger.

  2. Razer Kraken 7.1 Chroma Speaker Casing Replacement: 手順 2、 1の画像 1
    • Pull the ear cushion away from the speaker by sliding down to release the cushion from the plastic covering.

  3. Razer Kraken 7.1 Chroma Speaker Casing Replacement: 手順 3、 1の画像 1
    • Continue sliding downwards around all edges of the ear cushion until the cushion is fully removed.

  4. Razer Kraken 7.1 Chroma Speaker Casing Replacement, Speaker: 手順 4、 3の画像 1 Razer Kraken 7.1 Chroma Speaker Casing Replacement, Speaker: 手順 4、 3の画像 2 Razer Kraken 7.1 Chroma Speaker Casing Replacement, Speaker: 手順 4、 3の画像 3
    • Use the broad edge of the plastic spudger and a lot of force to pop off the speaker from the headset.

    • Insert the plastic spudger in between the speaker and the headset directly in line with one of the exposed screws of the headset casing, since that is where the four clamps that hold the speaker to the headset are located. These clamps are not visible until after speaker removal.

    • Make sure to insert the spudger in between the foam buffer-ring and the headset casing instead of in between the speaker and the foam buffer-ring.

    • Reassembly may be tricky, there is one clamp smaller than others, so you have to align it correctly.

  5. Razer Kraken 7.1 Chroma Speaker Casing Replacement: 手順 5、 1の画像 1
    • Cut both wires connecting the speaker to the headset by using a wire stripper or pair of scissors.

    • Cut as close as possible to the connections on the speaker circuit board.

  6. Razer Kraken 7.1 Chroma Speaker Casing Replacement, Speaker Casing: 手順 6、 2の画像 1 Razer Kraken 7.1 Chroma Speaker Casing Replacement, Speaker Casing: 手順 6、 2の画像 2
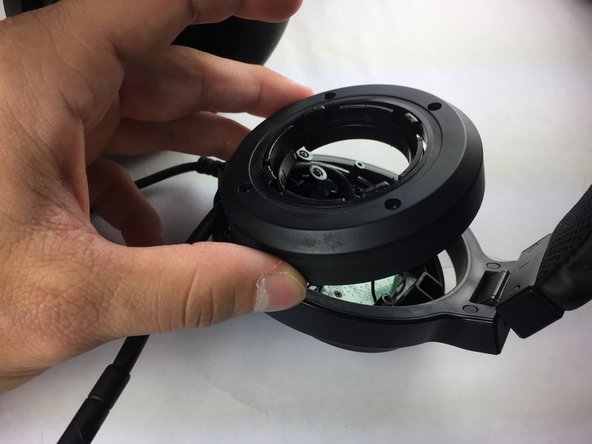
    • Use the Phillips #00 screwdriver to remove all four 9mm screws.

    • Rotate the screwdriver counterclockwise when removing each screw.

  7. Razer Kraken 7.1 Chroma Speaker Casing Replacement: 手順 7、 3の画像 1 Razer Kraken 7.1 Chroma Speaker Casing Replacement: 手順 7、 3の画像 2 Razer Kraken 7.1 Chroma Speaker Casing Replacement: 手順 7、 3の画像 3
    • Pull the casing upwards to remove it from the headset.

    • If you are removing the casing on the side of the microphone, slide the casing towards you along the length of the microphone until the casing is completely removed.

終わりに

To reassemble your device, follow these instructions in reverse order.

2 の人々がこのガイドを完成させました。

作成者

2人の作成者と共同で作成されました。

Karissa Sealey

メンバー登録日: 03/24/17

995 ポイント

4のガイドは作成済み

チーム

Baylor, Team S5-G3, Williams Spring 2017 Baylor, Team S5-G3, Williams Spring 2017人のメンバー

BU-WILLIAMS-S17S5G3

3 メンバー

8のガイドは作成済み

0 件のコメント

コメントを追加

統計データ:

過去 24時間: 0

過去 7 日: 2

過去 30 日: 19

今までの合計 5,089