メインコンテンツにスキップ

Razer Blade Stealth 2017 Speaker Replacement

必要な工具と部品

  1. Razer Blade Stealth 2017 Speaker Replacement, Battery: 手順 1、 2の画像 1 Razer Blade Stealth 2017 Speaker Replacement, Battery: 手順 1、 2の画像 2
    • Before you begin, be sure to turn off your laptop and discharge the battery down to 25%.

    • Use a Torx T5 screwdriver to remove the eight, 3mm screws on the bottom cover of the laptop.

    • Whenever you remove screws from the device, remember to save and label them.

  2. Razer Blade Stealth 2017 Speaker Replacement: 手順 2、 1の画像 1
    • Remove the bottom cover of the laptop by sliding it away from the hinge.

    • Do not force the cover up!

  3. Razer Blade Stealth 2017 Speaker Replacement: 手順 3、 2の画像 1 Razer Blade Stealth 2017 Speaker Replacement: 手順 3、 2の画像 2
    • Use your fingernail to pry up and disconnect the battery from the motherboard.

  4. Razer Blade Stealth 2017 Speaker Replacement: 手順 4、 1の画像 1
    • Use a Phillips #00 screwdriver to remove the six, 5mm screws securing the battery.

  5. Razer Blade Stealth 2017 Speaker Replacement: 手順 5、 2の画像 1 Razer Blade Stealth 2017 Speaker Replacement: 手順 5、 2の画像 2
    • Remove any tape attached to the battery.

    • Use the plastic spudger to pry out the battery.

  6. Razer Blade Stealth 2017 Speaker Replacement, Speaker: 手順 6、 2の画像 1 Razer Blade Stealth 2017 Speaker Replacement, Speaker: 手順 6、 2の画像 2
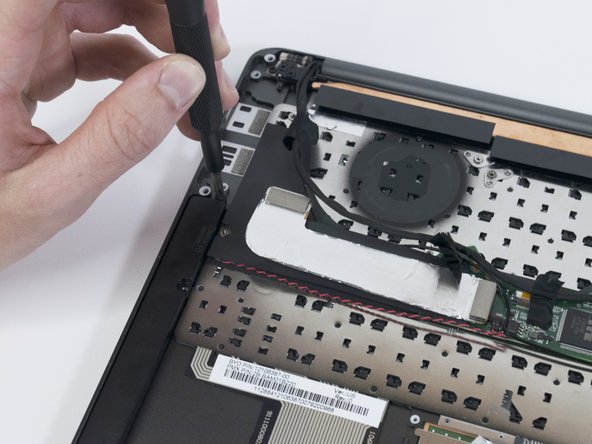
    • Use tweezers to disconnect the red and black speaker cables by lifting up on the pin-header.

    • The same process is used for both speaker connections.

    • Do not pull horizontally on the wires!

  7. Razer Blade Stealth 2017 Speaker Replacement: 手順 7、 2の画像 1 Razer Blade Stealth 2017 Speaker Replacement: 手順 7、 2の画像 2
    • Use a Phillips #00 to remove the two, 4mm screws on each speaker.

  8. Razer Blade Stealth 2017 Speaker Replacement: 手順 8、 3の画像 1 Razer Blade Stealth 2017 Speaker Replacement: 手順 8、 3の画像 2 Razer Blade Stealth 2017 Speaker Replacement: 手順 8、 3の画像 3
    • Use a plastic spudger to pry the speaker(s) away from the chassis.

    • The speakers are glued to the chassis, making them difficult to remove.

    • The same process is used for both speakers.

終わりに

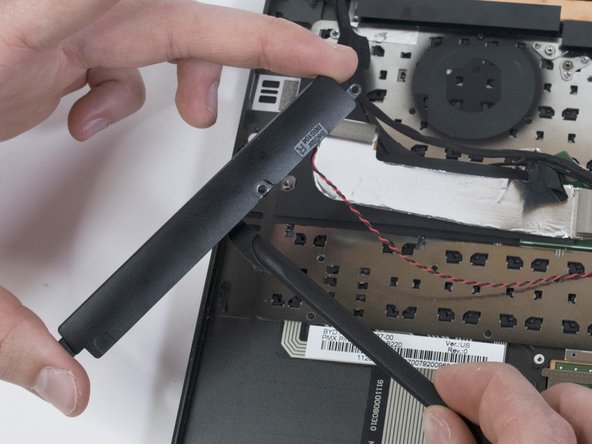
To reassemble your device, follow these instructions in reverse order.

ある他の人がこのガイドを完成しました。

作成者

5人の作成者と共同で作成されました。

Helene Willits

メンバー登録日: 10/10/19

762 ポイント

6のガイドは作成済み

チーム

Cal Poly, Team S11-G3, Regan Fall 2019 Cal Poly, Team S11-G3, Regan Fall 2019人のメンバー

CPSU-REGAN-F19S11G3

4 メンバー

7のガイドは作成済み

0 件のコメント

コメントを追加

統計データ:

過去 24時間: 0

過去 7 日: 2

過去 30 日: 13

今までの合計 1,081