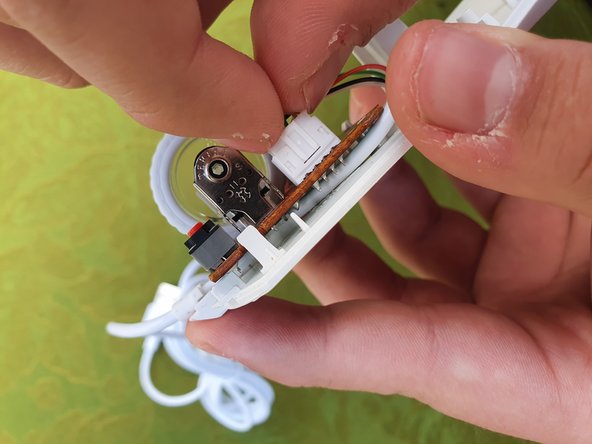
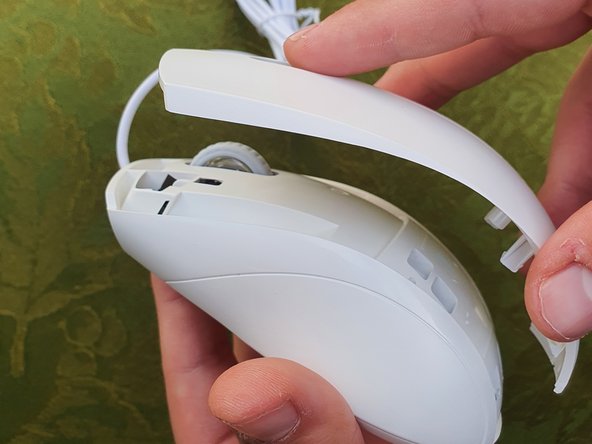
メインコンテンツにスキップ

Rapoo N1600 Cable Replacement

必要な工具と部品

  1. Rapoo N1600 Cable Replacement, Cable: 手順 1、 1の画像 1
    • Start by turning the mouse over where the bottom is facing up.

  2. Rapoo N1600 Cable Replacement: 手順 2、 1の画像 1
    • Remove the screw located in the hole.

  3. Rapoo N1600 Cable Replacement: 手順 3、 1の画像 1
    • Flip the mouse over and detach the middle mouse part.

    • Keep the mouse on a flat surface.

  4. Rapoo N1600 Cable Replacement: 手順 4、 3の画像 1 Rapoo N1600 Cable Replacement: 手順 4、 3の画像 2 Rapoo N1600 Cable Replacement: 手順 4、 3の画像 3
    • Use the iFixit opening tool to lift the cable connector plug slowly.

    • Use gentle pressure as pulling with force may damage the scroll wheel connector.

    • Using two fingers, slowly wiggle the connector plug out.

    • Do not pull from the wires.

  5. Rapoo N1600 Cable Replacement: 手順 5、 2の画像 1 Rapoo N1600 Cable Replacement: 手順 5、 2の画像 2
    • Place your index finger under the motherboard and lift your index finger so the motherboard pops up.

    • Ensure the bottom of the motherboard is held flat in your hand so the pieces don't fall out.

  6. Rapoo N1600 Cable Replacement: 手順 6、 2の画像 1 Rapoo N1600 Cable Replacement: 手順 6、 2の画像 2
    • Remove the old mouse cable.

    • Place the matching cross from the new mouse cable on the cross outline.

    • Keep the cable away from the scroll wheel area. Make sure the cable stays to the side.

    • Make sure the mouse sensor stays in place. If it falls out, set it back in place.

  7. Rapoo N1600 Cable Replacement: 手順 7、 3の画像 1 Rapoo N1600 Cable Replacement: 手順 7、 3の画像 2 Rapoo N1600 Cable Replacement: 手順 7、 3の画像 3
    • To replace the motherboard, match the circle from the motherboard and mouse and press down.

    • It will make a clicking sound.

    • Add the mouse cable plug to the socket. Press down so it connects.

  8. Rapoo N1600 Cable Replacement: 手順 8、 2の画像 1 Rapoo N1600 Cable Replacement: 手順 8、 2の画像 2
    • Slide an iFixit opening pick between the top shell and middle slowly until the end. Do this for the other side as well.

  9. Rapoo N1600 Cable Replacement: 手順 9、 3の画像 1 Rapoo N1600 Cable Replacement: 手順 9、 3の画像 2 Rapoo N1600 Cable Replacement: 手順 9、 3の画像 3
    • Match the middle part of the mouse with the bottom and slide it from top to bottom.

    • Once the middle part is attached, add the top shell of the mouse. Follow the pattern of the holes as they will help you.

ゴール

ある他の人がこのガイドを完成しました。

作成者

1人の作成者と共同作成されました。

Johan Salceda-Arredondo

メンバー登録日: 08/22/22

193 ポイント

1ガイドが承認済み

チーム

CSU Los Angeles, Team 2-25, Briggs Fall 2022 CSU Los Angeles, Team 2-25, Briggs Fall 2022人のメンバー

CSULA-BRIGGS-F22S2G25

1 メンバー

2のガイドは作成済み

0 件のコメント

コメントを追加

統計データ:

過去 24時間: 1

過去 7 日: 1

過去 30 日: 14

今までの合計 346