メインコンテンツにスキップ

RIDGID R32104 Trigger Replacement

必要な工具と部品

  1. RIDGID R32104 Trigger  Replacement, Trigger: 手順 1、 1の画像 1
    • Turn off your saw and unplug before starting.

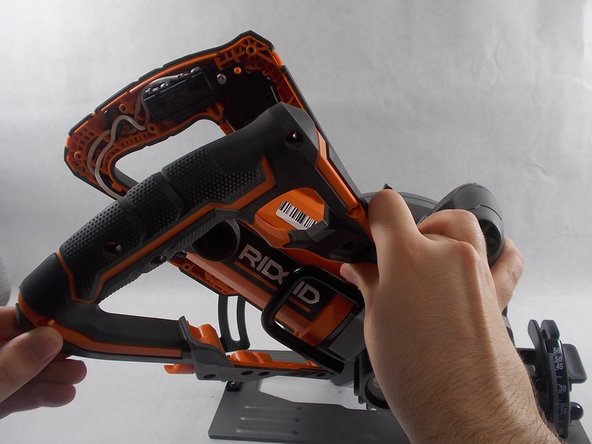
    • Place the Worm Drive Saw down and adjust the base plate, so that way the main housing assembly and handle set is easily accessible.

  2. RIDGID R32104 Trigger  Replacement: 手順 2、 2の画像 1 RIDGID R32104 Trigger  Replacement: 手順 2、 2の画像 2
    • Using the Torque 20 screwdriver, remove the twelve 3/10 cm screws holding the handle set together.

  3. RIDGID R32104 Trigger  Replacement: 手順 3、 2の画像 1 RIDGID R32104 Trigger  Replacement: 手順 3、 2の画像 2
    • Carefully remove the handle set from the main housing assembly.

  4. RIDGID R32104 Trigger  Replacement: 手順 4、 3の画像 1 RIDGID R32104 Trigger  Replacement: 手順 4、 3の画像 2 RIDGID R32104 Trigger  Replacement: 手順 4、 3の画像 3
    • Place the Worm Drive Saw on its side to help remove the trigger.

    • Use the Torque 20 screwdriver to remove the single 3/10 cm screw that attaches the trigger switch to the handle set.

  5. RIDGID R32104 Trigger  Replacement: 手順 5、 2の画像 1 RIDGID R32104 Trigger  Replacement: 手順 5、 2の画像 2
    • Use the Phillips 2 screwdriver to remove the four 3/10 cm screws holding the trigger and four wires, from the main housing assembly, in place.

  6. RIDGID R32104 Trigger  Replacement: 手順 6、 1の画像 1
    • Remove the trigger switch and trigger from the handle set.

終わりに

To reassemble your device, follow these instructions in reverse order.

2 の人々がこのガイドを完成させました。

作成者

1人の作成者と共同作成されました。

Lucas Pimentel

メンバー登録日: 04/02/19

1,010 ポイント

8のガイドは作成済み

チーム

UMass Dartmouth, Team S5-G1, Julie Spring 2019 UMass Dartmouth, Team S5-G1, Julie Spring 2019人のメンバー

UMASSD-JULIE-S19S5G1

4 メンバー

8のガイドは作成済み

0 件のコメント

コメントを追加

統計データ:

過去 24時間: 1

過去 7 日: 6

過去 30 日: 10

今までの合計 360