メインコンテンツにスキップ

RIDGID Belt Sander R2740 On/Off Switch Replacement

必要な工具と部品

  1. RIDGID Belt Sander R2740 On/Off Switch Replacement, Power Cord: 手順 1、 2の画像 1 RIDGID Belt Sander R2740 On/Off Switch Replacement, Power Cord: 手順 1、 2の画像 2
    • Orient the belt sander so that the RIDGID logo is facing you.

    • Remove the six 19 mm and three 51 mm T20 screws that hold the cover into place.

    • Remove the cover from the belt sander.

    • Make sure you remember the correct placement of each screw.

  2. RIDGID Belt Sander R2740 On/Off Switch Replacement: 手順 2、 2の画像 1 RIDGID Belt Sander R2740 On/Off Switch Replacement: 手順 2、 2の画像 2
    • Remove the two 16 mm T10 screws.

    • Remove the support bracket that holds the power cord into place.

  3. RIDGID Belt Sander R2740 On/Off Switch Replacement: 手順 3、 3の画像 1 RIDGID Belt Sander R2740 On/Off Switch Replacement: 手順 3、 3の画像 2 RIDGID Belt Sander R2740 On/Off Switch Replacement: 手順 3、 3の画像 3
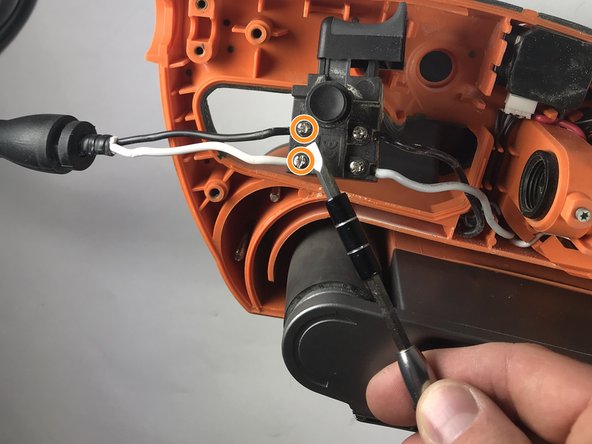
    • Lift the power cord from the resting grooves.

    • Rotate the switch so that the lock-on button is facing you.

    • Loosen the two 8 mm Phillips #3 screws.

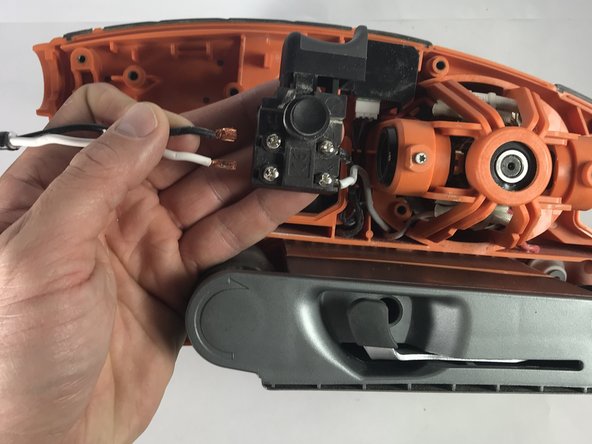
    • Pull the two wires away from the switch.

  4. RIDGID Belt Sander R2740 On/Off Switch Replacement, On/Off Switch: 手順 4、 1の画像 1
    • Undo the two screws on the backside of the switch with a Phillips #3 screw driver.

  5. RIDGID Belt Sander R2740 On/Off Switch Replacement: 手順 5、 1の画像 1
    • Pull out the wires from the switch.

終わりに

To reassemble your device, follow these instructions in reverse order.

ある他の人がこのガイドを完成しました。

作成者

2人の作成者と共同で作成されました。

Auddie Reynolds

メンバー登録日: 01/10/19

112 ポイント

1ガイドが承認済み

チーム

0 件のコメント

コメントを追加

統計データ:

過去 24時間: 2

過去 7 日: 9

過去 30 日: 17

今までの合計 813