メインコンテンツにスキップ

RCA Visys 25212 Ear Piece Speaker Replacement

必要な工具と部品

  1. RCA Visys 25212 Ear Piece Speaker Replacement, Handset Battery: 手順 1、 1の画像 1
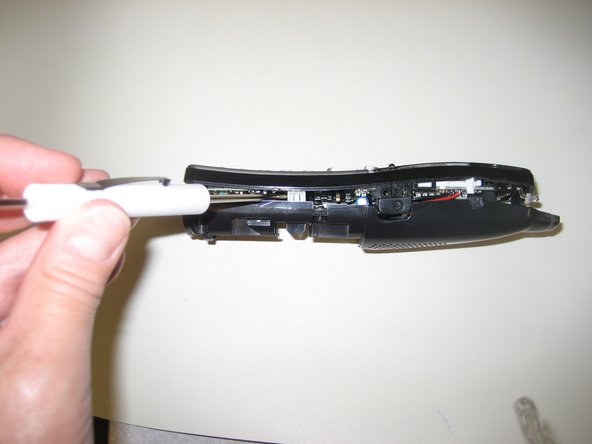
    • Place your thumb in the groove on the back of handset. Next, push down with your thumb and then slide the battery cover towards the bottom of the phone to remove the battery cover.

  2. RCA Visys 25212 Ear Piece Speaker Replacement: 手順 2、 2の画像 1 RCA Visys 25212 Ear Piece Speaker Replacement: 手順 2、 2の画像 2
    • To remove the battery, gently pull up on the white connector located on the left side of the phone.

  3. RCA Visys 25212 Ear Piece Speaker Replacement, Handset: 手順 3、 1の画像 1
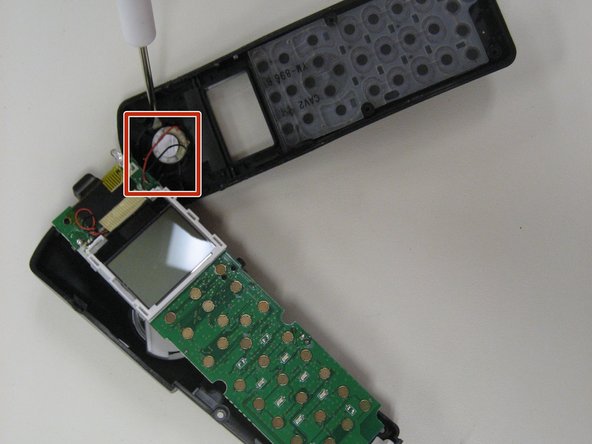
    • Remove the four screws, located at each of the corners within the back encasing, with a small Phillips head screwdriver.

  4. RCA Visys 25212 Ear Piece Speaker Replacement: 手順 4、 2の画像 1 RCA Visys 25212 Ear Piece Speaker Replacement: 手順 4、 2の画像 2
    • Insert a small flathead screwdriver between the face plate and the back of the handset.

    • Gently pry open the handset. You may need to insert the flathead screwdiver at multiple points in order to open the handset.

  5. RCA Visys 25212 Ear Piece Speaker Replacement: 手順 5、 1の画像 1
    • Using a small Phillips head screwdriver, remove the single screw (located at the top right) holding the circuit board in place.

  6. RCA Visys 25212 Ear Piece Speaker Replacement: 手順 6、 2の画像 1 RCA Visys 25212 Ear Piece Speaker Replacement: 手順 6、 2の画像 2
    • Lift up the circuit board to expose the keypad.

    • Be careful not to disconnect the two wires that connect the speaker to the circuit board.

    • Also, notice the two wires located at the bottom when lifting the circuit board, as these are apart of the charger.

  7. RCA Visys 25212 Ear Piece Speaker Replacement, Ear Piece Speaker: 手順 7、 1の画像 1
    • Gently lift out speaker using a small flathead screwdriver.

  8. RCA Visys 25212 Ear Piece Speaker Replacement: 手順 8、 1の画像 1
    • Set the speaker with the wires still attached on a flat surface. Place the tip of the soldering iron next to one of the leads until you are able to lift up the wire.

    • Repeat this process for the other lead.

    • Be sure you replace the wires at the same location on the new speaker.

終わりに

To reassemble your device, follow these instructions in reverse order.

作成者

3人の作成者と共同で作成されました。

Sandy South

メンバー登録日: 01/26/15

431 ポイント

4のガイドは作成済み

チーム

Pasco Hernando, Team 5-3, Prince Winter 2015 Pasco Hernando, Team 5-3, Prince Winter 2015人のメンバー

PHSC-PRINCE-W15S5G3

6 メンバー

8のガイドは作成済み

0 件のコメント

コメントを追加

統計データ:

過去 24時間: 1

過去 7 日: 3

過去 30 日: 3

今までの合計 152