メインコンテンツにスキップ

RCA ViSYS 25424RE1 Keypad Replacement

必要な工具と部品

  1. RCA ViSYS 25424RE1 Keypad Replacement, Base: 手順 1、 3の画像 1 RCA ViSYS 25424RE1 Keypad Replacement, Base: 手順 1、 3の画像 2 RCA ViSYS 25424RE1 Keypad Replacement, Base: 手順 1、 3の画像 3
    • Remove the eight 11mm screws found on the bottom side of the base with a Phillips #00 screwdriver.

  2. RCA ViSYS 25424RE1 Keypad Replacement: 手順 2、 3の画像 1 RCA ViSYS 25424RE1 Keypad Replacement: 手順 2、 3の画像 2 RCA ViSYS 25424RE1 Keypad Replacement: 手順 2、 3の画像 3
    • Use a plastic opening tool to separate the back and front pieces.

    • Gently remove the back cover, because the wires are connected to each piece.

  3. RCA ViSYS 25424RE1 Keypad Replacement: 手順 3、 3の画像 1 RCA ViSYS 25424RE1 Keypad Replacement: 手順 3、 3の画像 2 RCA ViSYS 25424RE1 Keypad Replacement: 手順 3、 3の画像 3
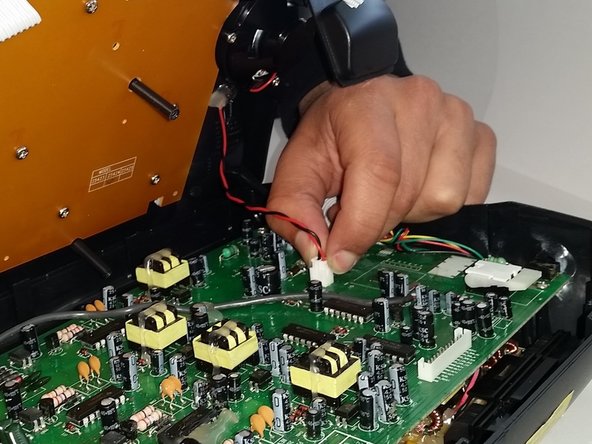
    • Unclip the wires that connect the front piece to the circuit board on the back piece.

  4. RCA ViSYS 25424RE1 Keypad Replacement, Keypad: 手順 4、 2の画像 1 RCA ViSYS 25424RE1 Keypad Replacement, Keypad: 手順 4、 2の画像 2
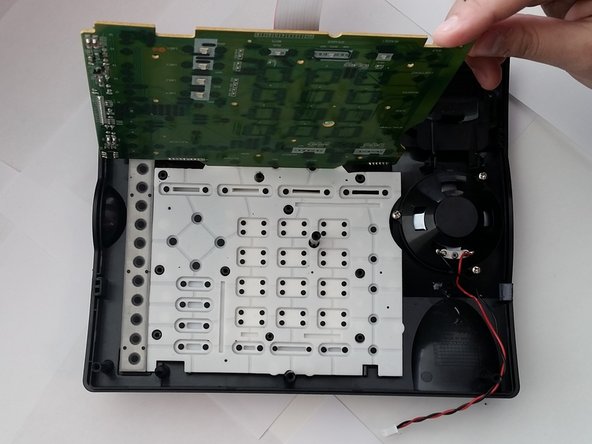
    • Remove the nine 11mm screws from the board using a Phillips #00 screwdriver, in order to expose the keyboard pressure sensors.

  5. RCA ViSYS 25424RE1 Keypad Replacement: 手順 5、 3の画像 1 RCA ViSYS 25424RE1 Keypad Replacement: 手順 5、 3の画像 2 RCA ViSYS 25424RE1 Keypad Replacement: 手順 5、 3の画像 3
    この手順で使用する道具:
    Tweezers
    $4.99
    購入する
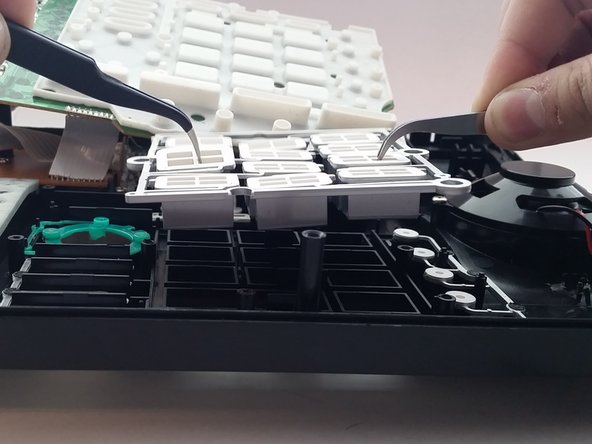
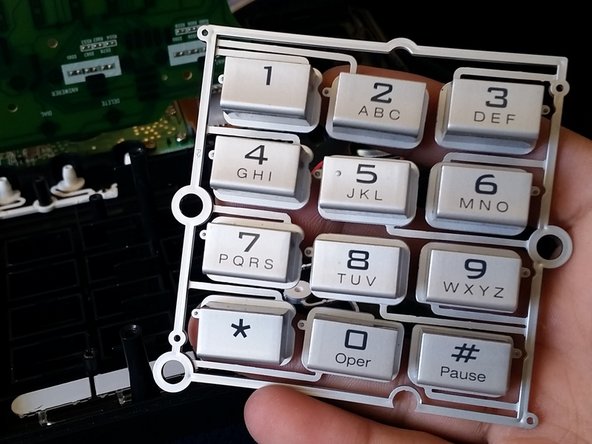
    • Lift the rubber keypad.

    • Use a pair of tweezers to lift the number pad from both ends at the same time.

終わりに

To reassemble your device, follow these instructions in reverse order.

作成者

5人の作成者と共同で作成されました。

Munija Ramin

メンバー登録日: 02/18/15

143 ポイント

1ガイドが承認済み

チーム

Penn State, Team 1-17, Kaschak Winter 2015 Penn State, Team 1-17, Kaschak Winter 2015人のメンバー

PSU-KASCHAK-W15S1G17

4 メンバー

6のガイドは作成済み

0 件のコメント

コメントを追加

統計データ:

過去 24時間: 1

過去 7 日: 2

過去 30 日: 8

今までの合計 288