メインコンテンツにスキップ

RAM memory replacement for why! W253EU

必要な工具と部品

  1. RAM memory replacement for why! W253EU, Battery from why! Remove W253EU: 手順 1、 3の画像 1 RAM memory replacement for why! W253EU, Battery from why! Remove W253EU: 手順 1、 3の画像 2 RAM memory replacement for why! W253EU, Battery from why! Remove W253EU: 手順 1、 3の画像 3
    • Turn off the computer.

    • Before each operation it is important to start with the removal of the accumulator.

    • Take the slide unlocked into position, remove the battery.

  2. RAM memory replacement for why! W253EU, Access to RAM and CPU from why! W253EU: 手順 2、 2の画像 1 RAM memory replacement for why! W253EU, Access to RAM and CPU from why! W253EU: 手順 2、 2の画像 2
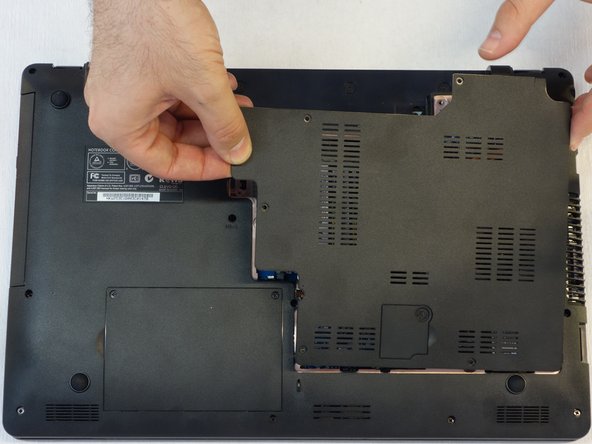
    • Using a Philips #1 screwdriver, unscrew the 5 screws securing the cover.

  3. RAM memory replacement for why! W253EU: 手順 3、 3の画像 1 RAM memory replacement for why! W253EU: 手順 3、 3の画像 2 RAM memory replacement for why! W253EU: 手順 3、 3の画像 3
    • Push the screwdriver a few millimeters under the cover so that it can be touched with your fingers.

    • Now lift the cover carefully.

    • Attention! Disconnect the ventillator cable so that the cover can be completely removed (see next step).

  4. RAM memory replacement for why! W253EU: 手順 4、 1の画像 1
    • Since the ventillator is mounted under the cover, its power supply cable must first be disconnected so that the cover can then be completely removed.

  5. RAM memory replacement for why! W253EU, RAM memory: 手順 5、 3の画像 1 RAM memory replacement for why! W253EU, RAM memory: 手順 5、 3の画像 2 RAM memory replacement for why! W253EU, RAM memory: 手順 5、 3の画像 3
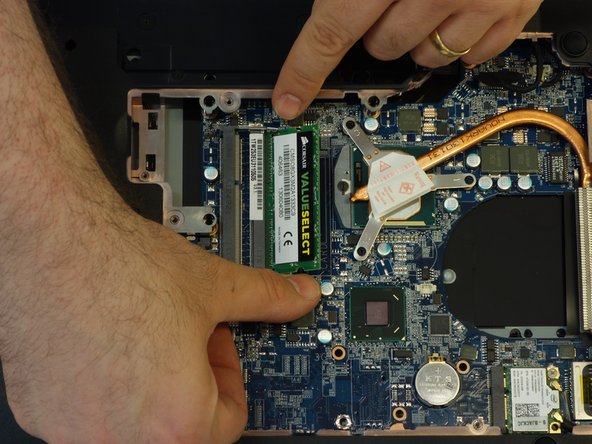
    • Locate the two memory modules.

    • Release the locking spring on both sides of the module.

    • Now lift the module with its connector slightly.

  6. RAM memory replacement for why! W253EU: 手順 6、 1の画像 1
    • Now remove the module from its connector by pulling it out symmetrically to its axis.

    • If necessary, repeat the procedure from the previous step with the second module.

    • Attention: the two memory modules must be identical, mainly in terms of their memory capacity!

終わりに

To reassemble, follow the instructions in reverse order.

以下の翻訳者の皆さんにお礼を申し上げます:

de en

100%

oldturkey03さんは世界中で修理する私たちを助けてくれています! あなたも貢献してみませんか?
翻訳を始める ›

作成者

3人の作成者と共同で作成されました。

Felice Suglia

メンバー登録日: 06/15/13

31,100 ポイント

264のガイドは作成済み

0 件のコメント

コメントを追加

統計データ:

過去 24時間: 0

過去 7 日: 2

過去 30 日: 13

今までの合計 292