メインコンテンツにスキップ

Quantum View 10.1 Volume buttons Replacement

必要な工具と部品

  1. Quantum View 10.1 Volume buttons  Replacement, Open Quantum View case: 手順 1、 1の画像 1
    • Start by turning the tablet over with the screen down. Carefully use a plastic opening tool to pry the cover off. Start from the corner opposite the hibernate button.

  2. Quantum View 10.1 Volume buttons  Replacement, Removing the electrical tape and magnets.: 手順 2、 2の画像 1 Quantum View 10.1 Volume buttons  Replacement, Removing the electrical tape and magnets.: 手順 2、 2の画像 2
    • Pick up the magnets from the bottom edge of the tablet next to the keyboard connection and put them in a place that they will not get lost. Then carefully remove all 4 strips of electrical tape.

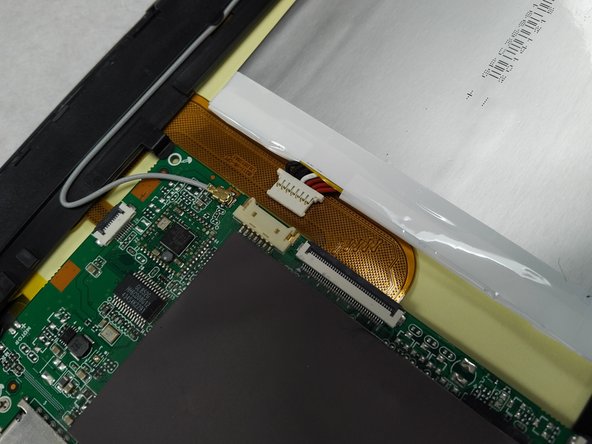
  3. Quantum View 10.1 Volume buttons  Replacement, Unhooking the battery: 手順 3、 2の画像 1 Quantum View 10.1 Volume buttons  Replacement, Unhooking the battery: 手順 3、 2の画像 2
    • Using a small plastic opening tool; genteelly pull the connection off of the motherboard.

  4. Quantum View 10.1 Volume buttons  Replacement, Disconnecting the buttons: 手順 4、 1の画像 1
    • Peel back the yellow clear tape. Followed by the use of a plastic opening tool to release the ribbon connection.

  5. Quantum View 10.1 Volume buttons  Replacement, Removing the volume buttons: 手順 5、 1の画像 1
    • Using tweezers genitally pull up on the volume button board to remove.

終わりに

To reassemble your device, follow these instructions in reverse order.

ある他の人がこのガイドを完成しました。

作成者

2人の作成者と共同で作成されました。

stephen Munchinsky

メンバー登録日: 04/01/17

786 ポイント

7のガイドは作成済み

チーム

Gateway Community College Team 1 BPC270 36301 Gateway Community College Team 1 BPC270 36301人のメンバー

Community

4 メンバー

7のガイドは作成済み

0 件のコメント

コメントを追加

統計データ:

過去 24時間: 0

過去 7 日: 1

過去 30 日: 1

今までの合計 141