メインコンテンツにスキップ

Processor of why! Replace W253EU

必要な工具と部品

  1. Processor of why! Replace W253EU, Battery from why! Remove W253EU: 手順 1、 3の画像 1 Processor of why! Replace W253EU, Battery from why! Remove W253EU: 手順 1、 3の画像 2 Processor of why! Replace W253EU, Battery from why! Remove W253EU: 手順 1、 3の画像 3
    • Turn off the computer.

    • Before each operation it is important to start with the removal of the accumulator.

    • Take the slide unlocked into position, remove the battery.

  2. Processor of why! Replace W253EU, Access to RAM and CPU from why! W253EU: 手順 2、 2の画像 1 Processor of why! Replace W253EU, Access to RAM and CPU from why! W253EU: 手順 2、 2の画像 2
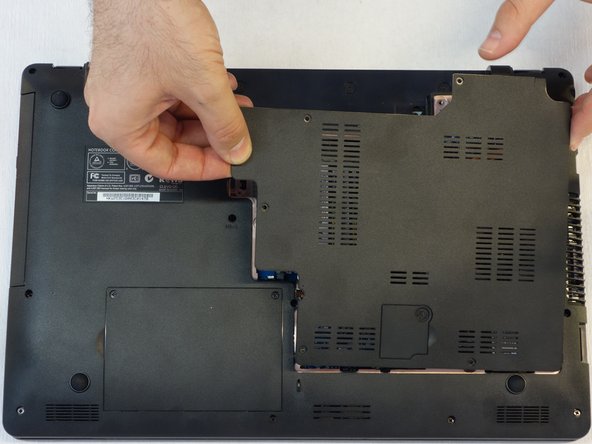
    • Using a Philips #1 screwdriver, unscrew the 5 screws securing the cover.

  3. Processor of why! Replace W253EU: 手順 3、 3の画像 1 Processor of why! Replace W253EU: 手順 3、 3の画像 2 Processor of why! Replace W253EU: 手順 3、 3の画像 3
    • Push the screwdriver a few millimeters under the cover so that it can be touched with your fingers.

    • Now lift the cover carefully.

    • Attention! Disconnect the ventillator cable so that the cover can be completely removed (see next step).

  4. Processor of why! Replace W253EU: 手順 4、 1の画像 1
    • Since the ventillator is mounted under the cover, its power supply cable must first be disconnected so that the cover can then be completely removed.

  5. Processor of why! Replace W253EU, processor: 手順 5、 3の画像 1 Processor of why! Replace W253EU, processor: 手順 5、 3の画像 2 Processor of why! Replace W253EU, processor: 手順 5、 3の画像 3
    • Using the Phillips # 1 screwdriver, unscrew the 3 mounting screws of the processor heat sink.

    • Note position of marker triangle as this will determine the positioning of the processor during replacement.

    • Unlock the coupling system of the processor with a classic screwdriver.

    • Make sure that you do not remove the heat-dissipating paste between the processor and the heat sink, as this is the only way to ensure that the processor is properly cooled.

  6. Processor of why! Replace W253EU: 手順 6、 3の画像 1 Processor of why! Replace W253EU: 手順 6、 3の画像 2 Processor of why! Replace W253EU: 手順 6、 3の画像 3
    • Carefully disconnect the processor from its holder.

    • Now place the processor aside, taking into account the position of the triangle.

終わりに

For reassembly, follow the instructions in the reverse order

以下の翻訳者の皆さんにお礼を申し上げます:

de en

100%

これらの翻訳者の方々は世界を修理する私たちのサポートをしてくれています。 あなたも貢献してみませんか?
翻訳を始める ›

作成者

2人の作成者と共同で作成されました。

Felice Suglia

メンバー登録日: 06/15/13

30,884 ポイント

263のガイドは作成済み

0 件のコメント

コメントを追加

統計データ:

過去 24時間: 0

過去 7 日: 2

過去 30 日: 3

今までの合計 401