メインコンテンツにスキップ

Probook 650 G5 Screen Replacement

必要な工具と部品

  1. Probook 650 G5 Screen Replacement, Turn of Laptop: 手順 1、 1の画像 1
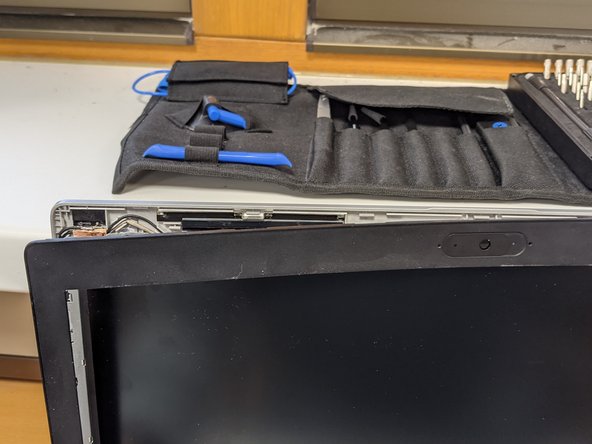
    • Turn off your Laptop and open the Lid so that you can access all sides of the Monitor

  2. Probook 650 G5 Screen Replacement, Remove Plastic Cover: 手順 2、 3の画像 1 Probook 650 G5 Screen Replacement, Remove Plastic Cover: 手順 2、 3の画像 2 Probook 650 G5 Screen Replacement, Remove Plastic Cover: 手順 2、 3の画像 3
    • Gently lift the Plastic Cover and move around the Screen doing this

  3. Probook 650 G5 Screen Replacement, Remove Screen: 手順 3、 2の画像 1 Probook 650 G5 Screen Replacement, Remove Screen: 手順 3、 2の画像 2
    • Remove the 4 Screws and gently Pull the Screen towards you

  4. Probook 650 G5 Screen Replacement, Unplug Screen: 手順 4、 3の画像 1 Probook 650 G5 Screen Replacement, Unplug Screen: 手順 4、 3の画像 2 Probook 650 G5 Screen Replacement, Unplug Screen: 手順 4、 3の画像 3
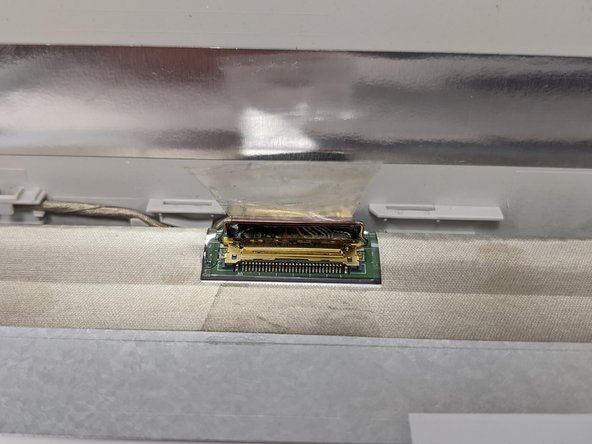
    • Lay the Screen gently on the Keyboard of the Laptop and unplug the Display Cable

    • To unplug the cable you need to pull up the adhesive Foil and lift the little Lever which secures the Display Cable

    • Remove the old screen

  5. Probook 650 G5 Screen Replacement, Connect new Screen: 手順 5、 1の画像 1
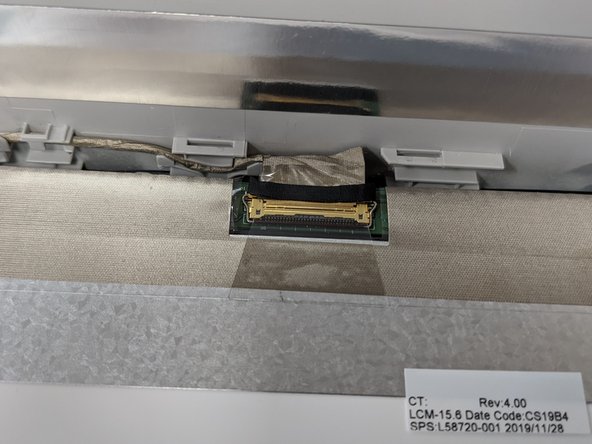
    • Place the new Screen on the keyboard and align it with the Display Cable

    • Slide the Cable in the Connector and secure it with the Lever and the adhesive foil

  6. Probook 650 G5 Screen Replacement, Place in the new Screen: 手順 6、 2の画像 1 Probook 650 G5 Screen Replacement, Place in the new Screen: 手順 6、 2の画像 2
    • Place the new Screen on the Little Plastic nobs and Screw it in using the old srews

    • After that place the Plastic cover on Top and gently Press in around the side

終わりに

Turn on the Laptop and check if the Screen is Working. If not go through the Steps again

4 の人々がこのガイドを完成させました。

作成者

1人の作成者と共同作成されました。

Sebbo

メンバー登録日: 09/23/20

214 ポイント

1ガイドが承認済み

0 件のコメント

コメントを追加

統計データ:

過去 24時間: 0

過去 7 日: 3

過去 30 日: 56

今までの合計 1,739