メインコンテンツにスキップ

この修理ガイドは変更されています。最新の未承認バージョンに切り替えます。

PowerBook G4 Aluminum 17" 1-1.67 GHz Rear Display Bezel Replacement

必要条件のみ
この修理ガイドは、他のガイドの前提条件として使用されます。それ自体は不完全で、単独で使用されることはありません。

必要な工具と部品

  1. PowerBook G4 Aluminum 17" 1-1.67 GHz Rear Display Bezel Replacement, Rear Display Bezel: 手順 1、 2の画像 1 PowerBook G4 Aluminum 17" 1-1.67 GHz Rear Display Bezel Replacement, Rear Display Bezel: 手順 1、 2の画像 2
    • Remove the single Phillips screw from the lower left and right corners of the display.

  2. PowerBook G4 Aluminum 17" 1-1.67 GHz Rear Display Bezel Replacement: 手順 2、 1の画像 1
    • The picture at left (rear panel already removed) shows the locations of the metal clips (shown in red) that snap on to the front display bezel. In the next few steps, you will use a small flathead screwdriver to release these clips from a ridge around the perimeter of the front display bezel.

    • When prying in the following steps, be sure not to damage the antenna cables that run around the perimeter of the front display bezel.

  3. PowerBook G4 Aluminum 17" 1-1.67 GHz Rear Display Bezel Replacement: 手順 3、 3の画像 1 PowerBook G4 Aluminum 17" 1-1.67 GHz Rear Display Bezel Replacement: 手順 3、 3の画像 2 PowerBook G4 Aluminum 17" 1-1.67 GHz Rear Display Bezel Replacement: 手順 3、 3の画像 3
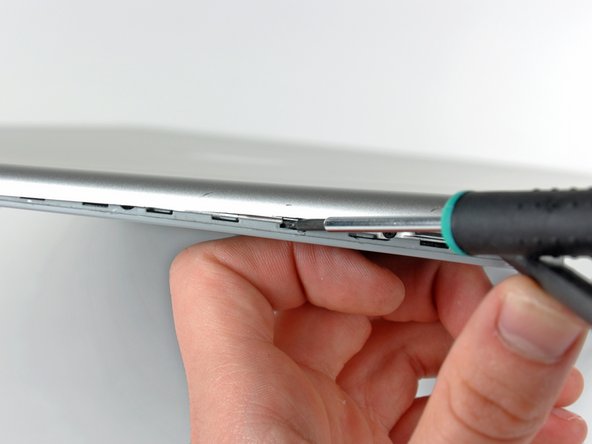
    • Insert the flat end of a spudger between the front display bezel and the plastic rim attached to the rear bezel near the lower right corner of the display.

    • Do not try to insert the spudger between the front display bezel and its plastic surround.

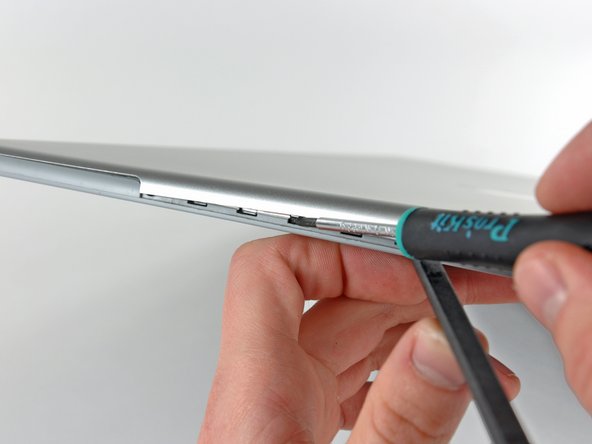
    • While carefully prying the rear display bezel away from the display assembly, use a small flathead screwdriver to pry the small steel clip nearest the bottom right corner of the display away from the edge of the front display bezel.

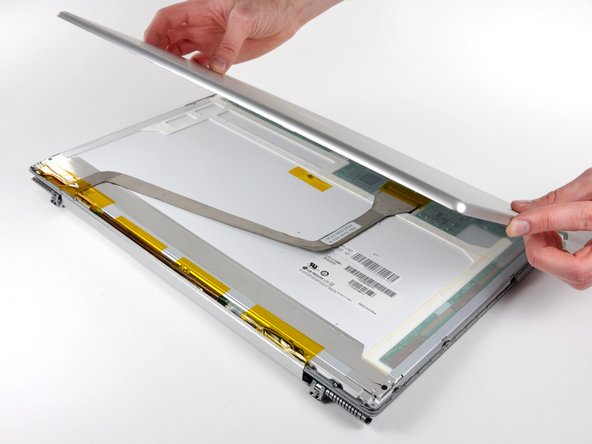
    • Repeat the above procedure until you've released all the clips along the right side of the display.

  4. PowerBook G4 Aluminum 17" 1-1.67 GHz Rear Display Bezel Replacement: 手順 4、 1の画像 1
    • Slightly lift the recently-freed corner of the rear display bezel to separate the clips along the span of the clutch hinges.

  5. PowerBook G4 Aluminum 17" 1-1.67 GHz Rear Display Bezel Replacement: 手順 5、 1の画像 1
    • Insert the flat end of a spudger between the rear display bezel and the plastic surround of the front display bezel near the lower left corner of the display.

    • Carefully pry the rear display bezel away from the front display bezel to release a metal clip.

  6. PowerBook G4 Aluminum 17" 1-1.67 GHz Rear Display Bezel Replacement: 手順 6、 1の画像 1
    • Repeat the previous procedure to release the clips along the left side of the rear display bezel.

  7. PowerBook G4 Aluminum 17" 1-1.67 GHz Rear Display Bezel Replacement: 手順 7、 2の画像 1 PowerBook G4 Aluminum 17" 1-1.67 GHz Rear Display Bezel Replacement: 手順 7、 2の画像 2
    • Slightly lift the lower edge of the rear display bezel and push it toward the top edge of the display, releasing the clips along the top edge of the rear display bezel.

    • Remove the rear display bezel and set it aside.

ゴール

ある他の人がこのガイドを完成しました。

作成者

3人の作成者と共同で作成されました。

Walter Galan

694,676 ポイント

1,203のガイドは作成済み

0 件のコメント

コメントを追加

統計データ:

過去 24時間: 0

過去 7 日: 0

過去 30 日: 1

今までの合計 474