メインコンテンツにスキップ

この翻訳は、ソースガイドの最新の更新を反映していない可能性があります。 翻訳の更新に協力してください。 または ソースガイドを参照してください

PowerBook G4 Aluminum 15インチ 1.67 GHzのリアディスプレイベゼルの交換

必要条件のみ
この修理ガイドは、他のガイドの前提条件として使用されます。それ自体は不完全で、単独で使用されることはありません。

必要な工具と部品

  1. この手順は未翻訳です。 翻訳を手伝う。

    PowerBook G4 Aluminum 15インチ 1.67 GHzのリアディスプレイベゼルの交換, リアディスプレイベゼル: 手順 1、 2の画像 1 PowerBook G4 Aluminum 15インチ 1.67 GHzのリアディスプレイベゼルの交換, リアディスプレイベゼル: 手順 1、 2の画像 2
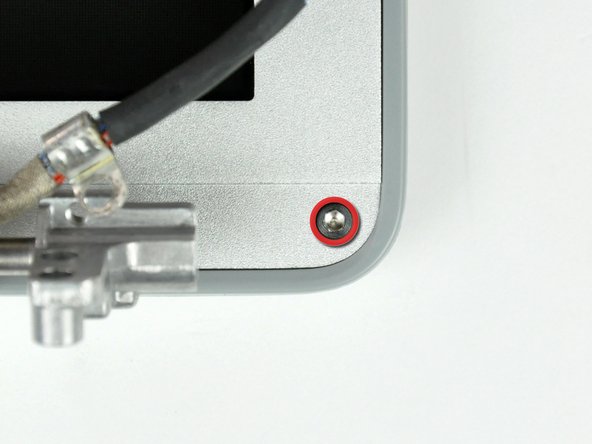
    • Remove the two 6mm long, 1.5 mm hex screws near the lower left and right corners of the display.

    • A T6 Torx screwdriver works just fine.

  2. この手順は未翻訳です。 翻訳を手伝う。

    PowerBook G4 Aluminum 15インチ 1.67 GHzのリアディスプレイベゼルの交換: 手順 2、 1の画像 1
    • Insert the flat end of a spudger between the front display bezel and the plastic rim attached to the rear bezel near the lower left corner of the display.

    • Do not insert the spudger between the plastic rim of the rear display bezel and the aluminum rear display bezel plate.

  3. この手順は未翻訳です。 翻訳を手伝う。

    PowerBook G4 Aluminum 15インチ 1.67 GHzのリアディスプレイベゼルの交換: 手順 3、 2の画像 1 PowerBook G4 Aluminum 15インチ 1.67 GHzのリアディスプレイベゼルの交換: 手順 3、 2の画像 2
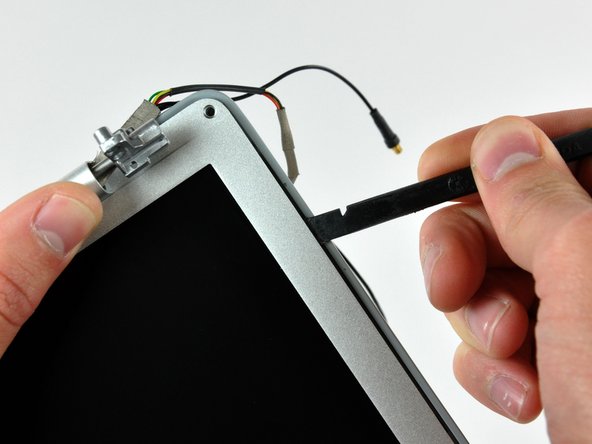
    • With your spudger still inserted under the front display bezel, run it around the lower left corner of the display.

    • Rotate the spudger away from yourself to pry the rear display bezel off the aluminum tabs on the front display bezel.

    • Work your way down the side of the display until the rear display bezel has been separated from the front display bezel.

  4. この手順は未翻訳です。 翻訳を手伝う。

    PowerBook G4 Aluminum 15インチ 1.67 GHzのリアディスプレイベゼルの交換: 手順 4、 1の画像 1
    • Insert the flat end of a spudger between the rear display bezel and the clutch cover.

    • Twist the spudger to unclip the rear bezel from the clutch cover.

  5. この手順は未翻訳です。 翻訳を手伝う。

    PowerBook G4 Aluminum 15インチ 1.67 GHzのリアディスプレイベゼルの交換: 手順 5、 2の画像 1 PowerBook G4 Aluminum 15インチ 1.67 GHzのリアディスプレイベゼルの交換: 手順 5、 2の画像 2
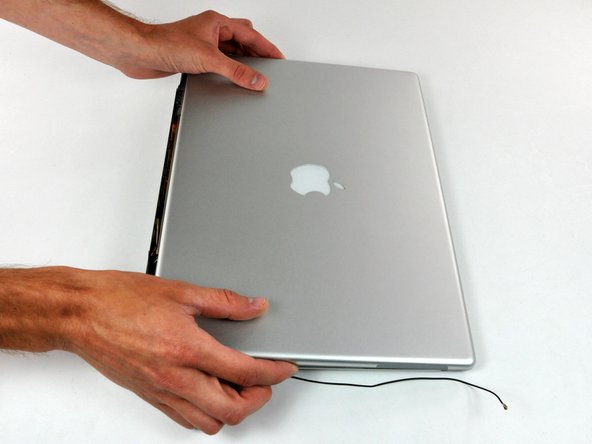
    • Repeat the previous steps to separate the right side of the rear display bezel from the display.

    • Use your spudger to pry the plastic retaining clips on the rear display bezel over the raised aluminum tabs on the front display bezel.

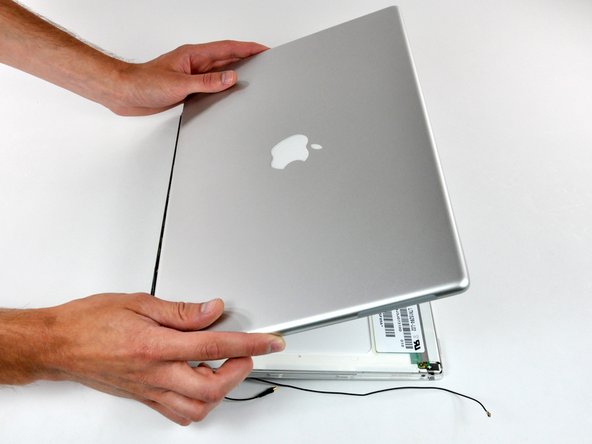
    • At this point, the clips on the left and right edges of the rear display bezel should be free from the raised aluminum tabs on the front display bezel. If they are not, use a spudger to pry them past the front display bezel.

  6. この手順は未翻訳です。 翻訳を手伝う。

    PowerBook G4 Aluminum 15インチ 1.67 GHzのリアディスプレイベゼルの交換: 手順 6、 3の画像 1 PowerBook G4 Aluminum 15インチ 1.67 GHzのリアディスプレイベゼルの交換: 手順 6、 3の画像 2 PowerBook G4 Aluminum 15インチ 1.67 GHzのリアディスプレイベゼルの交換: 手順 6、 3の画像 3
    • Slightly lift the lower edge of the rear display bezel and push it toward the top edge of the display, releasing the clips along the top edge of the rear display bezel.

    • Rotate the rear display bezel toward yourself and lay it flat on the table.

  7. PowerBook G4 Aluminum 15インチ 1.67 GHzのリアディスプレイベゼルの交換: 手順 7、 1の画像 1
    • リアディスプレイベゼルから2本のアンテナケーブルの接続を外します。

    • リアディスプレイベゼルを取り外して、脇に置きます。

終わりに

デバイスを再度組み立てるには、この説明書の逆の順番で組み立ててください。

以下の翻訳者の皆さんにお礼を申し上げます:

en jp

45%

railgunさんは世界中で修理する私たちを助けてくれています! あなたも貢献してみませんか?
翻訳を始める ›

作成者

4人の作成者と共同で作成されました。

Walter Galan

694,561 ポイント

1,203のガイドは作成済み

0 件のコメント

コメントを追加

統計データ:

過去 24時間: 0

過去 7 日: 0

過去 30 日: 0

今までの合計 1,416