The following procedure allows the changing of the rear display bezel without removing the display assembly from the computer. Do not attempt to rotate the display back farther than the hinges allow or your computer may be damaged.
Open the computer with the display facing you and rotate the display back as far as possible.
Remove the T6 Torx screw from the bottom left corner of the display assembly. The computer casing will not allow the screwdriver to be inserted directly into the screw, so be careful not to strip the screw.
Remove the T6 Torx screw from the bottom right corner of the display assembly.
To avoid cross-threading these screws during reinstallation, use a pair of tweezers to start each screw in its hole before using your Torx screwdriver to tighten them.
The next few steps require the use of plastic opening tools and spudgers that will probably be destroyed in the process. Have a few spares of each tool handy.
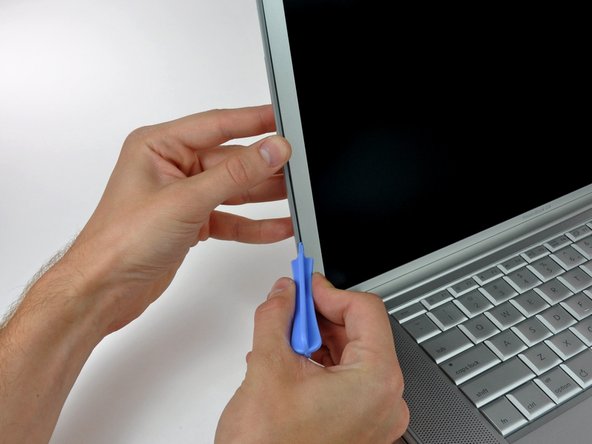
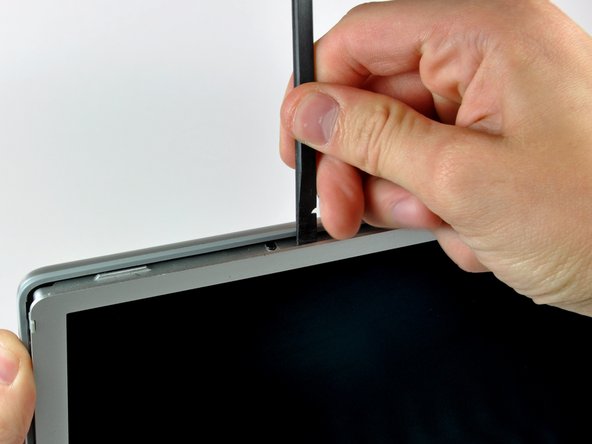
Insert a plastic opening tool between the left edge of the front display bezel and the plastic strip attached to the rear bezel, with the edge of the tool angled toward the LCD.
Rotate the tool away from the LCD to pop the rear bezel off the tabs on the front display bezel.
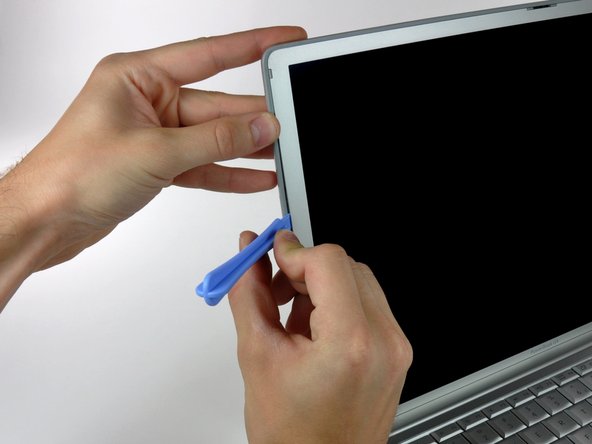
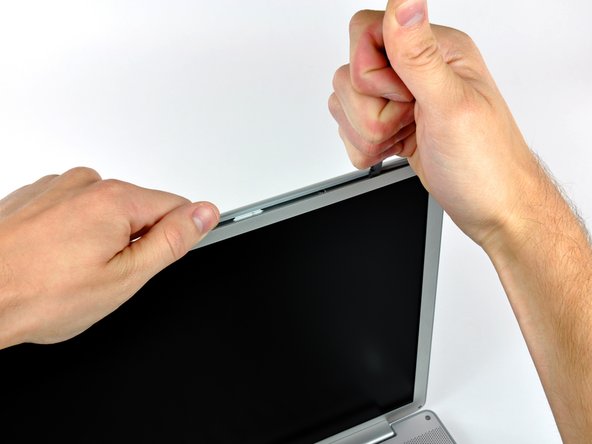
Work along the left edge of the display until the rear bezel is evenly separated from the front bezel.
Freeing these tabs may require some force. Be sure to support the display assembly with your other hand to avoid putting too much strain on the hinges.
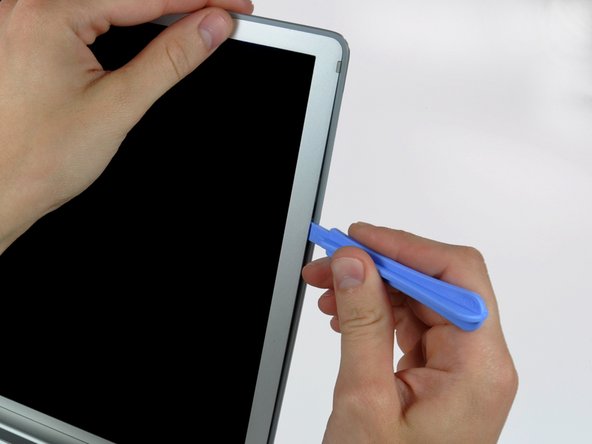
Insert a plastic opening tool between the right edge of the front display bezel and the plastic strip attached to the rear bezel, with the edge of the tool angled toward the LCD.
Rotate the tool away from the LCD to pop the rear bezel off the tabs on the front display bezel.
Work along the right edge of the display until the rear bezel is evenly separated from the front bezel.
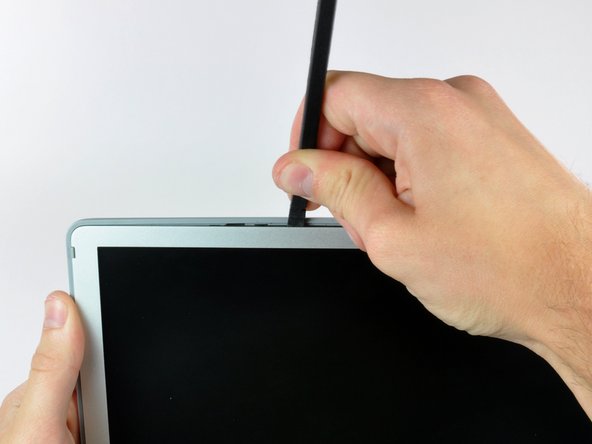
Insert a spudger just to the left of the hinge opening on the top edge of the display between the front display bezel and the plastic strip attached to the rear bezel.
Pry the rear bezel away from the front bezel along the top left half of the display.
If the flat end of your spudger is flexing too much, trim about .125" of the end to increase its stiffness.
Insert a spudger just to the right of the hinge opening on the top edge of the display between the front display bezel and the plastic strip attached to the rear bezel.
Pry the rear bezel away from the front bezel along the top right half of the display.
To release the clips in the far left and right corners of the display, it may be necessary to run a spudger parallel to the face of the display along the top edge of the front display bezel and force it into the corners to pop the rear bezel off.
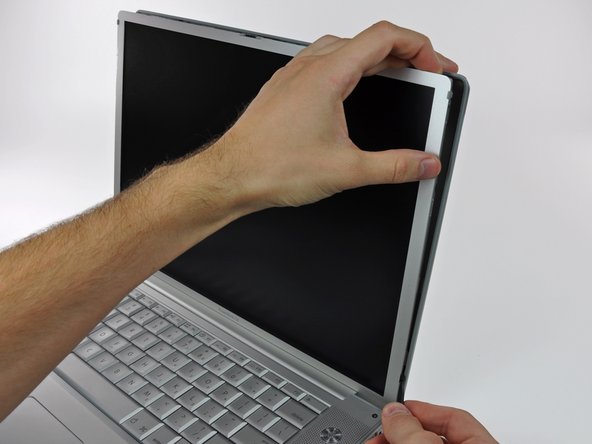
The rear bezel is still attached to the display by the antenna cables.
Rotate the top edge of the rear display bezel slightly away from the rest of the display, and then lift the lower edge of the rear bezel away from the clutch cover.