メインコンテンツにスキップ

このバージョンは誤った内容を含んでいる可能性があります。最新の承認済みスナップショットに切り替えてください。

必要な工具と部品

  1. , バッテリー: 手順 1、 1の画像 1
    • コインを使って、バッテリーロックネジを90度右側に回転させます。

    • コンピュータからバッテリーを持ち上げます。

  2. この手順は未翻訳です。 翻訳を手伝う。

    : 手順 2、 1の画像 1
    • Open the computer and rotate the display as far as possible.

    • Remove the T6 Torx screw from the bottom left corner of the display assembly. The computer casing will not allow the screwdriver to be inserted directly into the screw, so be careful not to strip the screw.

  3. この手順は未翻訳です。 翻訳を手伝う。

    : 手順 3、 1の画像 1
    • Remove the T6 Torx screw from the bottom right corner of the display assembly.

    • To avoid cross-threading these screws during reinstallation, use a pair of tweezers to start each screw in its hole before using your Torx screwdriver to tighten them.

  4. この手順は未翻訳です。 翻訳を手伝う。

    : 手順 4、 3の画像 1 : 手順 4、 3の画像 2 : 手順 4、 3の画像 3
    • The next steps involve the use of plastic opening tools and spudgers which will probably be ruined in the process. Have a few spares of each tool handy.

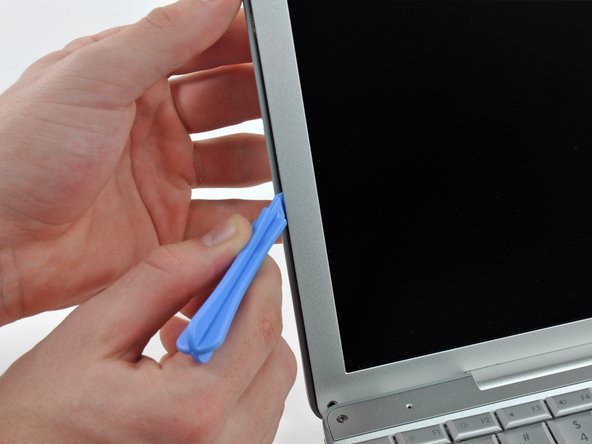
    • Insert a plastic opening tool between the left edge of the front display bezel and the plastic strip attached to the rear bezel, with the edge of the tool angled toward the LCD.

    • Rotate the tool away from the LCD to pop the rear bezel off the tabs on the front display bezel.

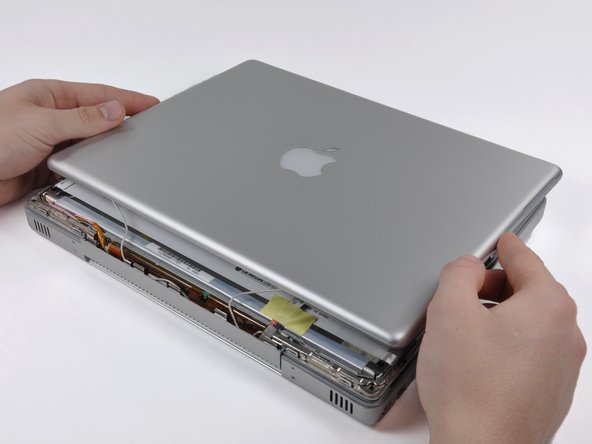
    • Work along the left edge of the display until the rear bezel is evenly separated from the front bezel.

    • Freeing these tabs may require some force. Be sure to support the display assembly with your other hand to avoid putting too much strain on the hinges.

  5. この手順は未翻訳です。 翻訳を手伝う。

    : 手順 5、 3の画像 1 : 手順 5、 3の画像 2 : 手順 5、 3の画像 3
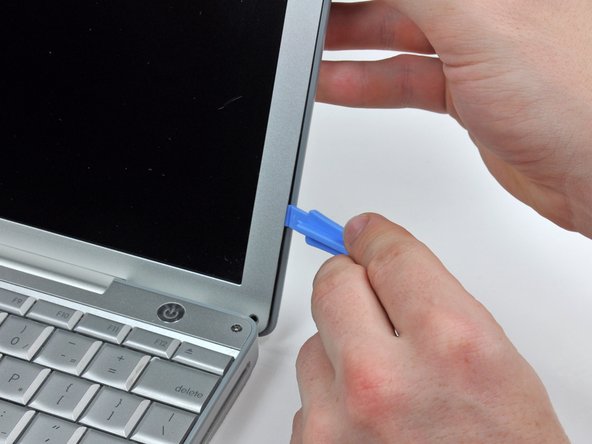
    • Insert a plastic opening tool between the right edge of the front display bezel and the plastic strip attached to the rear bezel, with the edge of the tool angled toward the LCD.

    • Rotate the tool away from the LCD to pop the rear bezel off the tabs on the front display bezel.

    • Work along the right edge of the display until the rear bezel is evenly separated from the front bezel.

  6. この手順は未翻訳です。 翻訳を手伝う。

    : 手順 6、 3の画像 1 : 手順 6、 3の画像 2 : 手順 6、 3の画像 3
    • Close the display.

    • The rear display bezel is still attached to the display via the antenna cables.

    • Lift the bottom edge of the rear display bezel up about an inch.

    • Slide the rear display bezel forward to release the clips along the top edge of the display.

    • Rotate the rear display bezel away from the display and lay it next to the computer.

  7. この手順は未翻訳です。 翻訳を手伝う。

    : 手順 7、 1の画像 1
    • Remove the Phillips screw securing the inverter board.

  8. この手順は未翻訳です。 翻訳を手伝う。

    : 手順 8、 2の画像 1 : 手順 8、 2の画像 2
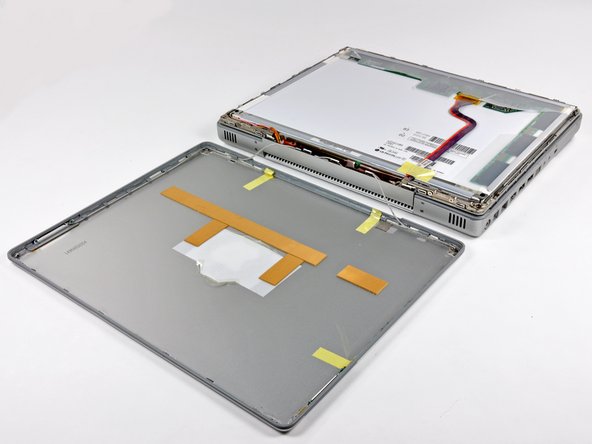
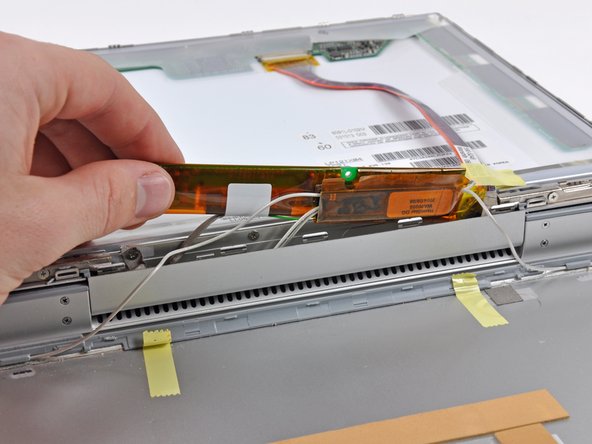
    • Insert the pointed end of the a spudger between the protective tape and the inverter board.

    • Carefully pull up with the spudger to lift the inverter board out enough to access the connector cables.

    • Once you can easily grab the board, pull it up enough to gain access to the inverter board's output connector.

    • Gently remove the board in order to avoid damaging any wires or connectors.

  9. この手順は未翻訳です。 翻訳を手伝う。

    : 手順 9、 1の画像 1
    • Disconnect the cable by pulling the connector away from the inverter board's socket.

  10. この手順は未翻訳です。 翻訳を手伝う。

    : 手順 10、 2の画像 1 : 手順 10、 2の画像 2
    • Remove the two Phillips screws from both sides of the display (four in total).

  11. この手順は未翻訳です。 翻訳を手伝う。

    : 手順 11、 2の画像 1 : 手順 11、 2の画像 2
    • Remove any tape on the display data cable.

    • Pull the display data cable connector away from its socket to disconnect it from the LCD.

  12. この手順は未翻訳です。 翻訳を手伝う。

    : 手順 12、 1の画像 1
    • Open the display slightly.

    • Push the LCD away from the front display bezel near its top edge.

    • Remove the LCD, being wary of any cables that may get caught

ゴール

4 の人々がこのガイドを完成させました。

作成者

5人の作成者と共同で作成されました。

Matthew Newsom

メンバー登録日: 01/05/10

39,524 ポイント

67のガイドは作成済み

コメント 1 件

Thanks for your guide!

There is a little mistake. The 2 screws at the bottom left and right corner of the display assembly, are not torx T6, They are Hex 1.5mm/1/16". you should use Hex Key with Ball End to remove them."Ball End" ones can work within a angle about 50 degree.

Terrance - 返信

コメントを追加

統計データ:

過去 24時間: 0

過去 7 日: 12

過去 30 日: 28

今までの合計 16,866