このバージョンは誤った内容を含んでいる可能性があります。最新の承認済みスナップショットに切り替えてください。
必要な工具と部品
-
この手順は未翻訳です。 翻訳を手伝う。
-
Turn the keyboard locking screw so that it is parallel to the space bar.
-
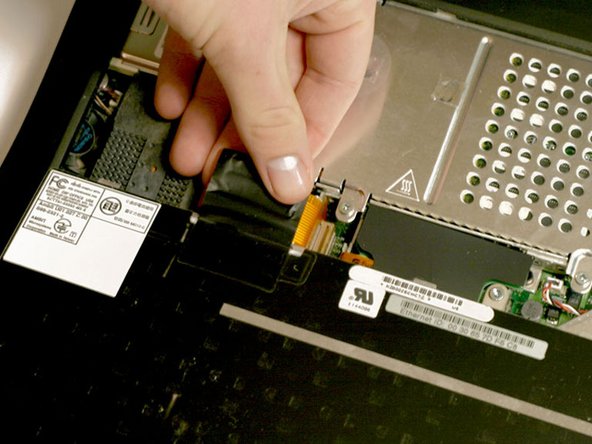
Pull the keyboard release tabs toward you and lift up on the keyboard until it pops free.
-
Lift the keyboard out by pulling it up and away from you. Rest the keyboard, face down, on top of the track pad.
-
-
-
この手順は未翻訳です。 翻訳を手伝う。
-
Lift the left side of the case partly up so that you can access and disconnect the audio in/out cables from the sound card in the upper right of the case.
-
Remove the upper casing. Note that there are two tabs on the laptop's front that often cause the upper case to stick.
-


7 の人々がこのガイドを完成させました。
添付文書

4 件のコメント
It should be noted (at least in my case) that it takes a considerable amount of pressure to snap the processor connector back into place on the logic board when reinstalling it step 12. I learned this the hard way, requiring another dis-assembly. I'd hate to say that you really have to shove on it, but at least put some strong pressure on the processor directly above the connector point, which is hidden under the card. It helped me to remove the memory module so that I could place my two fingers there and push with a little rocking motion.
To follow up on my last note regarding the processor card connector: On the next Pismo I worked on, I added an almost microscopic amount of silicone dielectric compound to the outside of the 6 tiny beveled plastic pin edges on the connector side that is mounted to the logic board. I applied the dielectric compound with a toothpick. This small amount of lubrication made it much easier to snap the connector down to the logic board.