メインコンテンツにスキップ

PowerBook G3 Pismo Heat Shield Replacement

必要な工具と部品

  1. PowerBook G3 Pismo Heat Shield Replacement, Keyboard: 手順 1、 1の画像 1
    • Turn the keyboard locking screw so that it is parallel to the space bar.

    • Pull the keyboard release tabs toward you and lift up on the keyboard until it pops free.

    • Lift the keyboard out by pulling it up and away from you. Rest the keyboard, face down, on top of the track pad.

  2. PowerBook G3 Pismo Heat Shield Replacement: 手順 2、 1の画像 1
    • Pull the keyboard ribbon straight up from the logic board. Place the keyboard aside.

    • The connector may be tight. Gently rock the connector from side to side while pulling directly upward to free it. You can use this technique on many of the cards and cables you'll be disconnecting.

    • Make sure you have removed the laptop battery and CD/DVD modules from the expansion bays before proceeding.

  3. PowerBook G3 Pismo Heat Shield Replacement: 手順 3、 1の画像 1
    • Your laptop should look approximately like this.

  4. PowerBook G3 Pismo Heat Shield Replacement, Heat Shield: 手順 4、 1の画像 1
    • Remove the two silver Phillips #1 screws that attach the heat shield to the internal metal framework.

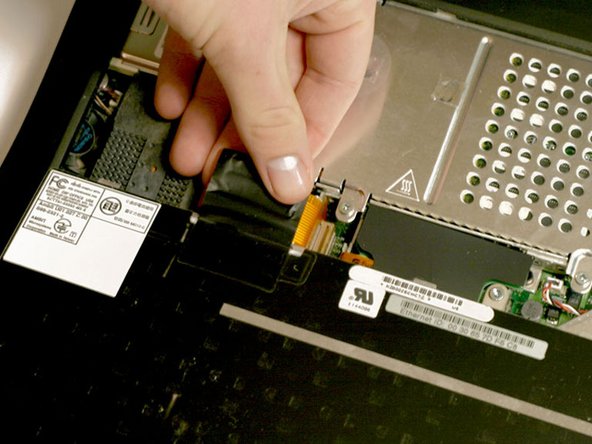
    • Lift the heat shield up and pull it toward you.

  5. PowerBook G3 Pismo Heat Shield Replacement: 手順 5、 1の画像 1
    • Your laptop should look approximately like this.

終わりに

To reassemble your device, follow these instructions in reverse order.

2 の人々がこのガイドを完成させました。

添付文書

作成者

2人の作成者と共同で作成されました。

iRobot

メンバー登録日: 09/24/09

1 ポイント

636のガイドは作成済み

0 件のコメント

コメントを追加

統計データ:

過去 24時間: 0

過去 7 日: 0

過去 30 日: 3

今までの合計 3,108