メインコンテンツにスキップ

このバージョンは誤った内容を含んでいる可能性があります。最新の承認済みスナップショットに切り替えてください。

必要な工具と部品

  1. この手順は未翻訳です。 翻訳を手伝う。

    : 手順 1、 3の画像 1 : 手順 1、 3の画像 2 : 手順 1、 3の画像 3
    • Remove the (9) nine 9.2mm screws with a JIS #1 screwdriver.

    • Remove the two bottom plastic grip covers.

  2. この手順は未翻訳です。 翻訳を手伝う。

    : 手順 2、 2の画像 1 : 手順 2、 2の画像 2
    • Remove the (2) two 9.2mm screws with a JIS #1 screwdriver.

    • Remove the back cover of the controller.

  3. この手順は未翻訳です。 翻訳を手伝う。

    : 手順 3、 3の画像 1 : 手順 3、 3の画像 2 : 手順 3、 3の画像 3
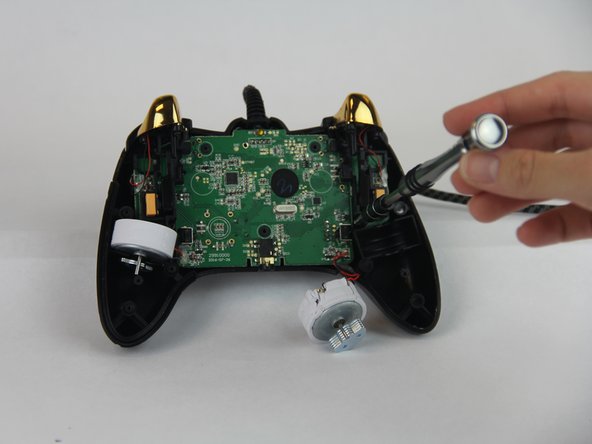
    • Remove the (5) five 9.2mm screws with a JIS #1 screwdriver.

    • Lift the motherboard and let it hang.

  4. この手順は未翻訳です。 翻訳を手伝う。

    : 手順 4、 2の画像 1 : 手順 4、 2の画像 2
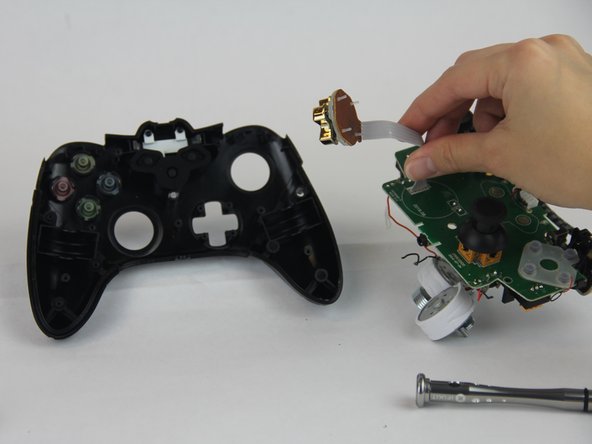
    • Remove the (4) four 9.2mm screws that are holding the motherboard to the controller.

    • Put the motherboard aside.

  5. この手順は未翻訳です。 翻訳を手伝う。

    : 手順 5、 2の画像 1 : 手順 5、 2の画像 2
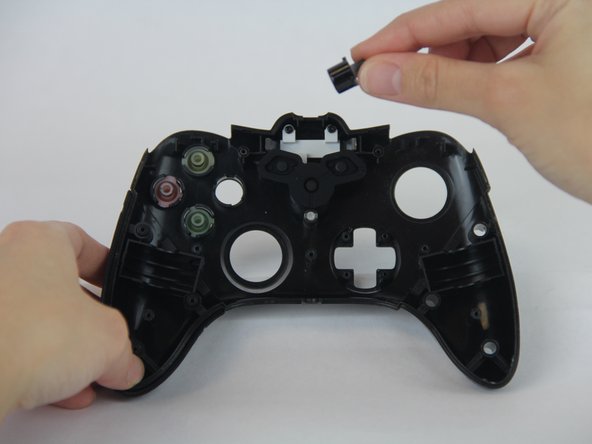
    • Remove the buttons.

  6. この手順は未翻訳です。 翻訳を手伝う。

    : 手順 6、 2の画像 1 : 手順 6、 2の画像 2
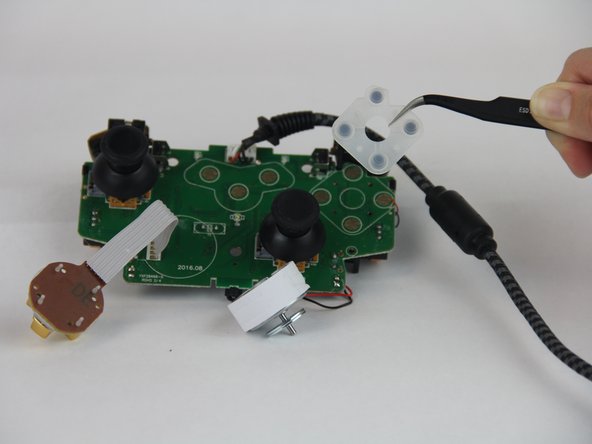
    • Go back to the motherboard, and remove the buttons' gasket with a tweezler.

ゴール

8 の人々がこのガイドを完成させました。

作成者

4人の作成者と共同で作成されました。

Andrea

メンバー登録日: 09/26/17

623 ポイント

4のガイドは作成済み

チーム

USF Tampa, Team S14-G4, Boczar Fall 2017 USF Tampa, Team S14-G4, Boczar Fall 2017人のメンバー

USFT-BOCZAR-F17S14G4

4 メンバー

5のガイドは作成済み

2 件のコメント

Okay so what do you do if by any chance one of the links that are sawdered to the mother board for the D Pad Connection cable breaks… Then what? How would I go about fixing that????

Heather Jesse - 返信

is there a guide to clean the bumpers out? my RB became less consistent and i'm hoping it's just because they're gunked up

urmum - 返信

コメントを追加

統計データ:

過去 24時間: 3

過去 7 日: 19

過去 30 日: 70

今までの合計 18,440