メインコンテンツにスキップ

PowerA Enhanced Wired Controller Disassembly

必要な工具と部品

  1. PowerA Enhanced Wired Controller Disassembly, Start by flipping over the controller the controller to find 8 #0 phillips screws: 手順 1、 2の画像 1 PowerA Enhanced Wired Controller Disassembly, Start by flipping over the controller the controller to find 8 #0 phillips screws: 手順 1、 2の画像 2
    • Insert wisdom here.

  2. PowerA Enhanced Wired Controller Disassembly, The rear programmable buttons appear to be moulded into the shell so are not replaceable: 手順 2、 2の画像 1 PowerA Enhanced Wired Controller Disassembly, The rear programmable buttons appear to be moulded into the shell so are not replaceable: 手順 2、 2の画像 2
    • front shell is pretty standard fair with removable buttons

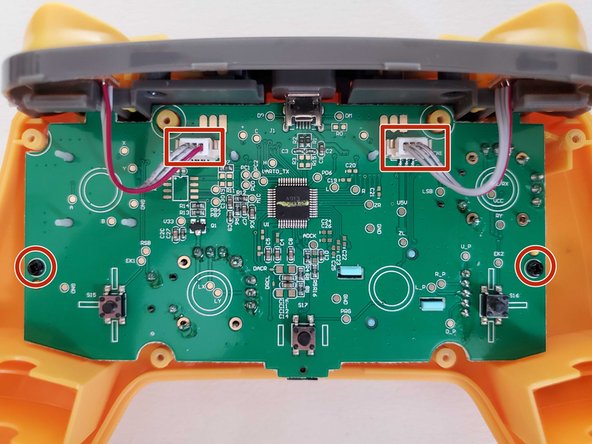
  3. PowerA Enhanced Wired Controller Disassembly, The front shell has mouldings for rumble motors but the motherboard does not have any apparent connections for them: 手順 3、 2の画像 1 PowerA Enhanced Wired Controller Disassembly, The front shell has mouldings for rumble motors but the motherboard does not have any apparent connections for them: 手順 3、 2の画像 2
    • two screws hold the shell in place, but first we will remove the should button connections

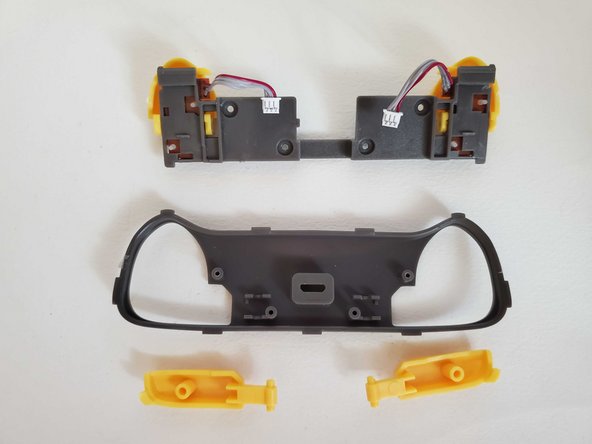
  4. PowerA Enhanced Wired Controller Disassembly, removing the shoulder button assembly we find two more phillips screws holding the button assembly together: 手順 4、 2の画像 1 PowerA Enhanced Wired Controller Disassembly, removing the shoulder button assembly we find two more phillips screws holding the button assembly together: 手順 4、 2の画像 2
    • nothing holds the L and R bumpers but the ZL and ZR triggers are on a hinge

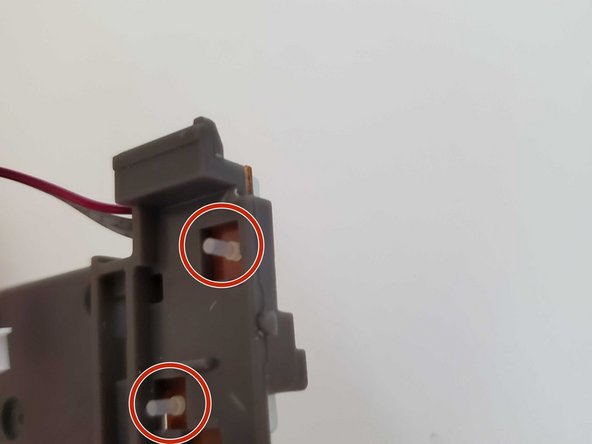
  5. PowerA Enhanced Wired Controller Disassembly, Remove the ZL and ZR triggers: 手順 5、 2の画像 1 PowerA Enhanced Wired Controller Disassembly, Remove the ZL and ZR triggers: 手順 5、 2の画像 2
    • small plastic posts hold the triggers in place, gently pry the triggers off the posts using a flathead. These are easy to break so be gentle here. The elastomer underneath is held on by these little posts that stick through the plastic. Removing them is easy but pushing them back in is a challenge

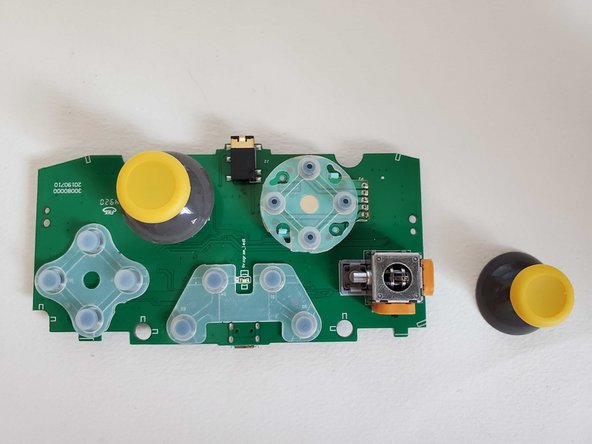
  6. PowerA Enhanced Wired Controller Disassembly, Back to the main board: 手順 6、 2の画像 1 PowerA Enhanced Wired Controller Disassembly, Back to the main board: 手順 6、 2の画像 2
    • the elastomers are held in with little posts that go through the board. The sticks and d pad are soldered in so are not easy to remove

終わりに

To reassemble your device, follow these instructions in reverse order.

作成者

1人の作成者と共同作成されました。

Ivan Sanaev

メンバー登録日: 09/30/18

133 ポイント

1ガイドが承認済み

0 件のコメント

コメントを追加

統計データ:

過去 24時間: 4

過去 7 日: 27

過去 30 日: 126

今までの合計 891