メインコンテンツにスキップ

このバージョンは誤った内容を含んでいる可能性があります。最新の承認済みスナップショットに切り替えてください。

必要な工具と部品

  1. この手順は未翻訳です。 翻訳を手伝う。

    : 手順 1、 1の画像 1
    • To avoid electrocution, shut down the computer. Do not open the computer or attempt to install any items inside it while the computer is on.

    • To avoid being burned, wait at least 10 minutes to allow the computer's internal components to cool.

  2. この手順は未翻訳です。 翻訳を手伝う。

    : 手順 2、 1の画像 1
    • Remove all the cables, including the power cables before opening the unit.

  3. この手順は未翻訳です。 翻訳を手伝う。

    : 手順 3、 2の画像 1 : 手順 3、 2の画像 2
    • Lift the tab to unlock the side panel.

    • The panel should fall out. If the panel does not fall out by itself pull a little from the edges.

  4. この手順は未翻訳です。 翻訳を手伝う。

    : 手順 4、 3の画像 1 : 手順 4、 3の画像 2 : 手順 4、 3の画像 3
    • Remove the air deflector (the clear plastic cover) by pulling on the handle.

  5. この手順は未翻訳です。 翻訳を手伝う。

    : 手順 5、 1の画像 1
    • Locate hard drive on the top right-hand corner of the desktop.

  6. この手順は未翻訳です。 翻訳を手伝う。

    : 手順 6、 2の画像 1 : 手順 6、 2の画像 2
    • Rotate up plastic tab labeled "B" on the right hand side of hard drive.

  7. この手順は未翻訳です。 翻訳を手伝う。

    : 手順 7、 2の画像 1 : 手順 7、 2の画像 2
    • Detach both cables from the hard drive.

  8. この手順は未翻訳です。 翻訳を手伝う。

    : 手順 8、 2の画像 1 : 手順 8、 2の画像 2
    • Pull out the hard drive out.

  9. この手順は未翻訳です。 翻訳を手伝う。

    : 手順 9、 1の画像 1
    • After hard drive is out, the space should look like this.

ゴール

101 の人々がこのガイドを完成させました。

作成者

6人の作成者と共同で作成されました。

Jessica Chaidez

メンバー登録日: 01/13/10

7,965 ポイント

3のガイドは作成済み

チーム

Cal Poly, Team 5-8, Forte Winter 2010 Cal Poly, Team 5-8, Forte Winter 2010人のメンバー

CPSU-FORTE-W10S5G8

7 メンバー

20のガイドは作成済み

8 件のコメント

I don't see why you'd need to remove the plastic cover

Petteri - 返信

I've tried many times to remove this and my other misplaced comment duplicate, but here they'll stay apparently... you're free to delete them if you can.

Petteri -

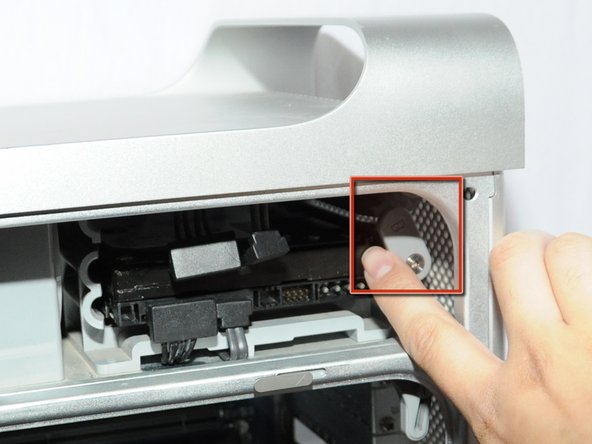
REMOVE the plastic cover to avoid knocking it off in the process of working on the drive bays. (Just a precaution - kind of like not setting a glass of red wine on an elegant white table cloth.)

EyeSpye -

The Comments appended to these instructions are VERY helpful. If you read them you will save time, and avoid some of the mistakes I made - particularly with respect to the Drive mounting screws located to the left side of the drive installation bays, and the need to remove the bottom drive FIRST if you wish to access the top drive. THANKS for a great set of instructions.

EyeSpye - 返信

This was helpful! Excellent photographs and clear, simple instructions. Thanks, Jessica and iFixit!

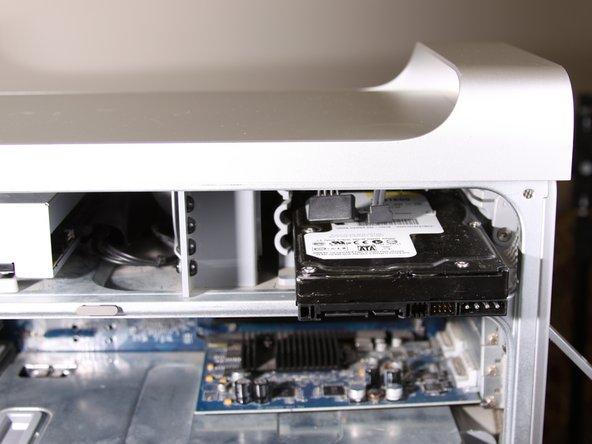
I used these instructions to remove an additional hard drive while leaving the original hard drive in place. I did not know which one to remove, as the hard drives do not have side labels, so I guessed: the original drive was on top, the additional drive on the bottom. It might be helpful for other viewers to know what to do in a similar situation.

Cheers.

Sharine Borslien - 返信

コメントを追加

統計データ:

過去 24時間: 15

過去 7 日: 53

過去 30 日: 151

今までの合計 83,691