メインコンテンツにスキップ

Porter Cable C2002 Type 5 Manifold Replacement

必要な工具と部品

  1. Porter Cable C2002 Type 5 Manifold Replacement, Manifold: 手順 1、 3の画像 1 Porter Cable C2002 Type 5 Manifold Replacement, Manifold: 手順 1、 3の画像 2 Porter Cable C2002 Type 5 Manifold Replacement, Manifold: 手順 1、 3の画像 3
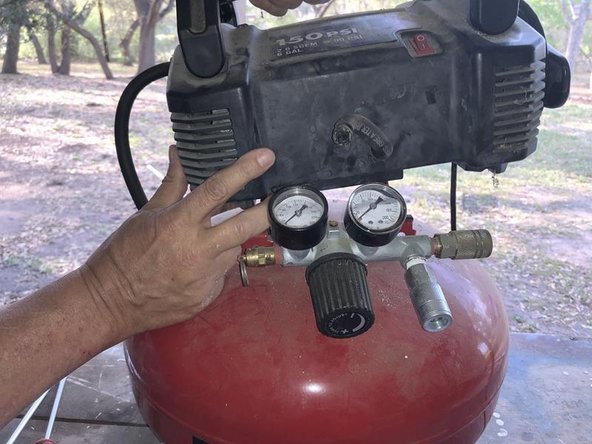
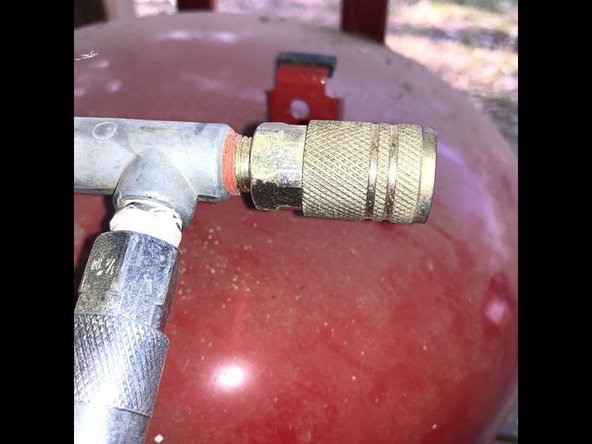
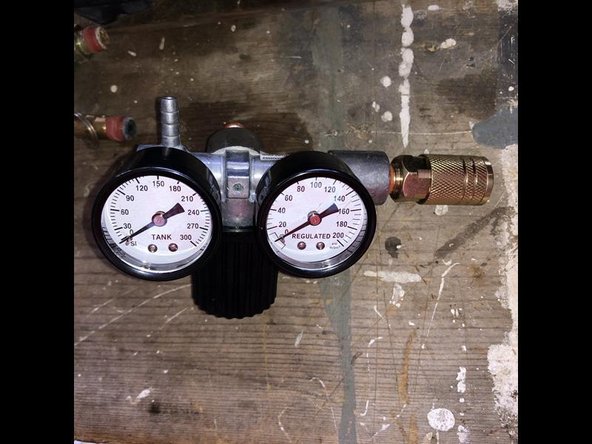
    • The manifold assembly cracked and would not let the compressor build up pressure consistently. Both gauges quit working long ago. This manifold has two quick connects and one safety valve

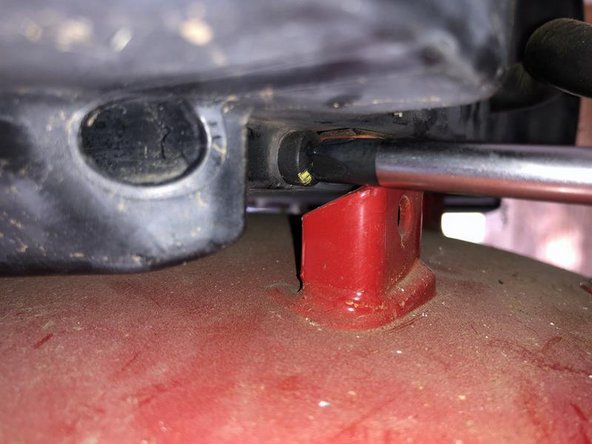
    • Mounting bracket for the air pump on the left side

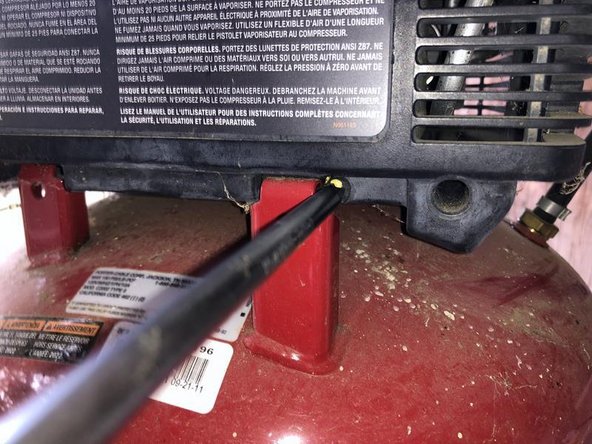
    • Mounting bracket for the air pump on the right side

  2. Porter Cable C2002 Type 5 Manifold Replacement: 手順 2、 3の画像 1 Porter Cable C2002 Type 5 Manifold Replacement: 手順 2、 3の画像 2 Porter Cable C2002 Type 5 Manifold Replacement: 手順 2、 3の画像 3
    • Pressure hose from air pump to manifold. Secured with one compression clamp to the manifold

    • Using a pair of End Cutting pliers to cut the compression clamp. Caution so as to not cut or puncture the hose

    • Remove the clamp from the hose

  3. Porter Cable C2002 Type 5 Manifold Replacement: 手順 3、 3の画像 1 Porter Cable C2002 Type 5 Manifold Replacement: 手順 3、 3の画像 2 Porter Cable C2002 Type 5 Manifold Replacement: 手順 3、 3の画像 3
    • Remove the Phillips head screw from the left mount

    • Remove the Phillips head screw from the right mount

    • Use a flathead screwdriver to push the pressure hose off the nipple on the manifold

  4. Porter Cable C2002 Type 5 Manifold Replacement: 手順 4、 3の画像 1 Porter Cable C2002 Type 5 Manifold Replacement: 手順 4、 3の画像 2 Porter Cable C2002 Type 5 Manifold Replacement: 手順 4、 3の画像 3
    • Lift the air pump of the compressor tank by slightly sliding it backwards.

    • Position the air pump so that the remaining hose does not get kinked .

    • Next is the pressure relief safety valve.

  5. Porter Cable C2002 Type 5 Manifold Replacement: 手順 5、 3の画像 1 Porter Cable C2002 Type 5 Manifold Replacement: 手順 5、 3の画像 2 Porter Cable C2002 Type 5 Manifold Replacement: 手順 5、 3の画像 3
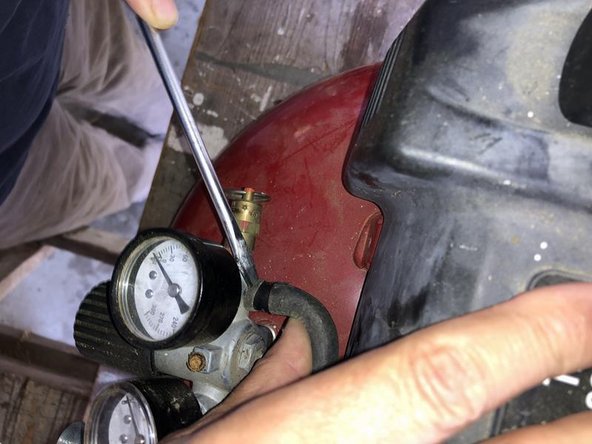
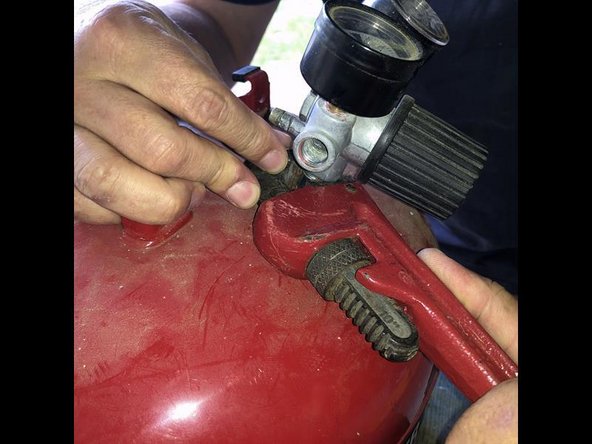
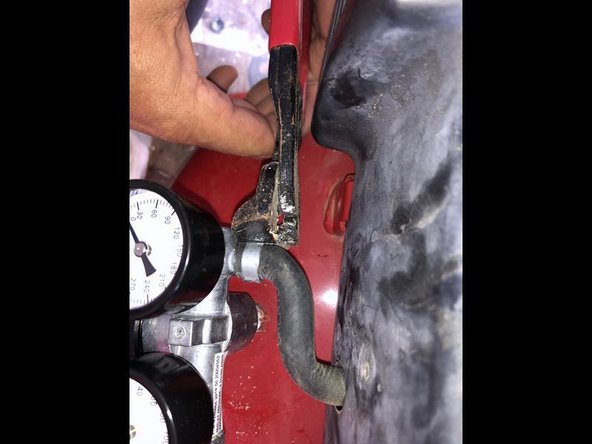
    • Use a pipe wrench or adjustable wrench whichever may be available. To remove the valve turn the wrench in a count clockwise direction.

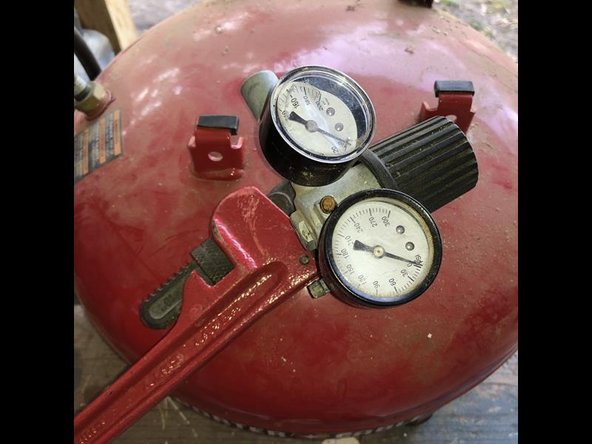
    • Next is the removal of the two Quick connects. Again, use whatever wrench is available and turn it in a counter clockwise direction to remove those.

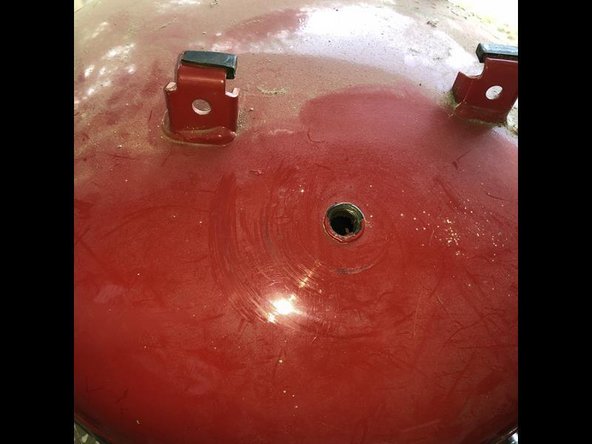
    • Manifold with pressure relief valve and two Quick connects removed

  6. Porter Cable C2002 Type 5 Manifold Replacement: 手順 6、 3の画像 1 Porter Cable C2002 Type 5 Manifold Replacement: 手順 6、 3の画像 2 Porter Cable C2002 Type 5 Manifold Replacement: 手順 6、 3の画像 3
    • Time to remove the manifold. Using a pipe wrench between the manifold and the tank

    • then turn the complete manifold assembly in a counter clockwise direction

    • Manifold assembly removed.

  7. Porter Cable C2002 Type 5 Manifold Replacement: 手順 7、 3の画像 1 Porter Cable C2002 Type 5 Manifold Replacement: 手順 7、 3の画像 2 Porter Cable C2002 Type 5 Manifold Replacement: 手順 7、 3の画像 3
    • Here is teh repalcment manifold. This was the only one that was readily available for this compressor. The only difference between the old one and the replacement is that here is only room for one (1) Quick connect

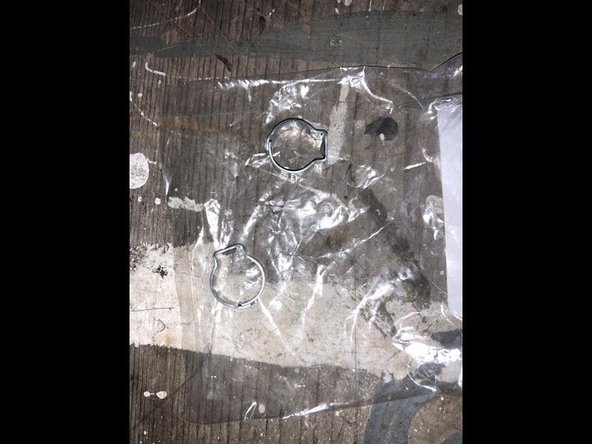
    • Purchased the proper clamp for this repair because they were available. The old clamp can definitely not being reused. It should also be possible to use a normal worm drive hose clamp which are widely available

    • I used a pair of End cutting pliers to compress the end of the clamp. A pair of Combination pliers etc. should accomplish this as well.

  8. Porter Cable C2002 Type 5 Manifold Replacement: 手順 8、 1の画像 1
    • Back in business. Manifold replaced and compressor functioning without any further issues.

終わりに

To reassemble your device, follow these instructions in reverse order.

作成者

2人の作成者と共同で作成されました。

oldturkey03

メンバー登録日: 09/29/10

791,325 ポイント

119のガイドは作成済み

チーム

Global Fixers Global Fixers人のメンバー

Community

35 メンバー

603のガイドは作成済み

0 件のコメント

コメントを追加

統計データ:

過去 24時間: 2

過去 7 日: 8

過去 30 日: 23

今までの合計 962