メインコンテンツにスキップ

Portege Z830-S8302 Internal Cooling Fan Replacement

必要な工具と部品

  1. Portege Z830-S8302 Internal Cooling Fan Replacement, Internal Cooling Fan: 手順 1、 3の画像 1 Portege Z830-S8302 Internal Cooling Fan Replacement, Internal Cooling Fan: 手順 1、 3の画像 2 Portege Z830-S8302 Internal Cooling Fan Replacement, Internal Cooling Fan: 手順 1、 3の画像 3
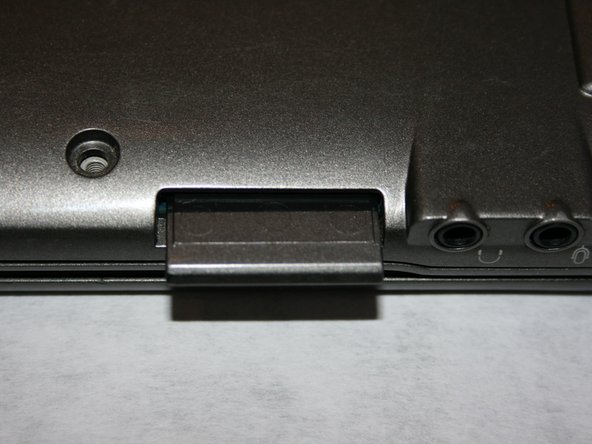
    • Flip the laptop over, with screen facing down to reveal bottom panel.

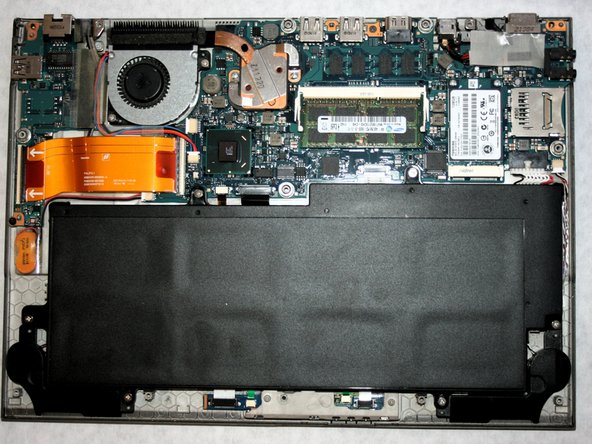
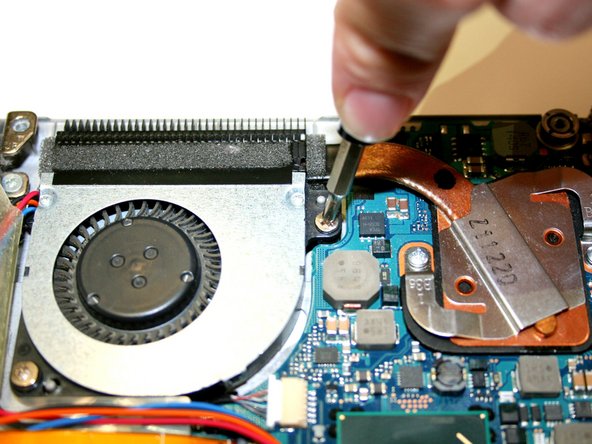
    • Remove thirteen 1.4mm Phillips #0 screws around the border of the frame.

  2. Portege Z830-S8302 Internal Cooling Fan Replacement: 手順 2、 3の画像 1 Portege Z830-S8302 Internal Cooling Fan Replacement: 手順 2、 3の画像 2 Portege Z830-S8302 Internal Cooling Fan Replacement: 手順 2、 3の画像 3
    • Using the metal spudger, remove the rubber fitting in middle of back panel to reveal hidden screw.

    • Use a Torx T7 bit screwdriver to remove screw.

  3. Portege Z830-S8302 Internal Cooling Fan Replacement: 手順 3、 3の画像 1 Portege Z830-S8302 Internal Cooling Fan Replacement: 手順 3、 3の画像 2 Portege Z830-S8302 Internal Cooling Fan Replacement: 手順 3、 3の画像 3
    • Remove the SD card in top right hand corner of the device, next to the headphone ports.

    • Push in the SD card then pull out completely to remove from slot.

    • This will help in the removal of backplate.

  4. Portege Z830-S8302 Internal Cooling Fan Replacement: 手順 4、 2の画像 1 Portege Z830-S8302 Internal Cooling Fan Replacement: 手順 4、 2の画像 2
    • Lift the back plate starting at the opposing edge to the SD card. Lift from left to right and continue lifting this plate at this angle until its free from the laptop.

    • Once the backplate is completely off, this will reveal the inside components of the device.

  5. Portege Z830-S8302 Internal Cooling Fan Replacement: 手順 5、 3の画像 1 Portege Z830-S8302 Internal Cooling Fan Replacement: 手順 5、 3の画像 2 Portege Z830-S8302 Internal Cooling Fan Replacement: 手順 5、 3の画像 3
    • Remove two 5mm Phillips #0 screws from the fan housing.

  6. Portege Z830-S8302 Internal Cooling Fan Replacement: 手順 6、 2の画像 1 Portege Z830-S8302 Internal Cooling Fan Replacement: 手順 6、 2の画像 2
    • Use the nylon spudger to disconnect the wire (red/blue) plug from the motherboard.

    • Be gentle and do not apply too much pressure when removing the plug as the motherboard may be fragile.

  7. Portege Z830-S8302 Internal Cooling Fan Replacement: 手順 7、 2の画像 1 Portege Z830-S8302 Internal Cooling Fan Replacement: 手順 7、 2の画像 2
    • Lift up the wire and peel back the clear protective tape.

    • Split the black protective foam inside the tape in half to uncover the wires.

    • This should make the wires free of all connections.

  8. Portege Z830-S8302 Internal Cooling Fan Replacement: 手順 8、 2の画像 1 Portege Z830-S8302 Internal Cooling Fan Replacement: 手順 8、 2の画像 2
    • The fan is now free and able to be removed. Lift the fan out of place.

終わりに

To reassemble your device, follow these instructions in reverse order.

作成者

3人の作成者と共同で作成されました。

Tanner Krygier

メンバー登録日: 09/17/18

913 ポイント

5のガイドは作成済み

チーム

Washington State, Team S2-G7, Hope Fall 2018 Washington State, Team S2-G7, Hope Fall 2018人のメンバー

WSU-HOPE-F18S2G7

3 メンバー

15のガイドは作成済み

0 件のコメント

コメントを追加

統計データ:

過去 24時間: 0

過去 7 日: 0

過去 30 日: 1

今までの合計 789