メインコンテンツにスキップ

Polaroid A10 Motherboard Replacement

必要な工具と部品

  1. Polaroid A10 Motherboard Replacement, Back Cover: 手順 1、 3の画像 1 Polaroid A10 Motherboard Replacement, Back Cover: 手順 1、 3の画像 2 Polaroid A10 Motherboard Replacement, Back Cover: 手順 1、 3の画像 3
    • Begin by having the side with volume and power button face up towards you.

    • Insert a plastic opening tool between the display and the back cover.

    • Once you have one plastic opening tool in, you can insert another one. While holding one in place, slide the other along the gap to release the tabs.

    • It is easier to remove the back cover, if the display screen is faced down.

    • The tabs must be released from all four sides before removing the back cover.

  2. Polaroid A10 Motherboard Replacement, Motherboard: 手順 2、 3の画像 1 Polaroid A10 Motherboard Replacement, Motherboard: 手順 2、 3の画像 2 Polaroid A10 Motherboard Replacement, Motherboard: 手順 2、 3の画像 3
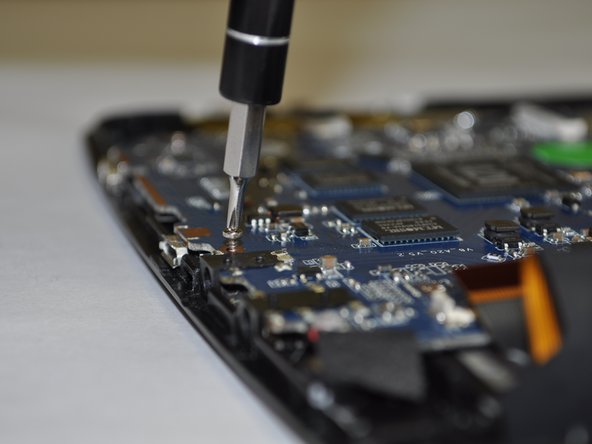
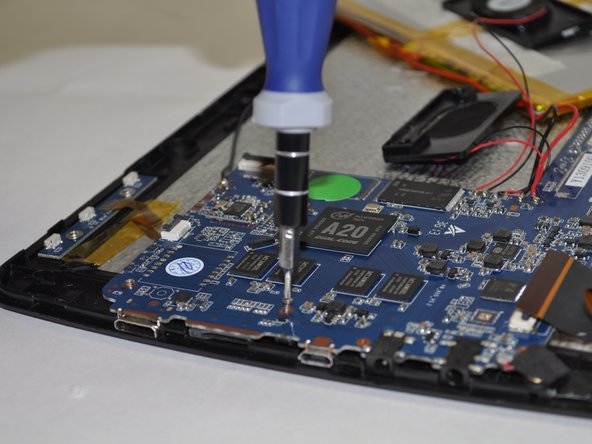
    • Take off yellow tapes that are surrounding the motherboard.

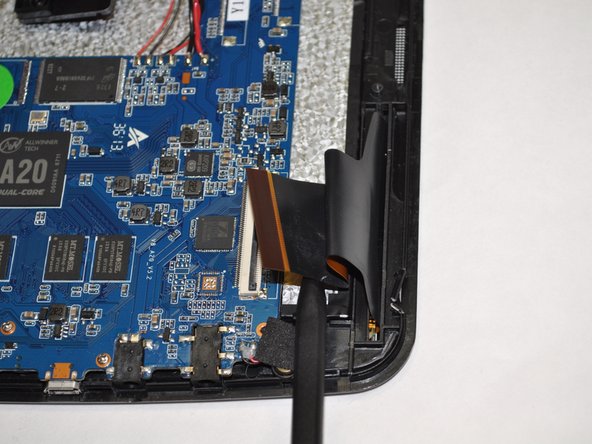
    • Use the plastic opening tools to disconnect the three ribbon cables: battery, screen, and volume/power buttons.

  3. Polaroid A10 Motherboard Replacement: 手順 3、 3の画像 1 Polaroid A10 Motherboard Replacement: 手順 3、 3の画像 2 Polaroid A10 Motherboard Replacement: 手順 3、 3の画像 3
    • Using the Phillips #000 screwdriver, remove the four 5 mm screws located in the picture by rotating the screw counter-clockwise.

  4. Polaroid A10 Motherboard Replacement: 手順 4、 2の画像 1 Polaroid A10 Motherboard Replacement: 手順 4、 2の画像 2
    • Use the soldering tool to unsolder the two bigger metals from the wires of the battery.

    • Use the same soldering tool to unsolder the four smaller metals from the wires of the speakers.

    • Use the same soldering tool to unsolder the ground wire.

    • Removal and installation of wires requires soldering. Here's a helpful link to assist you with great soldering techniques.

  5. Polaroid A10 Motherboard Replacement: 手順 5、 3の画像 1 Polaroid A10 Motherboard Replacement: 手順 5、 3の画像 2 Polaroid A10 Motherboard Replacement: 手順 5、 3の画像 3
    • Gently lift the motherboard up and out of the device.

終わりに

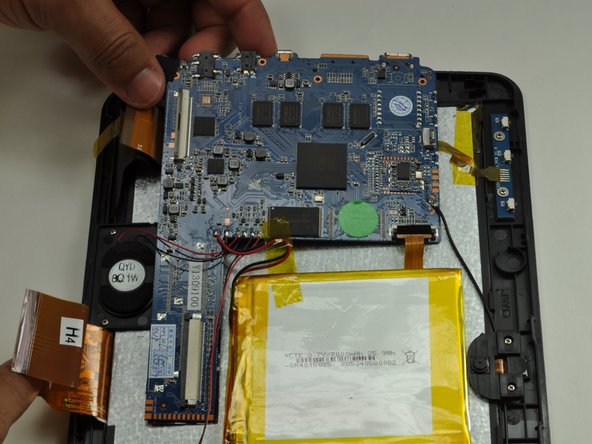
To reassemble your device, follow these instructions in reverse order.

ある他の人がこのガイドを完成しました。

作成者

3人の作成者と共同で作成されました。

Tracie

メンバー登録日: 01/22/15

119 ポイント

1ガイドが承認済み

チーム

UW Tacoma, Team 3-3, Rose Winter 2015 UW Tacoma, Team 3-3, Rose Winter 2015人のメンバー

UWT-ROSE-W15S3G3

4 メンバー

12のガイドは作成済み

0 件のコメント

コメントを追加

統計データ:

過去 24時間: 2

過去 7 日: 2

過去 30 日: 3

今までの合計 587