メインコンテンツにスキップ

Plum Optimax 10 Display Replacement

必要な工具と部品

  1. Plum Optimax 10 Display Replacement, Back Cover: 手順 1、 2の画像 1 Plum Optimax 10 Display Replacement, Back Cover: 手順 1、 2の画像 2
    • Use a metal spudger to remove the small panels to the immediate left and right side of the camera.

  2. Plum Optimax 10 Display Replacement: 手順 2、 2の画像 1 Plum Optimax 10 Display Replacement: 手順 2、 2の画像 2
    • Use a metal spudger to begin lifting the back cover.

    • Then, create leverage and gently remove the entire cover.

  3. Plum Optimax 10 Display Replacement, Motherboard: 手順 3、 2の画像 1 Plum Optimax 10 Display Replacement, Motherboard: 手順 3、 2の画像 2
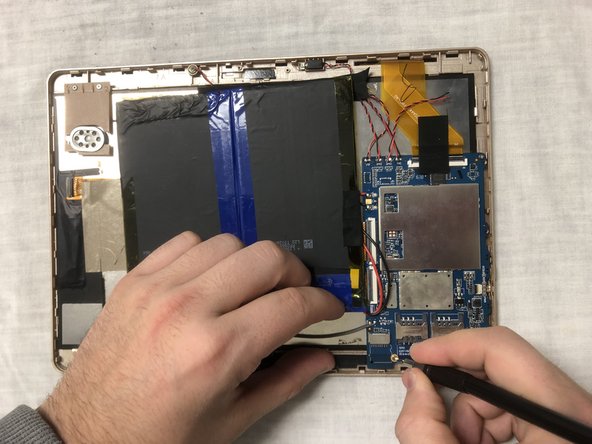
    • Use flathead screwdriver tool to remove the three 2.5 mm screws shown in the photo. Two screws are located at the base of the motherboard and there is one screw located at the top.

  4. Plum Optimax 10 Display Replacement: 手順 4、 1の画像 1
    • Once screws are removed, carefully remove the motherboard out of encasing.

  5. Plum Optimax 10 Display Replacement, Battery: 手順 5、 2の画像 1 Plum Optimax 10 Display Replacement, Battery: 手順 5、 2の画像 2
    • Remove electrical tape placed around the battery to keep it in place.

  6. Plum Optimax 10 Display Replacement: 手順 6、 2の画像 1 Plum Optimax 10 Display Replacement: 手順 6、 2の画像 2
    • Use the spudger as a wedge underneath the battery to assist in removal.

    • Once loosened with the spudger, the battery is now removed from the device.

    • Always use a plastic opening tool or nylon spudger to remove batteries. Metal tools can puncture a battery and potentially catch on fire.

  7. Plum Optimax 10 Display Replacement, Display: 手順 7、 1の画像 1
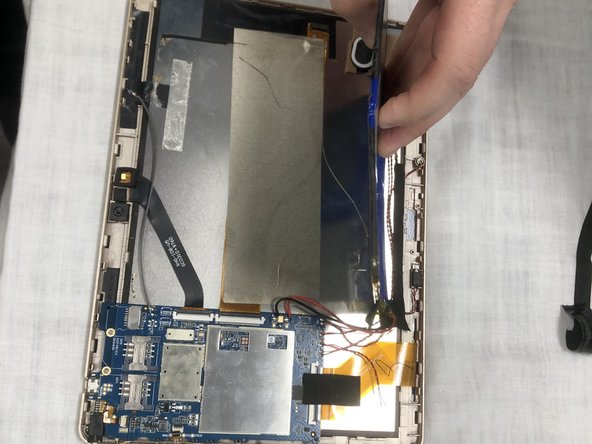
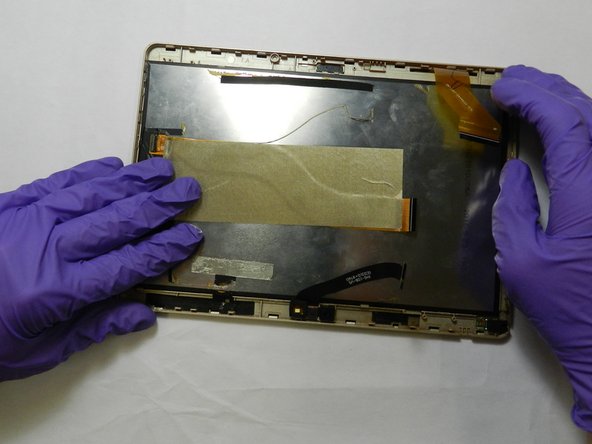
    • Gently pop the display out from the display cover by prying around the edges with a plastic opening tool or spudger.

    • The display is held in by about 4-5 clamps on each side.

    • Be careful not to crack or damage the glass display.

    • Using a metal spudger as shown in the photo has a higher chance of damaging the device. Use an ESD safe tool instead.

  8. Plum Optimax 10 Display Replacement: 手順 8、 2の画像 1 Plum Optimax 10 Display Replacement: 手順 8、 2の画像 2
    • Insert the new display in and clamp it back into the original spot.

    • Ensure that the display is in the correct spot where the ribbon cables are able to connect it to the motherboard.

    • Make sure the display snaps back into place. Listen for "popping," and press firmly until no more sounds are made.

終わりに

To reassemble your device, follow these instructions in reverse order.

作成者

4人の作成者と共同で作成されました。

Michael Glennon Graupner

メンバー登録日: 10/03/19

289 ポイント

3のガイドは作成済み

0 件のコメント

コメントを追加

統計データ:

過去 24時間: 0

過去 7 日: 2

過去 30 日: 2

今までの合計 216