はじめに
このガイドは、PlayStation Vitaにリアカメラを取り付けるプロセスを紹介します。
必要な工具と部品
-
-
スパッジャーで接続部分を慎重に持ち上げて、バッテリーケーブルを外します。
Any idea what type of pcb header is on the board for the battery? I have a motherboard with a broken header but I cant source a replacement
This is where I screwed up so I recommend extra caution for other newbies. Only the black part is supposed to come off. Don't be an idiot like me and pry off too much...
Yea I messed up there too. Is there a way to fix it?
This component was far more stubborn than the screen connector when it came to removal. I opted for a smaller tool than the spudger (small flat-head) and managed to disconnect it after determining the best bit size for the job. Screwdriver is metal, obviously, so being gentle helps to avoid damaging anything.
broke the white part
-
-
-
スパッジャーの先端を使って、ワイヤレスカード上部に付いている3つのアンテナケーブルコネクタの接続を外します。
-
アンテナケーブルを巻き戻します。するとワイヤレスカードケースから取り出せます。一旦、ワイヤを脇に置いてください。
Hello, I have the PCH-2001 model of the PS vita and the right analog stick went out. I ordered a replacement and the stick is slightly larger than the original. The original has a black rectangle on the back, the new version has the star version, which is what you have on this website as the replacement part. Any help here would be much appreciated. Thanks.
-
-
-
ワイヤレスカード上に留められた4.4mm#00プラスネジを2本外します。
-
ワイヤレスカードを引き抜きます。
My screwdriver does not want to unscrew those. They won’t turn at all.
Got the same, used PH #0 and grabbed wireless card casing with fingers from the top to release pressure on screen and avoid (possibly) breaking it.
Some PS vita models seem to use a T2 screw instead of a PH#00. I’ve encountered this twice now.
I replaced de wifi card but is still difficult to connect to wifi. Could it be the wifi antenna? which cable model is it?
3G Vita 1000.
I found that the PH00 head wouldn't actually fit in to the screw correctly. A PH000 fit but was still requiring a bit more force than seemed necessary. Also the card did not pop up when the screws were released and that's because Sony used a tacky pad under the card so needed a bit of prying up to get the angle.
-
-
-
-
スパッジャーを使って、左ショルダーボタンのフレックスケーブルソケットをリリースし、タブを開放します。
-
ピンセットを使って、ソケットからフレックスケーブルをスライドさせて外します。黒いタブを引っ張らないでください!代わりに、コネクタから薄いフレックスケーブルを(この画像では左側に)引っ張ってください。
-
-
-
左ショルダーボタンはケースに軽く接着剤で固定されています。スパッジャーを使って、左ショルダーボタンを慎重に接着剤から剥がします。
-
-
-
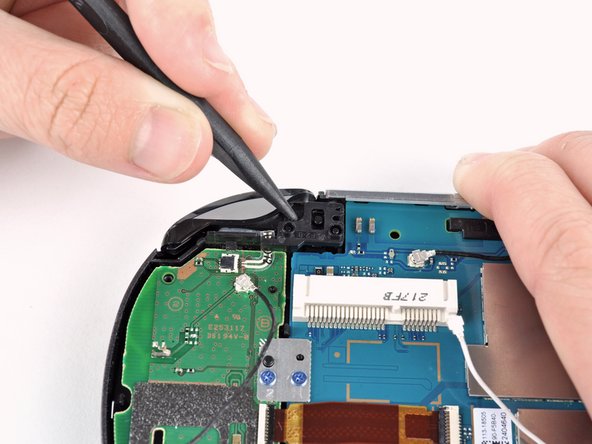
スパッジャーを使って、SIMカードリーダー上のZIFソケットのタブを持ち上げてリリースします。
-
ZIFソケットからフレックスケーブルを注意深く引き抜き、脇に置いておきます。
Este paso NO es necesario si tu PSVita no tiene lector de tarjeta SIM. Ve directamente al paso 15.
-
-
-
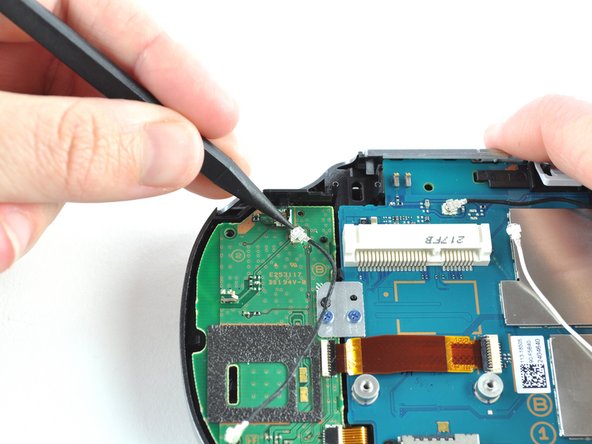
#00プラスドライバーを使って、2つのメタル製ブラケット上を6本外します。
-
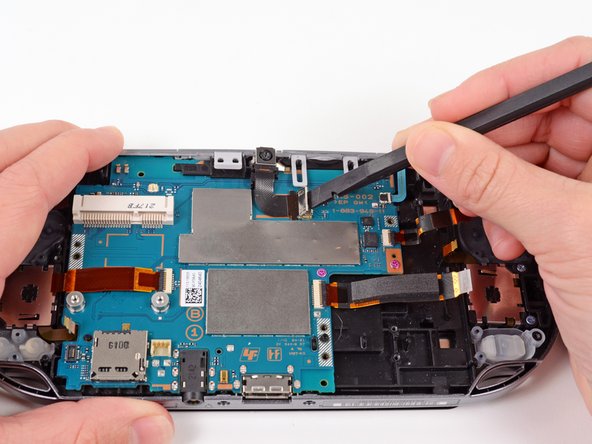
上部左ボタンボードをマザーボードに固定しているL字型ブラケット上の5.0mmブルーネジを2本外します。
-
下側左ボタンボードをマザーボードに固定している長方形ブラケット上の5.0mmブルーネジを4本外します。
-


デバイスを再度組み立てるには、この説明書の逆の順番で組み立ててください。
デバイスを再度組み立てるには、この説明書の逆の順番で組み立ててください。
3 の人々がこのガイドを完成させました。


コメント 1 件
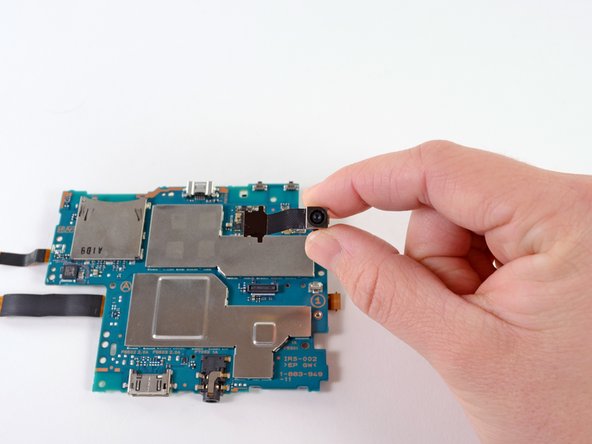
This is not it's rear-facing camera though - it is it's front-facing camera.