はじめに
このガイドは、PlayStation Vitaに方向キーを取り付けるプロセスを紹介します。
必要な工具と部品
-
-
スパッジャーで接続部分を慎重に持ち上げて、バッテリーケーブルを外します。
Any idea what type of pcb header is on the board for the battery? I have a motherboard with a broken header but I cant source a replacement
This is where I screwed up so I recommend extra caution for other newbies. Only the black part is supposed to come off. Don't be an idiot like me and pry off too much...
Yea I messed up there too. Is there a way to fix it?
This component was far more stubborn than the screen connector when it came to removal. I opted for a smaller tool than the spudger (small flat-head) and managed to disconnect it after determining the best bit size for the job. Screwdriver is metal, obviously, so being gentle helps to avoid damaging anything.
broke the white part
-
-
-
-
スパッジャーを使って、左ショルダーボタンのフレックスケーブルソケットをリリースし、タブを開放します。
-
ピンセットを使って、ソケットからフレックスケーブルをスライドさせて外します。黒いタブを引っ張らないでください!代わりに、コネクタから薄いフレックスケーブルを(この画像では左側に)引っ張ってください。
-
-
-
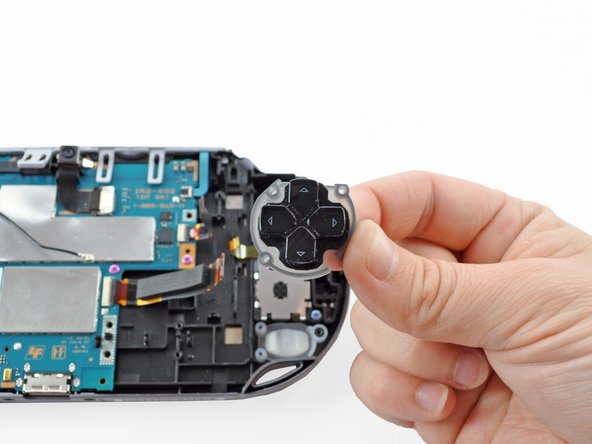
左ショルダーボタンはケースに軽く接着剤で固定されています。スパッジャーを使って、左ショルダーボタンを慎重に接着剤から剥がします。
-
-
-
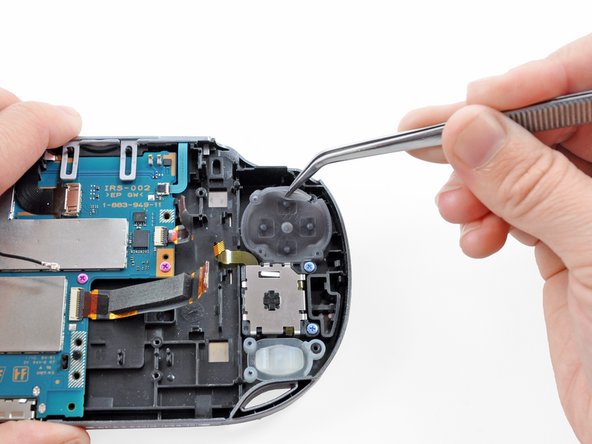
スパッジャーを使って、SIMカードリーダー上のZIFソケットのタブを持ち上げてリリースします。
-
ZIFソケットからフレックスケーブルを注意深く引き抜き、脇に置いておきます。
Este paso NO es necesario si tu PSVita no tiene lector de tarjeta SIM. Ve directamente al paso 15.
-
-
-
#00プラスドライバーを使って、2つのメタル製ブラケット上を6本外します。
-
上部左ボタンボードをマザーボードに固定しているL字型ブラケット上の5.0mmブルーネジを2本外します。
-
下側左ボタンボードをマザーボードに固定している長方形ブラケット上の5.0mmブルーネジを4本外します。
-


デバイスを再度組み立てるには、この説明書の逆の順番で組み立ててください。
デバイスを再度組み立てるには、この説明書の逆の順番で組み立ててください。
9 の人々がこのガイドを完成させました。


コメント 1 件
I read this guide from the first to the20th step I haven't tried it yet though